background image


M

ANTARO

B

OT


T

ELE

M

Assembly Instructions & 
Quick Start Guide


MantaroBot™ 

20410 Century Boulevard 

 Suite 120 

 Germantown Maryland 20874 

www.MantaroBot.com


 info@mantarobot.com 

Phone 301 528 2244 

 Fax 301 528 1933 


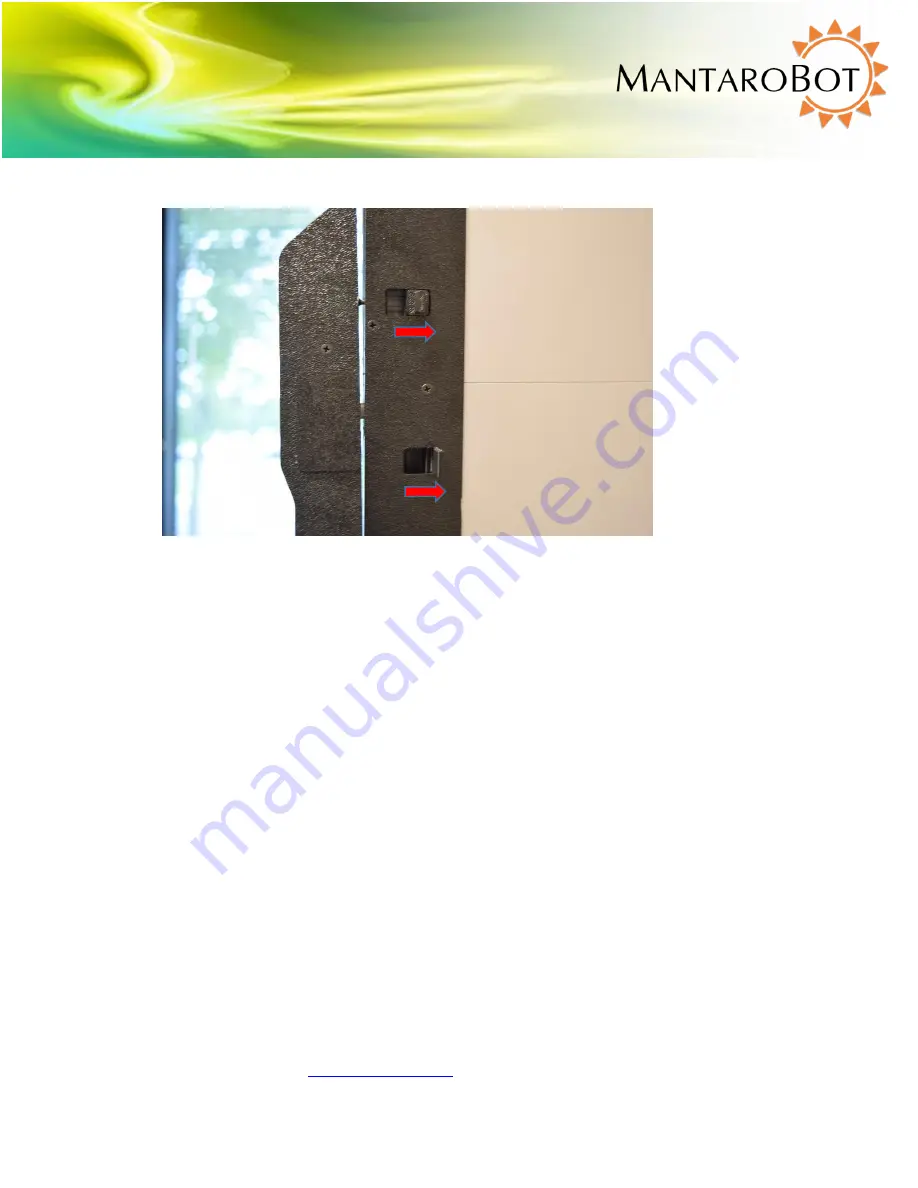
Then, slide the two finger tabs to the right (towards the Surface Pro) to connect the USB 3.0 
connector and charging connector to the tablet.  Ensure both connectors are properly mated. 


To remove the Surface Pro tablet from the holder, reverse the above steps. 


10.


If you have also purchased the Charging Docking Station, please refer to the Docking Station User 
Guide and Operating Manual on the included CD for assembly instructions. 


WARNING:    When  installing  your  tablet  or  smartphone  to  the  device  holder, 
PLEASE ensure that it is plugged all the way into the device holder and is fully 
mated with the docking connector inside the bottom or side of the device holder.  
Improper  installation  could  result  in  your  device  falling  out  of  the  holder  and 
breaking!!!


Summary of Contents for TeleMe 2

Page 1: ...ntaroBot 20410 Century Boulevard Suite 120 Germantown Maryland 20874 www MantaroBot com info mantarobot com Phone 301 528 2244 Fax 301 528 1933 MANTAROBOT TELEME 2 Assembly Instructions Quick Start Guide ...

Page 2: ...structions Quick Start Guide MantaroBot 20410 Century Boulevard Suite 120 Germantown Maryland 20874 www MantaroBot com info mantarobot com Phone 301 528 2244 Fax 301 528 1933 2 Table of Contents Assembly Instructions 3 Quick Start 10 ...

Page 3: ...Phone 301 528 2244 Fax 301 528 1933 3 Assembly Instructions 1 Carefully unpack the contents in which your TeleMe 2 was shipped DO NOT throw away the shipping materials Store them safely so they can be used to ship or transport your TeleMe in the future 2 Identify the parts in the picture below The only tool required to assemble your TeleMe 2 is a 1 Phillips screwdriver ...

Page 4: ...ntarobot com Phone 301 528 2244 Fax 301 528 1933 4 3 Protruding from bottom of mast B is a female connector Protruding from top of base pole A is a male connector Plug female connector from mast B onto female connector of base A See picture below 4 Slide mast B over the base pole A while aligning the two screw holes in both A and B See picture on the right ...

Page 5: ... 301 528 2244 Fax 301 528 1933 5 5 Using a 1 Phillips screw driver screw two of the provided screws D into the bottom of mast B to secure it to base A See picture below 6 Protruding from bottom of device holder C is a female connector Protruding from top of mast B is a male connector Plug female connector from device holder C onto female connector of mast B See picture below ...

Page 6: ...33 6 7 Slide pole of device holder C over the mast B while aligning the two screw holes in both B and C 8 Using a 1 Phillips screw driver screw two of the provided screws D into the pole of device holder C to secure it to mast B 9 Install your tablet or smartphone into the device holder C Standard holders If your device holder has the charging connector at the bottom slide in the tablet as shown b...

Page 7: ...e the charging connector is on the side so slide in the tablet in the two step process shown below Then make sure you turn the lock connector on the back Please refer to the full MantaroBot TeleMe 2 User Guide and Operating Manual for additional details on the installation of the device Slide tablet all the way down first and then slide towards the charging connector and connect On the backside of...

Page 8: ...www MantaroBot com info mantarobot com Phone 301 528 2244 Fax 301 528 1933 8 Surface Pro 12 landscape Slide the two Finger tabs to the left as shown in the picture below Now slide your Surface Pro device all the way down in the holder with the backside facing you as shown in the picture above USB 3 0 Finger Tab Charging Finger Tab ...

Page 9: ...perly mated To remove the Surface Pro tablet from the holder reverse the above steps 10 If you have also purchased the Charging Docking Station please refer to the Docking Station User Guide and Operating Manual on the included CD for assembly instructions WARNING When installing your tablet or smartphone to the device holder PLEASE ensure that it is plugged all the way into the device holder and ...

Page 10: ...eleMe 2 User Guide and Operating Manual is highly recommended Before starting ensure that your WiFi network is on and broadcasting 1 Turn ON the battery power switch located on the front grill at the bottom of the TeleMe 2 near the right wheel 2 Turn ON the TeleMe 2 by pressing the Power ON OFF push button on the front of the device holder Initially a single beep will be heard and the LED will tur...

Page 11: ...nk in a repeating pattern two blinks and a pause This will indicate that the TeleMe is ready for configuration 4 Using a Wifi capable tablet smartphone or a computer browse for available wireless connections in your area It might be easiest to use the tablet smartphone installed into the TeleMe 2 device holder Look for the wireless connection named MantaroBot TeleMe_ The at the end of the name wil...

Page 12: ...own Maryland 20874 www MantaroBot com info mantarobot com Phone 301 528 2244 Fax 301 528 1933 12 5 Once the Wifi connection is established open a web browser on the device used above type http 192 168 0 1 in the address bar and hit Enter The browser will show the MantaroBot TeleMe main page webpage as shown below ...

Page 13: ...eet that was shipped with the robot To connect to a hidden network e g network whose SSID is not broadcasted click Connect to hidden wireless network and enter the requested information Most networks require a network security key or passphrase To connect ask your network administrator or Internet service provider ISP for the security key or passphrase 8 If connecting to the selected network was s...

Page 14: ...sed has the Multi WiFi configuration option please refer to the full MantaroBot TeleMe 2 User Guide and Operating Manual for further configuration details 11 In the case that you are transporting the TeleMe 2 to a new location you must delete existing WiFi Profiles on the Wifi Profile Editor page before connecting to a new network If you have any questions or need additional help please contact su...

Reviews: