background image

3. OIT Installation

It is necessary to follow all installation procedures described in this chapter for

electrical noise immunity and CE compliance.
Your Maple Systems OIT is designed to connect easily to your PLC. External

connectors provide quick connection for power and communications wiring.
• There is one serial port with an RJ-45 shielded jack. This port is used to connect

to the PLC and to configure the OIT.

• A separate three-position terminal block is supplied to provide power to the

OIT.

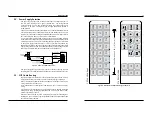
3.1. Create Custom Slide-In Legend

Please refer to the “Custom Keypad Slide-in Legends” section for details.

3.2. Prepare Panel for OIT Mounting

The OIT3185 and OIT4185 are mounted to a control panel from the front. For a

proper NEMA 4/12 seal, you will need:
• A panel with a maximum thickness of 0.125 inches (3.2 mm).
• A panel with a minimum thickness of 16-gauge (0.059 inches; 1.5 mm) steel or

10-gauge (0.102 inches; 2.6 mm) aluminum. Thinner panels may bow between

the mounting studs, requiring the use of a stiffener on the rear.

• The surface of the panel, where the panel comes into contact with the gasket,

must be free of scratches, pits, and other features that prevent the gasket from

sealing properly.

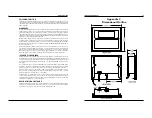
The diagram in Appendix D shows the dimensions of the panel cutout required for

proper installation. This panel cutout illustration is shown actual size and can be

photocopied to be used as a template. Check photocopy accuracy with the printed

check dimension. The panel cutout should be cleaned and deburred before the OIT

is installed.

3.3. Enclosures

Allow enough spacing within an enclosure for adequate ventilation. For some

applications, you may have to consider heat produced by other devices within a

panel. The ambient temperature around the terminal must be maintained as

specified.

10

OIT3185A/4185A

1010-0104, REV 03

4. OIT Configuration Wiring

The OIT3185 and OIT4185 must be configured for a particular protocol before use.

The OITware-200 or STEPware-100 software (used on a computer with Windows

3.1 or later) is used for OIT configuration. For detailed instructions on installing

and using the software, please refer to the software documentation.

4.1. Connect OIT to PC for Configuration

To configure the OIT using Maple Systems’ configuration software, remove the

PLC/host cable from the serial port on the OIT and connect the OIT to the computer

using an RS-232 serial communications cable (P/N 7431-0096, purchased

separately from Maple Systems). The configuration cable should be connected to

the proper COM port on your computer, then attached to the serial port on the OIT.

See Figure 7 below for serial port pin assignments.

INSTALLATION MANUAL

15

1010-0104, REV 03

CTS

DSR
RTS

DCD
DTR

8

7

6

4

1

RXD

TXD

6

5

RJ-45

OIT

PC

4 Return

Ground 5

TXD 3

RXD 2

9S

1 TXD+
2 TXD-
3 CTS
7 RXD-
8 RXD+

N/C
N/C
N/C
N/C
N/C

9

N/C

Top

8

1

8

1

Pin Configuration

RJ-45 Plug

Printer

Com2

Back

of

OIT

7431-0096

Com1

OIT

PC

OIT Power Supply

Power

Maple Systems

OIT to PC cable

(If mouse is using

Com 1, use Com2)

Figure 7 OIT3185/4185 to PC RS-232 Communication

Summary of Contents for OIT3185

Page 1: ...Connect mounting stud s to control panel earth ground 808 134th Street SW Suite 120 Everett WA 98204 USA 425 745 3229 Fax 425 745 3429 E mail maple maple systems com URL www maple systems com CLEAR ENTER 9 8 7 Help 6 5 Alarm Ack 4 Next Msg Del Last Msg Page Down 0 3 2 1 Toggle F8 F2 F9 F3 F10 F4 F5 F6 F7 F1 CLEAR ENTER 9 8 7 Help 6 5 Alarm Ack 4 Next Msg Del Last Msg Page Down 0 3 2 1 Toggle F8 F2...

Page 2: ...or otherwise under any patent or patent rights of Maple Systems Inc Maple Systems retains the right to revise or change its products and documentation at any time without notice IF SERVICE IS REQUIRED Package the unit in its original packaging container or if unavailable any suitable rigid container If a substitute container is used surround the unit with shock absorbing material damage in shipmen...

Page 3: ...an installation feeding the manufacturing or similar plant The product described in this document is intended for use solely in an industrial environment as defined above When installed in Europe any other application is in contravention of European Union Directives and a breach of those laws 1010 0104 REV 03 22 OIT3185A 4185A INSTALLATION MANUAL 3 1010 0104 REV 03 Read Me First Your new Maple Sys...

Page 4: ... equipment needs to be stored returned to Maple Systems or transported for any reason Appendix A OIT Hardware Specifications Mechanical Material Aluminum sealed to NEMA 4 12 when panel mounted Mounting Panel Wiring Unit is field wired by user to external power plug and shielded RJ 45 communications connectors Weight 1 pound 0 45 kg OIT3185A Environmental Operating Temp 14 to 149 F 10 to 65 C Stora...

Page 5: ...cs against the edge of the access slot in the aluminum plate A paper shoehorn may be used to prevent this Gasket Aluminum Plate Front of OIT Figure 11 Custom Keypad Legend Installation INSTALLATION MANUAL 5 1010 0104 REV 03 Table of Contents 1 Safety Warnings 6 1 1 Hazardous Locations 6 2 Control Panel Design Guidelines 7 2 1 Control Panel Grounding 7 2 2 Power Supply Selection 8 2 3 OIT Cable Rou...

Page 6: ...imate enclosure must be in accordance with Class I Division 2 wiring methods as described in the National Electrical Code ANSI NFPA 70 All peripheral equipment must be suitable for the location in which it is used Use only a Class 2 power source as described in the National Electrical Code ANSI NFPA 70 WARNING Use only with Class 2 power source limited to 30 VDC open circuit and 8A short circuit 1...

Page 7: ...er installation Pay careful attention to the placement of system components and associated cable routing These items can significantly enhance the performance and integrity of your control application 2 1 Control Panel Grounding The control panel should be connected to a good high integrity earth ground both for safety considerations and shielding purposes This must be a reliable earth ground with...

Page 8: ... differential mode attenuation The power supply that provides power to the OIT should not be used to power switchingrelaysorsolenoidsunlessnoisefiltercapsareconnectedtoeachrelay 2 3 OIT Cable Routing Input and output I O wiring must be in accordance with Class I Division 2 wiring methods and in accordance with the authority having jurisdiction Always route the OIT communication cable and power cab...

Page 9: ...ted When photocopying Use only non glossy stock which is 0 004 0 008 inches 0 1 0 2 mm thick Check photocopy accuracy with the printed check dimension When illustrating Use the tick marks to locate the switch centers Refer to the computer generated legend dimensions if unsure NOTE Pressing the center of the switch is critical for switch actuation Recommended key size is 0 500 inches 12 7 mm square...

Page 10: ... with the printed check dimension The panel cutout should be cleaned and deburred before the OIT is installed 3 3 Enclosures Allow enough spacing within an enclosure for adequate ventilation For some applications you may have to consider heat produced by other devices within a panel The ambient temperature around the terminal must be maintained as specified 10 OIT3185A 4185A 1010 0104 REV 03 4 OIT...

Page 11: ...S 4 RETURN 5 TXD 6 RXD 7 RXD 8 RXD Figure 6 Port 1 Pin Outs 3 4 Mount OIT to Panel STEPS 1 Gently position the OIT with the studs through the panel mounting holes 2 Secure the OIT by installing the four 6 32UNC mounting nuts using a 5 16 inch socket wrench or nut driver CAUTION Do not torque the 4 mounting nuts to over 15 pound inches Over torquing can strip the threads or pull the studs loose RE ...

Page 12: ...PLY OIT Red Output Black Output Shield Wire Case Ground Shield NOTE The power connector on the OIT has M3 slotted screws 3 6 Connect OIT to PLC Host Each PLC host supported by Maple Systems has its own wiring requirements Maple Systems offers pre constructed OIT to PLC communication cables for most PLCs Most cables are available for same day shipment from Maple Systems They are built and tested fo...

Reviews: