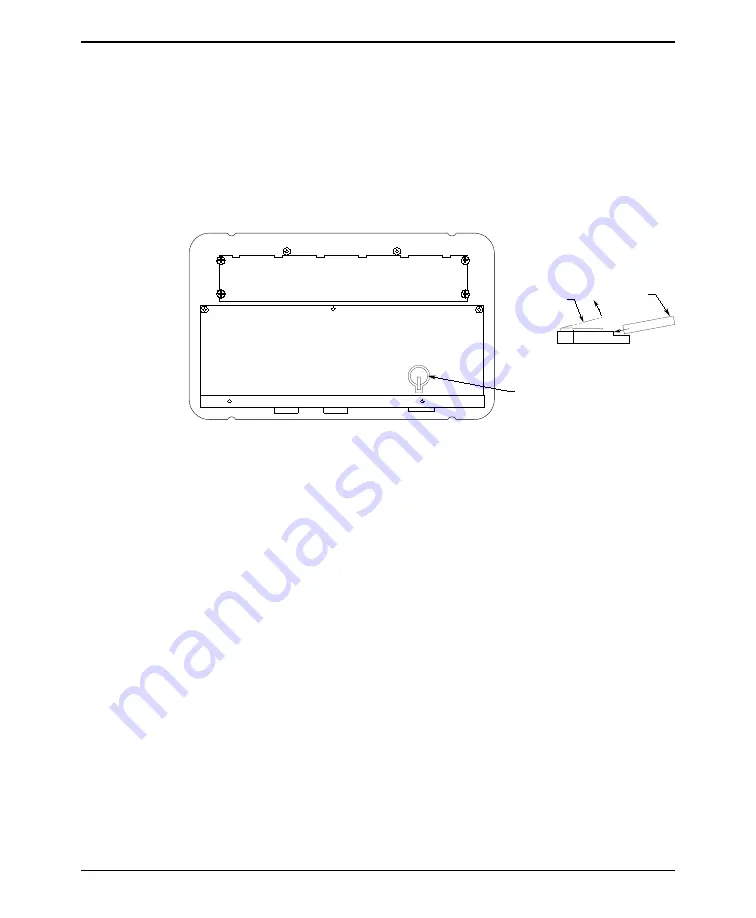
4.4. Battery Replacement
The OIT3250 is shipped with a 3V lithium coin cell battery installed for backing up
the real-time clock. During periods of power loss, the coin cell will allow the
internal clock to continue to run and keep accurate time. As long as power is
applied to the OIT, the battery will not be drained. The battery will experience no
loss of power until the OIT has been configured. Following OIT configuration, the
battery will last for approximately 4-6 months if the OIT is in a continually powered
down state. Replacement batteries can be Ray-O-Vac or Panasonic BR1225 or
equivalent 3V coin cell batteries.
STEPS
1. Remove the protective cover from the rear of the unit.
CAUTION:
When the rear cover is removed, the circuitry inside is exposed to
possible damage by electrostatic discharge. Refer to Static Awareness on page 4.
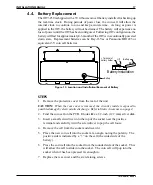
2. Find the coin cell on the PCB. It looks like a 1/2-inch (12.7 mm) silver disk.
3. Insert a small screwdriver into the top of the socket near the positive
terminal and carefully twist the screwdriver to pop the cell loose.
4. Remove the cell from the socket and discard it.
5. Place the new coin cell into the socket at an angle, noting the polarity. The
positive side is indicated by a “+” on the cell (the widest side of the
battery).
6. Press the coin cell into the socket from the rounded side of the socket. This
will allow the cell to slide into the socket. The coin cell will pop into the
socket when it has been pressed far enough in.
7. Replace the rear cover and the six retaining screws.
INSTALLATION MANUAL
17
1010-0081A, REV 04
Battery
+ Terminal of
battery holder
Battery Installation
+ SIDE
Lift
Battery
Figure 15 Location and Installation/Removal of Battery


