•
If you want to display a popup window on one particular full screen window
, then try using the
Popup Window option in the Function Key Object. This is particularly useful if you want the OIT
operator to control the ability to display the popup window. If you want the PLC to determine
when to display the popup window, then try using the Direct Window object.
•
If you want to display a popup window that can be shown on any full screen window
, then try
using the Popup Window option in the Function Key Object. You should place the Function Key
Object in the Fast Selection Window with the Task Bar enabled, (more information is available on
the Task Bar later in this chapter). This will allow the OIT operator access to that popup window
regardless of which full screen window is displayed. If you want to display the popup window only
when some condition in the PLC has occurred, then try using the Direct Window object on the
Common Window, (more about the common window later in this chapter).
•
If you want to display one of many possible popup windows on any full screen window
, then
try using the Indirect Window object on the Common Window. You can then let the PLC
determine which popup window should be displayed or you can create several Set Word objects to
allow the OIT operator to select which window to look at, (more about the Set Word object in a
succeeding chapter).
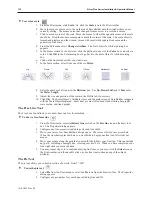
Re turn ing to a pre vi ous win dow
You can configure a function key to display the full-sized base window that was on the OIT screen before the
currently shown window. Perform the following:
4
Create a function key to return to previous window
1.
From the
Objects
menu, select
Function Key
. The New Function Key Object dialog box is
displayed.
2.
Select the Return to Previous option button.
3.
Configure the rest of the function key, and then click
OK
.
4.
Place the function key object onto the full-sized base screen.
Placing a ‘return to previous’ function key onto a popup window will not work.
Us ing a func tion key to close a win dow
You can configure a function key to close any popup window that is currently displayed on the OIT screen, and was
called by a function key:
4
Create a function key to close a window
1.
From the Objects menu, select
Function Key
. The New Function Key Object dialog box is
displayed.
2.
Select the Close Window option button.
3.
Configure the rest of the function key, and then click
OK
.
4.
Place the function key object onto the popup window.
Placing a ‘close window’ function key onto a full-size base screen will not work.
To
close a direct window, turn off the controlling bit. To close an indirect window, write a
0 to the controlling register.
Us ing the Com mon Win dow
Your project might require that some data be displayed on the OIT screen at all times, regardless of which
window(s) are displayed. For example, you may want to display a company logo on the OIT screen at all times, or
you may want to display some critical data or an alarm message which should be seen no matter what windows are
displayed.
Using base windows to display this information requires that you configure every full screen base window with the
same graphics object. The common window however, is a predefined window in the OIT that you can enable to
display this information. When created, the common window always operates in the background as a full screen
window that overlays any full screen base window displayed.
Whenever you create a new project, the common window (Window #4) is automatically created.
1010-1007, Rev 05
118
Sil ver Plus Se ries In stal la tion & Op er a tion Man ual
Summary of Contents for Silver Plus Series
Page 20: ...1010 1007 Rev 05 16 Silver Plus Series Installation Operation Manual ...
Page 31: ...COM Ports for the HMI5056 5070 1010 1007 Rev 05 Connect the OIT to the PLC or Controller 27 ...
Page 38: ...1010 1007 Rev 05 34 Silver Plus Series Installation Operation Manual ...
Page 49: ...7 Click the Shape tab 1010 1007 Rev 05 Creating Your First Project 45 ...
Page 62: ...1010 1007 Rev 05 58 Silver Plus Series Installation Operation Manual ...
Page 75: ...3 Click OK The System Parameter Settings dialog appears 1010 1007 Rev 05 Using EZware 5000 71 ...
Page 132: ...1010 1007 Rev 05 128 Silver Plus Series Installation Operation Manual ...
Page 156: ...1010 1007 Rev 05 152 Silver Plus Series Installation Operation Manual ...
Page 210: ...1010 1007 Rev 05 206 Silver Plus Series Installation Operation Manual ...
Page 216: ...1010 1007 Rev 05 212 Silver Plus Series Installation Operation Manual ...
Page 246: ...1010 1007 Rev 05 242 Silver Plus Series Installation Operation Manual ...


