7.
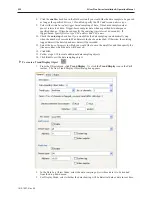
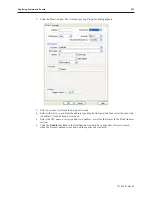
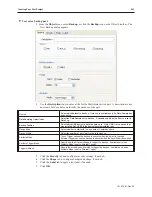
Click the
Message
tab to display the Message form.
8.
Enter the
message
to display when the alarm or event is triggered. If you would like to
configure the message in different languages, click Label and follow the instructions in
Chapter 7 - Creating Databases and Languages
.
9.
In the Write value window, enter the
window number
to display once the alarm or event is
acknowledged.
10. Click the
Enable
checkbox in the Sound section to have the OIT play a sound when the alarm
is triggered. Click
Sound library..
.to select a sound from the sound libraries. If no sound is
selected, the default sound is a beep. Click
Play
to preview the sound.
11. Click
OK
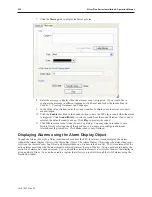
to return to the Alarm (Event) Log dialog. You may select a location to save
History files by selecting one of the check boxes. You may also configure additional
Alarm/Event log items here. Click
Close
when you are finished.
Dis play ing Alarms us ing the Alarm Dis play Ob ject
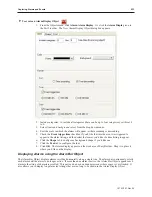
Though the Alarm (Event) Log Object continuously monitors the PLC for alarms, it cannot display the alarms
without the Alarm Display Object or the Alarm Bar Object. The Alarm Display Object takes the alarm strings sent
to it from the Alarm (Event) Log Object and displays them on a window screen as a list. The list contains all of the
active alarms occurring with the most recently activated alarm at the top of the list. You do not have to display the
entire list of alarms on a window screen. You can limit the viewable alarms to a ‘scrollable window’ that displays a
given number of lines. You can then create a register that allows you to scroll through the list of alarms using the
scrollable window.
1010-1007, Rev 05
232
Sil ver Plus Se ries In stal la tion & Op er a tion Man ual
Summary of Contents for Silver Plus Series
Page 20: ...1010 1007 Rev 05 16 Silver Plus Series Installation Operation Manual ...
Page 31: ...COM Ports for the HMI5056 5070 1010 1007 Rev 05 Connect the OIT to the PLC or Controller 27 ...
Page 38: ...1010 1007 Rev 05 34 Silver Plus Series Installation Operation Manual ...
Page 49: ...7 Click the Shape tab 1010 1007 Rev 05 Creating Your First Project 45 ...
Page 62: ...1010 1007 Rev 05 58 Silver Plus Series Installation Operation Manual ...
Page 75: ...3 Click OK The System Parameter Settings dialog appears 1010 1007 Rev 05 Using EZware 5000 71 ...
Page 132: ...1010 1007 Rev 05 128 Silver Plus Series Installation Operation Manual ...
Page 156: ...1010 1007 Rev 05 152 Silver Plus Series Installation Operation Manual ...
Page 210: ...1010 1007 Rev 05 206 Silver Plus Series Installation Operation Manual ...
Page 216: ...1010 1007 Rev 05 212 Silver Plus Series Installation Operation Manual ...
Page 246: ...1010 1007 Rev 05 242 Silver Plus Series Installation Operation Manual ...


