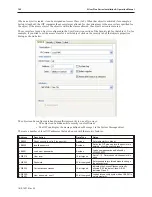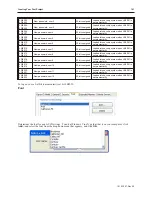
EasyBuilder allows you to assign up to three underlay windows to any base window that you are creating. First,
create the underlay window; then select it from the pull-down list box when you change the settings of the base
window.
How to Dis play Un der lay Win dows
When you have common objects to display on multiple screens, use the Underlay Window feature to store these on
underlay windows attached to a base window. This decreases the amount of memory required for the project. The
base window “calls” the underlay window. Each full-size base window can display up to three underlay windows,
which are called Underlay #1, Underlay #2, and Underlay #3. Objects on the underlay windows cannot be edited
from the base window on which they are displayed.
A pop-up window cannot display any underlay windows.
To assign underlay windows to a base window, you must first create the underlay windows. Underlay windows are
created the same way base windows are created. Then you can assign the underlay windows to the base window.
4
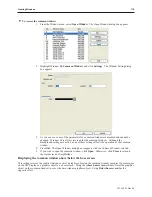
To assign underlay windows to a base window
1.
From the Window menu, select
Open Window
. The Open Window dialog box appears.
2.
Highlight the
base window
you wish to use.
3.
Click the
Setting
command button. The Window Setting dialog box appears.
4.
Click the
pull-down list box
for each Underlay Window to assign the underlay window
screens to the base window.
5.
Click
OK
. Click
Close
on the Window Setting dialog box.
Rules That Ap ply to Un der lay Win dows
Please note the rules that apply when you use the underlay window feature:
• Only the objects of an underlay window are displayed on the base window. All background
information about the underlay window (i.e. background color, frame color and size, etc.) are not
displayed on the base window.
• Active objects can be ‘overlaid’ on top of each other over two or more underlay windows. For
example, a Set Bit object that is configured to set an OIT local bit LB0 is located at X=20, Y=50 for
Underlay Window #1. Another Set Bit object that controls LB1 is placed on Underlay Window #2
at the same location. When the Base Window displays these two windows, both objects will be
active so that when they are pressed both LB0 and LB1 will be set.
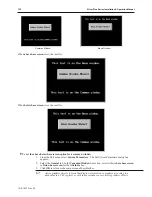
• Static objects may be overlaid using underlay windows. However, any static object that is on the
Base Window has the highest precedence and will be displayed over any static objects that are on
the underlay windows. Active objects have higher precedence over static objects.
• Popup windows cannot display underlay windows.
• Underlay windows are always positioned from the top left corner of the screen. Any position
settings you make when creating the underlay window are ignored when the window is displayed
by a Base Window as an underlay window.
For more information and an example of how to use underlay windows, consult the EasyBuilder Help files.
Cre ating a Frame
EasyBuilder provides the option of having a frame around any window that you create. You can a frame from 0-16
pixels wide in any of EasyBuilder's 65K available colors. The default setting is no frame.
Win dow Back ground
You can also select a different background color for each window created. The default setting is black.
4
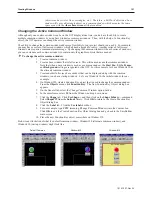
To select a different background color
1.
From the Window menu, select
Open Window
. The Open Window dialog box appears.
2.
Click on the window that you wish to change the background color. Click
Setting
. The
Window Setting dialog box appears.
3.
In the Background frame section, check the
Filled
box.
4.
Click the pull-down arrow of the
Color
box. The Color dialog box appears.
1010-1007, Rev 05
Cre ating Win dows
111
Summary of Contents for Silver Plus Series
Page 20: ...1010 1007 Rev 05 16 Silver Plus Series Installation Operation Manual ...
Page 31: ...COM Ports for the HMI5056 5070 1010 1007 Rev 05 Connect the OIT to the PLC or Controller 27 ...
Page 38: ...1010 1007 Rev 05 34 Silver Plus Series Installation Operation Manual ...
Page 49: ...7 Click the Shape tab 1010 1007 Rev 05 Creating Your First Project 45 ...
Page 62: ...1010 1007 Rev 05 58 Silver Plus Series Installation Operation Manual ...
Page 75: ...3 Click OK The System Parameter Settings dialog appears 1010 1007 Rev 05 Using EZware 5000 71 ...
Page 132: ...1010 1007 Rev 05 128 Silver Plus Series Installation Operation Manual ...
Page 156: ...1010 1007 Rev 05 152 Silver Plus Series Installation Operation Manual ...
Page 210: ...1010 1007 Rev 05 206 Silver Plus Series Installation Operation Manual ...
Page 216: ...1010 1007 Rev 05 212 Silver Plus Series Installation Operation Manual ...
Page 246: ...1010 1007 Rev 05 242 Silver Plus Series Installation Operation Manual ...


