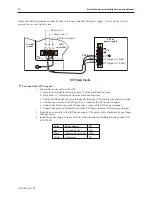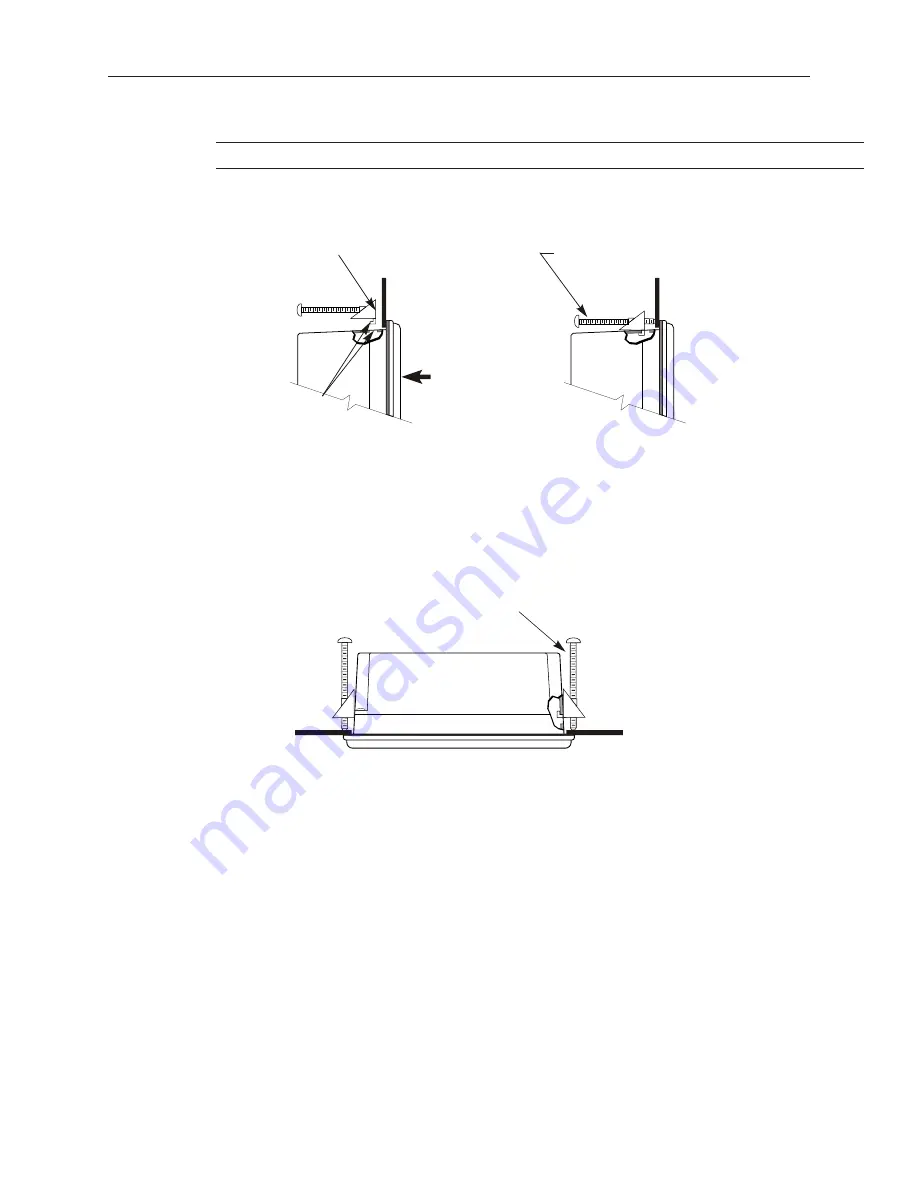
Clean and deburr the panel cutout before the OIT is installed.
Mount the OIT to the Panel
1010-1007, Rev 05
14
Sil ver Plus Se ries In stal la tion & Op er a tion Man ual
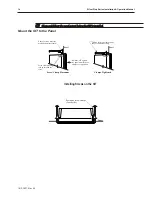
Screw clamp locking
tabs go through the
slots
Tighten all screw clamps until
they are uniformly snug
Ends of screws must not
protrude from the clamp
Screw Clamp Placement
Clamps Tightened
Hold the OIT against
the panel until all screw
clamps are in position
Panel
Panel
In stall ing Screws on the OIT
Position 4 screw clamps
(2 each side)
Panel
Summary of Contents for Silver Plus Series
Page 20: ...1010 1007 Rev 05 16 Silver Plus Series Installation Operation Manual ...
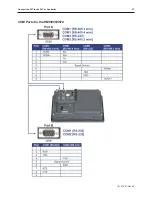
Page 31: ...COM Ports for the HMI5056 5070 1010 1007 Rev 05 Connect the OIT to the PLC or Controller 27 ...
Page 38: ...1010 1007 Rev 05 34 Silver Plus Series Installation Operation Manual ...
Page 49: ...7 Click the Shape tab 1010 1007 Rev 05 Creating Your First Project 45 ...
Page 62: ...1010 1007 Rev 05 58 Silver Plus Series Installation Operation Manual ...
Page 75: ...3 Click OK The System Parameter Settings dialog appears 1010 1007 Rev 05 Using EZware 5000 71 ...
Page 132: ...1010 1007 Rev 05 128 Silver Plus Series Installation Operation Manual ...
Page 156: ...1010 1007 Rev 05 152 Silver Plus Series Installation Operation Manual ...
Page 210: ...1010 1007 Rev 05 206 Silver Plus Series Installation Operation Manual ...
Page 216: ...1010 1007 Rev 05 212 Silver Plus Series Installation Operation Manual ...
Page 246: ...1010 1007 Rev 05 242 Silver Plus Series Installation Operation Manual ...

