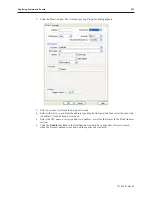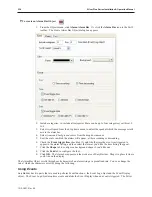
3.
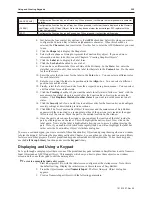
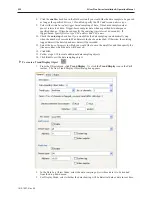
Description: Enter a
name
for the object. This isn't necessary, but will help in later
identification of the object.
4.
Max data records: Set the
maximum number of records
to log.
5.
Select the
Device type
from the drop down menu, and then specify the
PLC name
and
address
. Click
Data Format...
to set configure the format of each logged item. The Data
Format dialog appears. Click
New...
to call the configuration dialog.
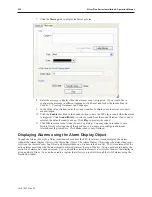
6.
Enter a
Description
for the data format and then select the
Data type
. Click
OK
to return to
the Data configuration dialog and then
Exit
to return to the Data Sampling dialog.
7.
Click the
enable
check box in the Clear address section if you would like the data sample to
be cleared when the bit is momentarily set. If enabled, specify the
PLC address
and
device
type
.
1010-1007, Rev 05
Bar Graphs, Me ters and Trends
221
Summary of Contents for Silver Plus Series
Page 20: ...1010 1007 Rev 05 16 Silver Plus Series Installation Operation Manual ...
Page 31: ...COM Ports for the HMI5056 5070 1010 1007 Rev 05 Connect the OIT to the PLC or Controller 27 ...
Page 38: ...1010 1007 Rev 05 34 Silver Plus Series Installation Operation Manual ...
Page 49: ...7 Click the Shape tab 1010 1007 Rev 05 Creating Your First Project 45 ...
Page 62: ...1010 1007 Rev 05 58 Silver Plus Series Installation Operation Manual ...
Page 75: ...3 Click OK The System Parameter Settings dialog appears 1010 1007 Rev 05 Using EZware 5000 71 ...
Page 132: ...1010 1007 Rev 05 128 Silver Plus Series Installation Operation Manual ...
Page 156: ...1010 1007 Rev 05 152 Silver Plus Series Installation Operation Manual ...
Page 210: ...1010 1007 Rev 05 206 Silver Plus Series Installation Operation Manual ...
Page 216: ...1010 1007 Rev 05 212 Silver Plus Series Installation Operation Manual ...
Page 246: ...1010 1007 Rev 05 242 Silver Plus Series Installation Operation Manual ...


