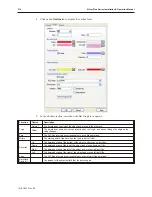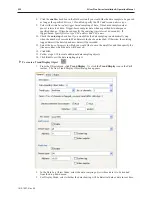
12. Check the
Enable
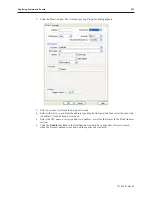
checkbox in the grid section if you would like the trend to display a grid,
and then configure the X and Y axis of the grid from the scroll boxes.
13. In the channel section, select the channel to configure from the drop-down menu, and then
select the pen properties for that channel. Next, select the
value
at which the pen will be at
the bottom of the trend (zero) and the span of the trend. Finally, check the
Enable
checkbox
if you would like the time and date to be displayed on the OIT then select the format in which
you'd like the time and date displayed.
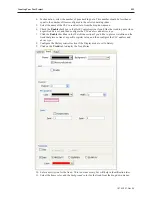
14. Click the
Shape
tab to configure a background shape, if any.
15. Click the
Profile
tab if you'd like to position your trend using the properties dialog using the
X,Y position instead of dragging and placing it in the work area.
16. Click
OK
. The Trend appears on EasyBuilder's work area. Move the trend to place it on the
display. If you'd like to reconfigure any of its properties, double click on the trend to display
the Trend Display Object's Properties Dialog.
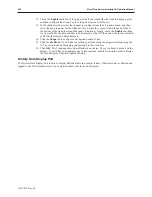
History Data Display Part
The History Data Display Part is used to display Historical data in a tabular format. Historical data is collected and
logged by the Data Sample object. Up to eight channels of data can be displayed.
1010-1007, Rev 05
224
Sil ver Plus Se ries In stal la tion & Op er a tion Man ual
Summary of Contents for Silver Plus Series
Page 20: ...1010 1007 Rev 05 16 Silver Plus Series Installation Operation Manual ...
Page 31: ...COM Ports for the HMI5056 5070 1010 1007 Rev 05 Connect the OIT to the PLC or Controller 27 ...
Page 38: ...1010 1007 Rev 05 34 Silver Plus Series Installation Operation Manual ...
Page 49: ...7 Click the Shape tab 1010 1007 Rev 05 Creating Your First Project 45 ...
Page 62: ...1010 1007 Rev 05 58 Silver Plus Series Installation Operation Manual ...
Page 75: ...3 Click OK The System Parameter Settings dialog appears 1010 1007 Rev 05 Using EZware 5000 71 ...
Page 132: ...1010 1007 Rev 05 128 Silver Plus Series Installation Operation Manual ...
Page 156: ...1010 1007 Rev 05 152 Silver Plus Series Installation Operation Manual ...
Page 210: ...1010 1007 Rev 05 206 Silver Plus Series Installation Operation Manual ...
Page 216: ...1010 1007 Rev 05 212 Silver Plus Series Installation Operation Manual ...
Page 246: ...1010 1007 Rev 05 242 Silver Plus Series Installation Operation Manual ...

