Chapter 15 - Macros
Using Macros
The “macro” language in EasyBuilder allows the programmer to perform simple transfers of data and/or simple to
complex conditional logic and transfers.
Macros are high-level language programs that can run inside the OIT to perform various data transfers and can
perform conditional logic. They are useful for doing tasks that are not supported in a standard object or feature of
the OIT. The macro language combines syntax elements of C, C++ and a little of its own style.
Previous experience in programming with C or C++ would be helpful when developing macros. It is not the scope
of this document to explain concepts of high-level language programming and the basics such as: variable data
types, arrays, conditional logic, and variable passing. However, it is the scope of this document to discuss the
commands and command structures that are required in building macros.
Macro Sam ple and Implementation
Macros can be used for customizing an application or when a special operation is needed that the normal OIT
objects (set bit, data transfer, etc) do not provide. A few possibilities are listed:
• Unusual or non-linear scaling of data
• Displaying the result of arithmetic operations on 2 or more PLC register values
• Indirect addressing (where a PLC register holds the address of the desired data)
• Lookup tables
• Transferring Data once, instead of periodically
• Writing data to the PLC in a specific sequence
• Timed splash screens
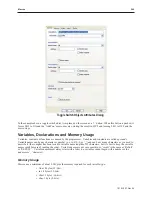
A macro is written using the “macro” utility found in the ‘Tools’ menu list of Easy Builder. The ‘Add’ button will
create a new worksheet to program a new macro. The programmer first gives the macro a name in the top right
corner. Then programming can be added. After the code is finished, it needs compiled. If the code compiles
correctly there will be no errors and the macro name will be added to the top list. If the macro does not compile
correctly it will display error codes. If the programmer should cancel out from creating the macro before a
successful compile, it will put the macro into the bottom panel of the macro list and it will not be available as a
usable macro, but the text will remain to be edited later.
The macros are triggered by a setting a bit or a function key. The bit is specified in the ‘PLC Control Object’ list.
The bit may be a local bit ‘LB’ or it may be a PLC bit. Each macro created will have a unique name and bit.
When a specified bit is set high so it executes a specific macro, the macro will be entered into and its variables
initialized. The macro will run its sequence of events and will exit when finished. The bit that called the macro into
execution should be cleared by the macro before it exits, otherwise the macro will immediately be entered again
upon exit. If this immediate re-entry should happen, this could form an endless loop and will certainly cause a
taxing of the CPU time and cause slow screen refreshing and communications.
A sample macro is listed below which reads two local word registers and adds them together and stores them into
another register location:
macro_command
main()
short
num1
short
num2
short
result
bool
AllDone =
0
// get two registers
to
add together
// (LW0 & LW1)
GetData(num1,
“Local HMI”
, LW_BIN,
0
,
1
)
GetData(num2,
“Local HMI”
, LW_BIN,
1
,
1
)
// add the values
1010-1007, Rev 05
Macros
243
Summary of Contents for Silver Plus Series
Page 20: ...1010 1007 Rev 05 16 Silver Plus Series Installation Operation Manual ...
Page 31: ...COM Ports for the HMI5056 5070 1010 1007 Rev 05 Connect the OIT to the PLC or Controller 27 ...
Page 38: ...1010 1007 Rev 05 34 Silver Plus Series Installation Operation Manual ...
Page 49: ...7 Click the Shape tab 1010 1007 Rev 05 Creating Your First Project 45 ...
Page 62: ...1010 1007 Rev 05 58 Silver Plus Series Installation Operation Manual ...
Page 75: ...3 Click OK The System Parameter Settings dialog appears 1010 1007 Rev 05 Using EZware 5000 71 ...
Page 132: ...1010 1007 Rev 05 128 Silver Plus Series Installation Operation Manual ...
Page 156: ...1010 1007 Rev 05 152 Silver Plus Series Installation Operation Manual ...
Page 210: ...1010 1007 Rev 05 206 Silver Plus Series Installation Operation Manual ...
Page 216: ...1010 1007 Rev 05 212 Silver Plus Series Installation Operation Manual ...
Page 246: ...1010 1007 Rev 05 242 Silver Plus Series Installation Operation Manual ...

