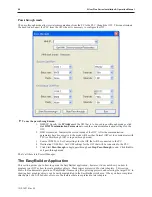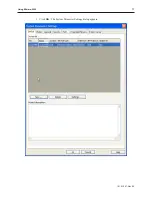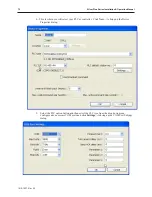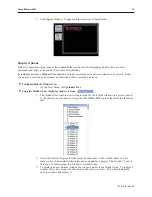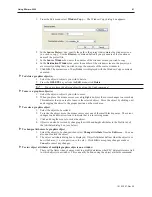
6. Configure the
appropriate COM port settings
for your PLC (for more information, see the
Controller Information Sheet
for your PLC) and click
OK
.
7. Adjust
Interval of Block pack
settings, if necessary. This can be adjusted later by selecting
System Parameters-Settings.
8. Click
OK.
You are now ready to begin working in EZware-5000 to create your EasyBuilder
project.
4
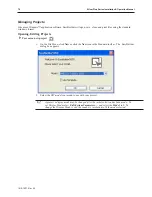
To open an existing project
1.
On the File Menu, click
Open
or click the
Open
icon in the Standard toolbar. The Open
dialog box appears.
2.
Click on the project file you intend to open.
3.
Click
Open
. The main screen of EasyBuilder appears with the initial screen of the project
displayed.
4
To close a project
1.
On the File Menu, click
Close
.
2.
If changes have been made to the project file, EasyBuilder will ask you if you would like to
save the project. Then the main screen of EasyBuilder will remain but with no work area
displayed. You must now use the Open or New commands to edit a project.
4
To save an existing project
1.
On the File Menu, click
Save
or click the
Save
icon in the Standard toolbar.
2.
If the project already has a name, then the project will automatically be saved. If this is a new
project, then the
Save As
dialog box appears.
3.
Enter a file name and then click
Save
.
4.
The main screen of EasyBuilder reappears.
4
To save a project using the compress feature
The compress feature allows you to save a project in compressed format so that the project data takes less space on
your hard drive. This utility also will save the graphics libraries associated with the project into the project file.
This facilitates sending a copy of the project to another person who has EZware in order to download the project
into an OIT.
1010-1007, Rev 05
Using EZware-5000
73
Summary of Contents for Silver Plus Series
Page 20: ...1010 1007 Rev 05 16 Silver Plus Series Installation Operation Manual ...
Page 31: ...COM Ports for the HMI5056 5070 1010 1007 Rev 05 Connect the OIT to the PLC or Controller 27 ...
Page 38: ...1010 1007 Rev 05 34 Silver Plus Series Installation Operation Manual ...
Page 49: ...7 Click the Shape tab 1010 1007 Rev 05 Creating Your First Project 45 ...
Page 62: ...1010 1007 Rev 05 58 Silver Plus Series Installation Operation Manual ...
Page 75: ...3 Click OK The System Parameter Settings dialog appears 1010 1007 Rev 05 Using EZware 5000 71 ...
Page 132: ...1010 1007 Rev 05 128 Silver Plus Series Installation Operation Manual ...
Page 156: ...1010 1007 Rev 05 152 Silver Plus Series Installation Operation Manual ...
Page 210: ...1010 1007 Rev 05 206 Silver Plus Series Installation Operation Manual ...
Page 216: ...1010 1007 Rev 05 212 Silver Plus Series Installation Operation Manual ...
Page 246: ...1010 1007 Rev 05 242 Silver Plus Series Installation Operation Manual ...

