4.
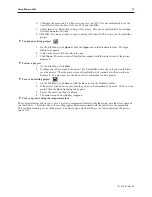
To change any settings or close an open window, click on the
window number
to select it.
Then right-click anywhere inside the Window Treebar to display a pop-up dialog box. Select
Close
to close the window or
Setting
to change any of the window settings.
5.
Finally, to create a new window click on any window number that is not currently used.
Then, right-click inside the Window Tree and click
New
.
4
Using the Window Tree to change object attributes
1.
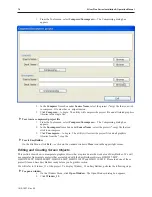
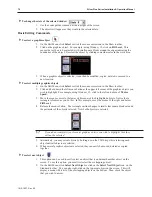
On the Window Tree, click + adjacent to any window number. The tree will expand to list
the objects on that window, as shown:
2.
The Object ID of each objects will be listed. For example, TX_0 is Text Display #0, SW_0 is
Set Word #0, etc.
3.
To highlight a particular object on the screen, click on the Object ID in the list. This allows
the quick selection of a particular object, especially on crowded screens or screens where
objects may be overlapping..
4.
To display the object’s attribute dialog box, double-click the
Object ID
in the Window Tree.
4
Using the grid function
One option is to have the work area covered with grid lines. These grid markings can be helpful when trying to
align objects that are created on the work area. If grid lines are selected, you can decide what size each grid is.
1.
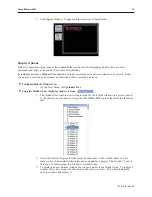
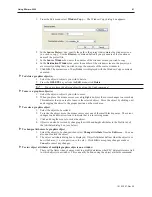
On the Option Menu, click
Grid/Snap
.
2.
Click the
Display
box or click the
Grid
icon in the Standard toolbar.
If you still don’t see the grid after you have enabled it, make sure that the color of the
grid doesn’t match the background color of the window currently displayed.
4
Changing the grid size & color
1.
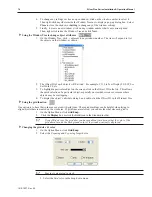
On the Option Menu, click
Grid/Snap
2.
Select the
X spacing
and
Y spacing
for grid size.
Spacing is measured in pixels.
3. Select the
Grid color
in the drop down menu.
1010-1007, Rev 05
76
Sil ver Plus Se ries In stal la tion & Op er a tion Man ual
Summary of Contents for Silver Plus Series
Page 20: ...1010 1007 Rev 05 16 Silver Plus Series Installation Operation Manual ...
Page 31: ...COM Ports for the HMI5056 5070 1010 1007 Rev 05 Connect the OIT to the PLC or Controller 27 ...
Page 38: ...1010 1007 Rev 05 34 Silver Plus Series Installation Operation Manual ...
Page 49: ...7 Click the Shape tab 1010 1007 Rev 05 Creating Your First Project 45 ...
Page 62: ...1010 1007 Rev 05 58 Silver Plus Series Installation Operation Manual ...
Page 75: ...3 Click OK The System Parameter Settings dialog appears 1010 1007 Rev 05 Using EZware 5000 71 ...
Page 132: ...1010 1007 Rev 05 128 Silver Plus Series Installation Operation Manual ...
Page 156: ...1010 1007 Rev 05 152 Silver Plus Series Installation Operation Manual ...
Page 210: ...1010 1007 Rev 05 206 Silver Plus Series Installation Operation Manual ...
Page 216: ...1010 1007 Rev 05 212 Silver Plus Series Installation Operation Manual ...
Page 246: ...1010 1007 Rev 05 242 Silver Plus Series Installation Operation Manual ...


