2. Factory Initialization Mode
Initialize backup data of the MCU.
2.1. Starting up
1. Press the power operation button to turn off the power, and remove the AC plug from the socket.
2. Insert the AC plug while pressing buttons "
INPUT
" and "
BACK
" together, and wait for more than 3
seconds.
3. Release buttons "
INPUT
" and "
BACK
" when the power indicator turns green.
4. All lights on the display illuminate for 2 seconds. The power indicator lights up in orange.
5. All lights on the display turn off for 2 seconds.
6. All of the indicators illuminate for 4 seconds.
7. "
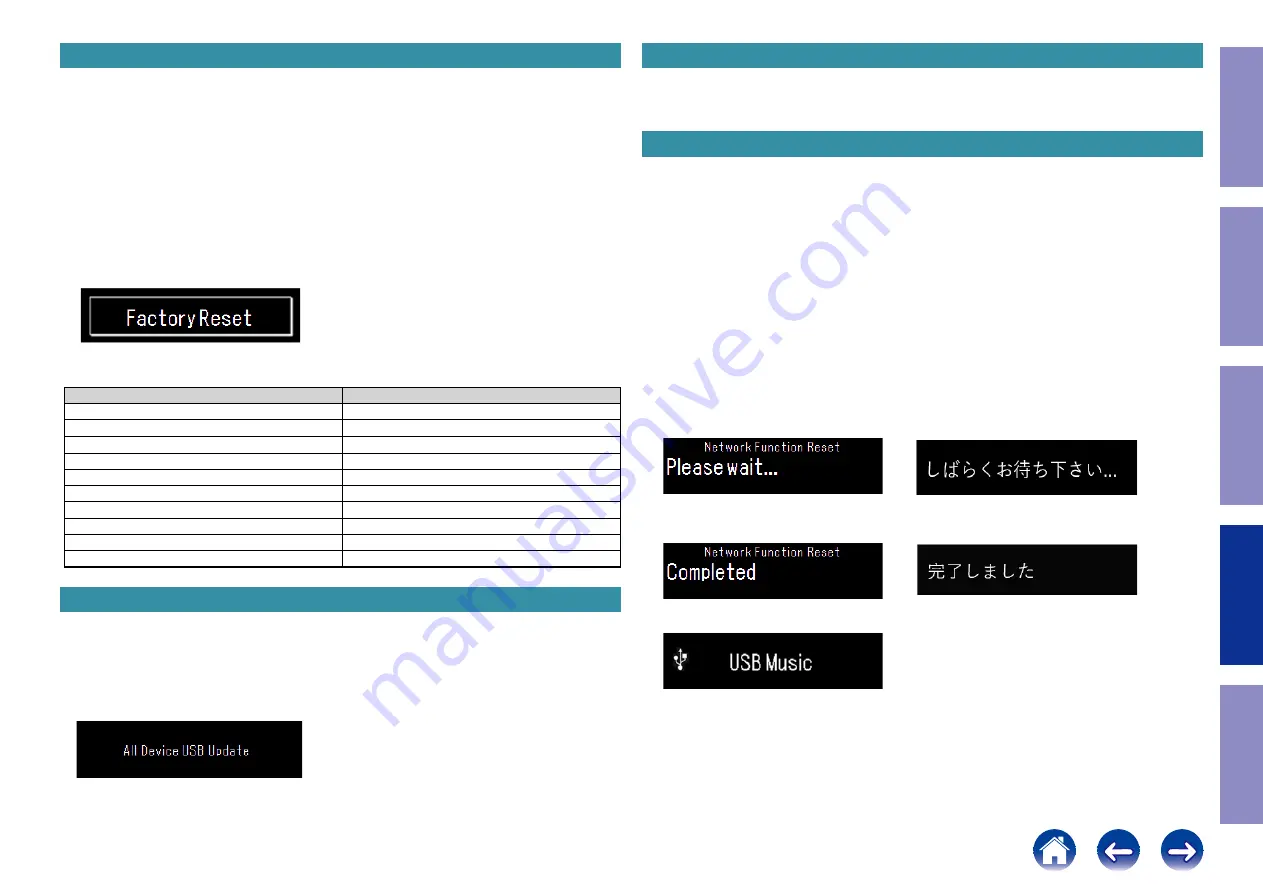
Factory Reset
" is shown on the display for 5 seconds.
The settings for the Installer Setup is also initialized.
Network function settings are not initialized.
2.2. Factory Reset item
Items
Default
INPUT
Internet Radio
Dimmer
100%
Sleep
Off
Repeat / Random / Program
Off
Setup Menu items
Clear all
Variable Volume
54 (-40dB)
Favorites list
Clear
Standby / Power On
Power On
Protection history
Delete
Update retry flag
Clear
3. All Device USB Update
Perform an update by USB memory.
The firmware of all devices in the unit is forcibly updated without performing a version check.
Button and remote control operation is not recognized during the update.
Insert the AC plug while pressing buttons "
INPUT
" and "
ENTER
" together, and wait for more than 3
seconds.
• "
All Device USB Update
" is displayed for 5 seconds.
The display during this update is the same as standard update mode.
4. Firmware Factory Restore
Used when replacing the Network module.
See "
3. Update method when the MAIN PCB or network module is replaced (Using a USB flash drive
5. Network Function Reset
Initializes network settings.
5.1. Actions
The following items are initialized.
(1) Network setup
(2) Friendly Name
(3) Auto Update setting
(4) Allow Update setting
(5) Time Zone setting
(6) Queue list
(7) Internet Radio recently played station
(8) Quick Select playback station
(9) AirPlay Password
(10) Bluetooth Pairing History
(11) Crestron Connected Setup
5.2. Starting up
While the power is on, hold down buttons "
POWER
" and "
BACK
" for at least 3 seconds.
(1) "
Please wait
" is displayed.
Changes between ".", then ".." and "..." for 1 second each.
(English is selected)
(Japanese is selected)
(2) "
Completed
" is shown on the display for 5 seconds.
(English is selected)
(Japanese is selected)
(3) This is displayed for 5 seconds before returning to the normal display.
Before Servicing
This Unit
Electrical
Mechanical
Repair Information
Updating
58


