6
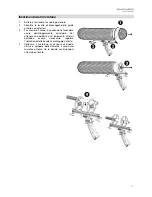
Fitting a Cable
1.
Plug the XLR cable into the XLR socket of your
microphone, taking care to align the rails with the main
housing, and slide the suspension assembly back into
the main housing.
2.
Tighten the front and rear rail clamping levers.
3.
Screw the rear dome back in place.
Note:
If using the pre-installed ZP-1 cable, secure the cable in
place using the cable grommet at the rear of the rails,
ensuring that the orientation matches the image shown. If
using a cable other than the one supplied with ZP-1, secure it
in place using the cable grommet, ensuring there is enough
room to connect the rear dome.
Note:
Connect the cable to the microphone and adjust the
handle to the desired angle for use.
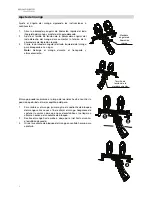
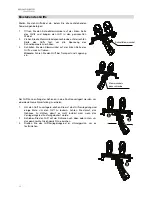
Adjusting the Suspension Mounts
Some microphones will require the shock clip to be shifted forward
or backwards along rail. To adjust the position of the suspension
mounts, follow the instructions below.
1.
Use a screwdriver to loosen the clamp screw on the shock
clip.
2.
Hold the base of the shock clip and the rail while gently
sliding the shock clip to the desired location.
3.
Ensure that the shock clip is centered and sitting straight up
and down on the rail, then re-tighten the clamp screw.
1
Summary of Contents for ZP-1
Page 2: ......


