background image

1

V

iti plastica 40 x 16

2

Rondella esterna

3

Fondo

4

Boccole quadre

5

Anelli grandi

6

Ruot

a media

7

Ruot

a grande

8

Piastra

9

Gommini

10

Interruttore

11

Motore

12

Coperchio

13

Anelli piccoli

14

Ruot

a piccola

15

V

iti M 4 x 8

16

Rondella dent. esterna 4 mm

17

Port

afusibile

18

Fusibile

19

Condensatore

20

Cavo

21

S

pina

22

Perni ingranaggi

23

Guaina

24

Scatolett

a

25

Coperchio scatolett

a

26

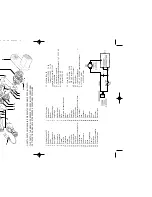
Circuito elettrico

1

40 x 16 screws

2

Outer washer

3

Bottom

4

Square bushings

5

Large rings

6

Medium wheel

7

Large wheel

8

Plate

9

Grommet

s for reduction gear

10

Switch

11

Motor

12

Cover

13

Small rings

14

Small wheel

15

M 4 x 8 screws

16

Toothed outer washer dia. 4 mm

17

Fuse holder

18

Fuse

19

Condenser

20

Cable

21

Plug

22

Gear pins

23

Sheath

24

Box

25

Box cover

26

Electric circuit

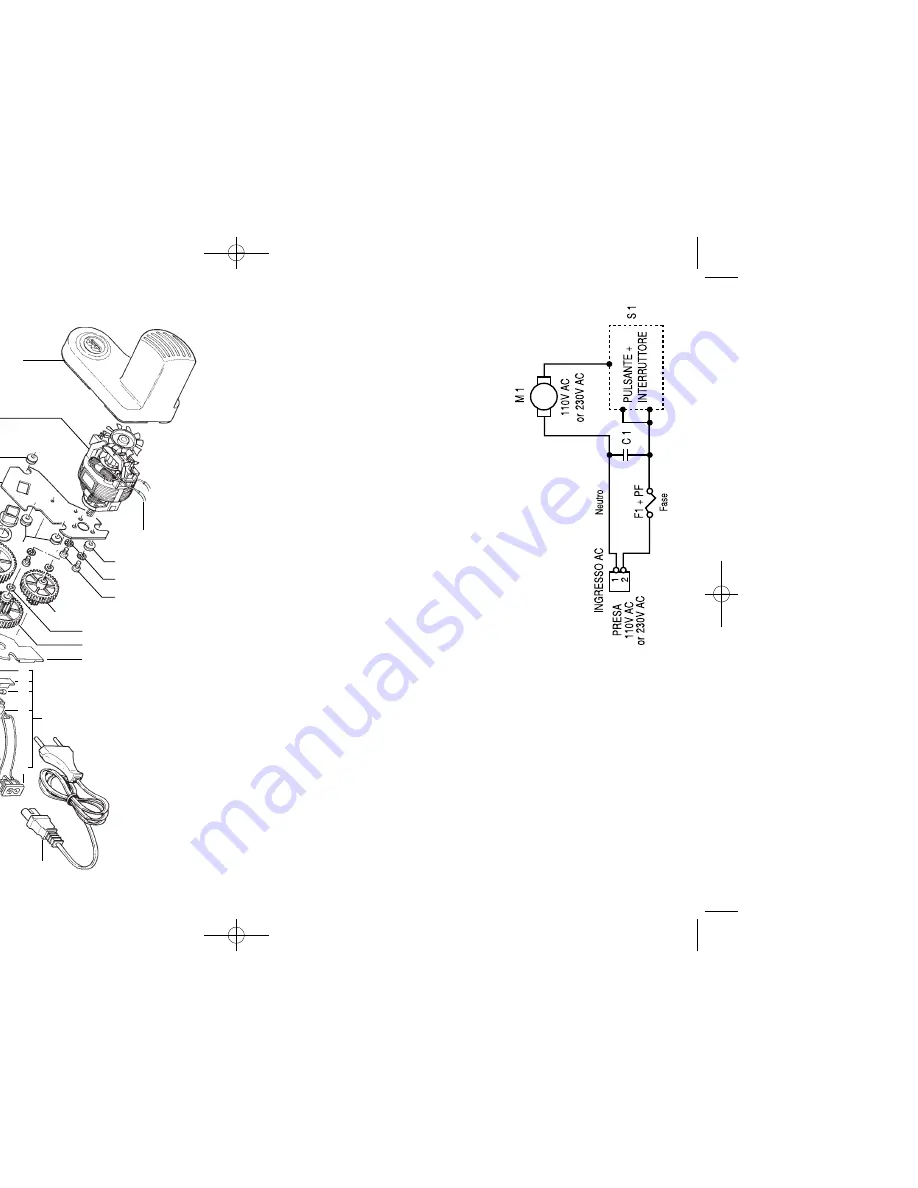
F1 = Fusibile Ø 5 x 20 

V

ersione 1

10 V 

AC    F = 2A

V

ersione 230 V 

AC    F = 1A

Ingresso 

AC = presa 230 / 1

10V

PF = Port

afusibile

S1 = Interr pulsante

C1 = Condensatore filtro antidisturbo 0,1 

μ

 F   250 V 

AC

M1 = Motore 1

10 V  

AC

Motore 230 V  

AC

F1 = Fuse Ø 5 x 20 

110 V 

AC version   F = 2A

230 V 

AC version   F = 1A

AC inlet = 230 / 1

10V socket

PF = fuse holder 

S1 = pushbutton

C1 = 0,1 

μ

 F   250 V 

AC suppressing condenser

M1 = 1

10 V 

AC motor 

or 230 V 

AC motor

12

11

9

8

4

4

24

3

2

22

20

21

B

A

B

A

19

26

25

13
6

15

9

16

14

18

17

10

1

13

5

5

7

23

- QUEST

A

P

AR

TE DEL

MANUALE È RISER

VATA

A

PERSONALE SPECIALIZZA

T

O

THIS P

AR

T

OF  

THE MANUAL

IS RESER

VED 

T

O SPECIALIZED PERSONNEL

- CETTE P

AR

TIE DU MANUEL

EST

RESER

VÉE À PERSONNEL

SPECIALISÉ

SOLO PER USO CASALINGO

FOR HOUSEHOLD USE ONL

Y

UNIQUEMENT

POUR USAGE DOMESTIQUE

3

 Imp.istruz. Pastadrive  08/09/2009  15.48  Pagina  2

Summary of Contents for Ampiamotor

Page 1: ...so e la manutenzione e Instructions for use and maintenance D Mode d emploi et d entretien Gebrauchs und Wartungsanleitungen C Instrucciones para el uso y el mantenimiento t i J IJ J L Li lI I J 00 tL...

Page 2: ...ws 16 Toothed outer washer dia 4 mm 17 Fuse holder 18 Fuse 19 Condenser 20 Cable 21 Plug 22 Gear pins 23 Sheath 24 Box 25 Box cover 26 Electric circuit F1 Fusibile 5 x 20 Versione 110 V AC F 2A Versio...

Page 3: ......

Page 4: ...ente spostando le rotelline lungo il perno cromato Per estrarre il perno delPastabike dalla sua sede dopo avere tolto le rotelline esterne tiratelo prima da una parte e poi dall altra come mosu ato in...

Page 5: ...that indicated on the motor plaque To detach the motor from the machine tum the motor upwards by approx 30 and pull it outwards Fig 2 To install the motor on thc smooth rollers hold it facing upwards...

Page 6: ...Crostoli and Crackers Fig 20 by simply moving dle wheels along the chrome plated pino To remove the Pastabike pin from its seat after removing the outer wheels pull il first from one side and then fro...

Page 7: ...xt rieur Fig 2 Pour installer le moteur sur les rouleaux lisses l approcher de la machine en position inclin e de 30 o vers le haU et introduire l axe dans le trou des rouleaux Fig 3 Pousser le moteur...

Page 8: ...rom Pour retirer l axe du Pastabike de son logement apr s avoir retir les roulettes ext rieures le tirer tout d abord d un cat puis de l autre conune le montre la Fig 16 D placer les rou lettes le lon...

Page 9: ...nehmen muB dieser um ca 30 naeh oben gedreht und h ausgezogen werden Abb 2 Um den Motor auf die glat len Walzen zu montieren muB dieser von oben bei ea 30 der Maschine genahen werden Setzen Sie den Za...

Page 10: ...n haben ist dieser zuerst aufder cinen Seite und dann auf der anderen zu ziehen wie in Abb 16 dargestellt Verschieben Sie nun die Radchen wie in Abb 18 dargestelll entlang des Zapfens Abb 17 und selZe...

Page 11: ...tor del cuerpo de la miiguina girarlo hacia arriba unos 300 y tire de l hacia fuera Fig 2 Para instalar el motor sobre los rodillos Iisos ac rquelo a la maguina inclinado hacia arriba unos 300 y intro...

Page 12: ...er el perno del Pastabike de su asiento despu s de haber quitado las ruedecillas extemas tire primero de una parte y luego de la otra como se muestra en la Fig 16 Desplace las nledecillas a lo largo d...

Page 13: ...1o I jJA lbvk o le 1 jA 1 I I vo o tJI jA I I JL I lI J I Ij II I A o l W rL r l ti L w w J1 bll J1I i GJ I UI 0l U o I 4 s WI o l wl JI JI r I jA o T J I t O L 1 vk L I Ju 1 oJ L ili lS 1 1 6 1 I 0 l...

Page 14: ...Si H r 0 9 L6 i1 9 c SWI J iI l 2 l 00 1J J IHltr 7 i 7 Y7 r 7 c7t Y J j E tTI j ffl 9 i l rC 1 9 fi f t7 t i jt i Wt iii t7 ftl t l T 7 i l L I i JIJ I 11 tt l j ffl 9 i J l1J L 1 9 tl I I q Y 7 1JJ...

Page 15: ...i Iilm l r lll ttL l j T l fZ l t t8 ji j l 1f Thli q 7 Ij li t L j T 2 i lr ll l li i 1Jo z t 7t de 0 5kg 0 7 7 I Ml4 I IvO i jtijf t1 tt q 7 i h j T iU de q 7 IH 7tl t1 l J r J j T 1 1 JZ 2 7t 57t l...

Page 16: ......

Page 17: ...J ll J ll D D t T T D D t t b t1 t1 I t 1 1 D D t t t t X X i B i B f f xt xt L L t t I I f F f F J J I r t3 w t3 w 1 J J 11 11 B B D D G G ii i ii i 3 3if if r 1 fJk 1 fJk 1m JH H tt 1m JH H tt bT bT...

Reviews: