marinco.com | 800.307.6702
2
INSTALLATION INSTRUCTIONS:
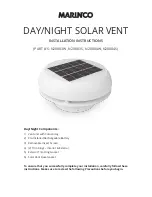
DAY/NIGHT SOLAR VENT
FEATURES & OPERATION
Switch Operation
The Day/Night features two switches located on the bottom of the battery
compartment. The three-position fan switch can be set to ‘Intake’, ‘Exhaust’, or ‘Off’
positions. The second switch controls ‘On’/’Off’ operation of the LED accessory light.
When both switches are set to the ‘Off’ positon, all current produced by the solar array
is used to charge the battery.
Shut-off Damper
The Day/Night VENT is equipped with a green water shut-off damper which can be
operated from below. There are two ears on the inside edge of the fan housing.
To open and allow outside air flow, pull the damper down about a 1/2" (13 mm). To
close, push it up until it rests and seals against the vent cover. The damper may need
lubrication occasionally if it is hard to open and close. To lubricate, apply a small
amount of silicone grease to the damper.
NOTE: To prevent unnecessary wear on the motor, switch the vent to the off
position when the shut-off damper is in the closed position.
Rechargeable Battery
Each Day/Night vent is equipped with a built-in replaceable battery. The solar array
keeps the battery charged during daylight hours so that it can run the fan at night and
during low light situations. The Day/Night will run for up to 24 hours without sunlight
on a fully charged battery. Average battery life is 3-5 years, depending on climate
conditions.
NOTE: To maximize battery life, make sure it as fully charged as possible during initial
use. To fully charge, expose vent to the sun, (not a light bulb) for 24 to 36 hours. This
will insure a fully-charged battery. (Depending on angle to the sun, weather conditions,
and shadowing of the solar array, the time necessary to charge the battery may vary.)
Insect Screen
Your new vent comes with a removable insect screen that attaches to the shut-off
damper. Installation of the insect screen is optional. The screen is easy to install/
remove by grasping the fins on the outside of the screen and carefully twisting. Make
sure to clean the insect screen periodically to ensure maximum air flow.
INSTALL PRECAUTIONS
DECK CAMBER (OR DECK CURVATURE) is VERY CRITICAL: When installing the Day/
Night Vent on a cambered, or curved, surface, it is critical to check to make sure there is
no more than 1/2" (12 mm) of camber over a 12" (300 mm) length of deck surface. Too
much camber will distort the unit’s base plate, causing the cover to be raised off the
deck. This creates the potential for water to get under the cover and may also prevent
the damper from closing properly.
To check for camber, place a 12" (300 mm) straight edge on the deck location for the
vent and try to rock it. Then rotate it 90 degrees and repeat.


