INSTALLATION INSTRUCTIONS
NOTE: It is YOUR responsibility to ensure all fittings are tight and that codes are met.
WARNING:
Household water pressure can cause leaks and damage the surrounding building or fixtures
if not properly installed. You must check all fittings for tightness. When installing canisters, hand-tighten
ONLY! Filter wrench is only used for removal. Marine Depot assumes no responsibility for water damage
due to leaks.
DO NOT
expose unit to direct sunlight or freezing conditions!
Marine Depot KleanWater Systems can be mounted to any secure location using hardware screws. Keep in
mind that the filter system will gain a substantial amount of weight when it is full of water. For this reason, it
is necessary that the filter system be mounted to a strong backing.
Mount the filter system level, with clearance for all housings and hoses vertically and horizontally. Also
keep in mind that there will be space needed below the unit to accomplish regular maintenance of the filter
system such as pre-filter removal. Additional hardware and/or plumbing parts are available at MarineDepot.
com or your local hardware or plumbing supply stores.
* For RO/DI systems, you will need to remove the DI cartridge
from the far left chamber(s) before turning on the cold
water supply.
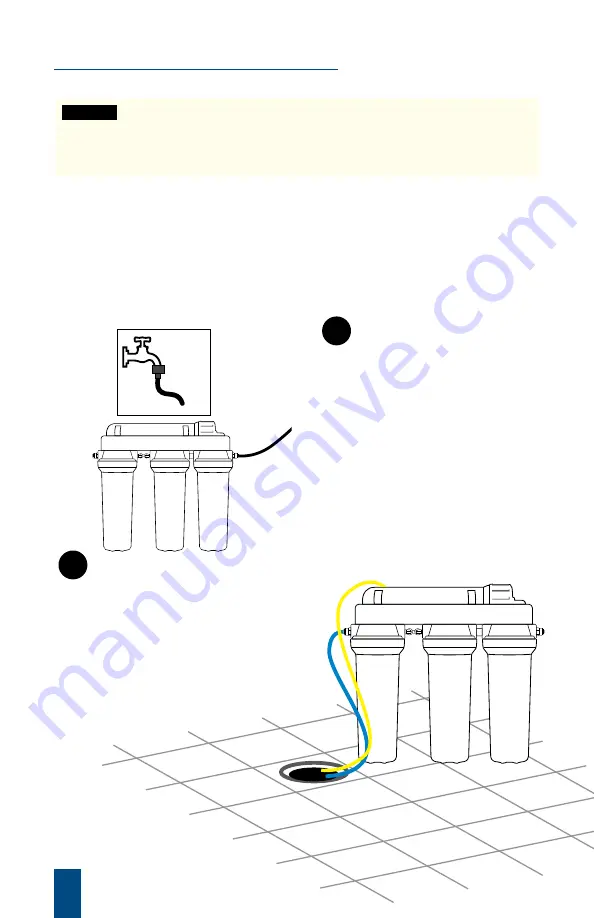
Place the yellow waste water line and blue product water line
into your drain.
Do not restrict flow from these lines. Do not
install the TFC membrane at this point.
Slowly open the
cold water supply valve and allow the first two housings
to fill. You may use pressure up to 85 psi. Double check
the system to ensure that all fittings are tight and leak-
free before leaving the system unattended.
1
2
Attach the garden hose adapter to your cold-water source.
Never run hot water (greater than 100° F or 38° C) through
the system.
Attach one end of the black feed water tubing
to the garden hose adapter and the other end to the IN
port of the sediment filter canister on the right side of your
Kleanwater System.
4
Questions? Call 1-800-566-3474


