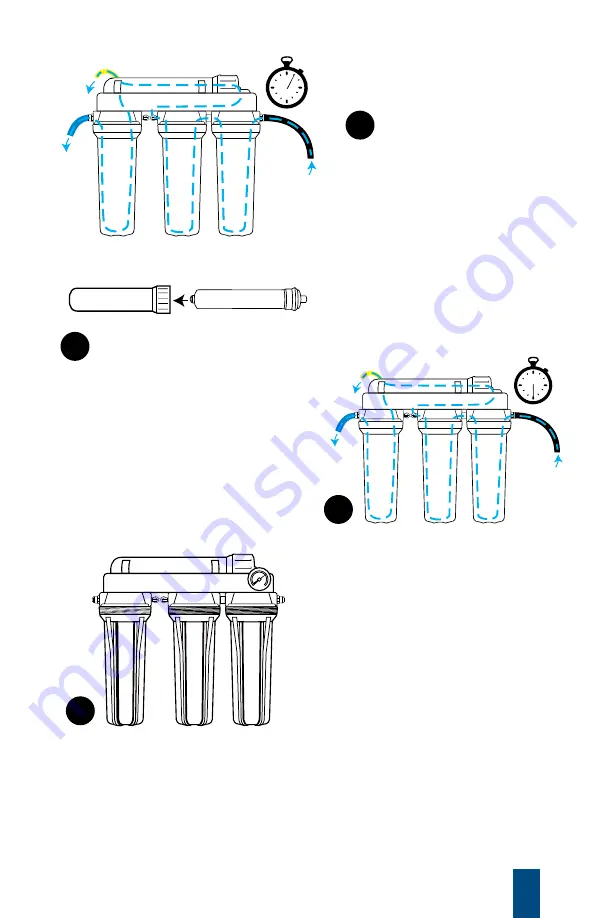
Allow the cold water to run for 5 minutes to
flush the sediment and carbon-block pre-filters
(already installed). Flushing the pre-filters will
help to maximize the TFC membrane life.
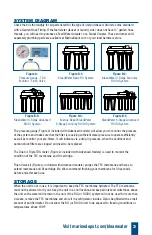
Next, turn off the water supply. Remove the TFC
membrane (blue tubular filter) from the protective bag
and install the membrane into the TFC housing on the top
of the RO System.
You will need to disconnect the tubing
to be able to unscrew the cap.
Take careful note of tubing
colors and connection location on TFC housing.
Securely
and fully seat the TFC membrane into the housing: there
should be about ¾” of space from the lip of the housing
to the top of the TFC membrane. Once the TFC membrane
is seated, screw on the top and reconnect the tubing.
Reverse osmosis membranes are packed with an
anti-bacterial agent to keep them sterile prior to use.
This agent should be flushed away to avoid human
or animal consumption. Turn on the water once
again and allow the unit to run for 30 minutes to
flush out the anti-bacterial agent.
For RO systems, allow the system to flush completely for 30 minutes and discard the initial batch
of water produced. Once flushed, the water from the product water line (blue) can now be collected
for use.
For RO/DI systems, allow the system to flush completely for 30 minutes. Then re-install the DI
cartridge(s) into the far left canister(s). Once DI cartridge(s) are installed, discard the first 2 gallons
of product water and start collecting pure RO/DI water for use thereafter.
*Trapped air in the DI
cartridge is a normal condition and will not affect the operation of the DI cartridge.
3
4a
4b
5
DI Cartridge
Carbon
Sediment
5
Visit marinedepot.com/kleanwater


