3-16
Setup Menu
Mark Levinson
Analog and Component SD Interlaced
Analog standard definition video has a resolution of 480i or 576i,
and is available on the Composite Video, S-Video, or Component
Video (YPbPr) output ports. SD interlaced video can be used for
monitoring the video signal output, or for other applications where
high definition or progressive scan resolution is not required. To
select the analog standard definition output, place the video output
switch in the
SD video
(top) position.
When using the SCART interface, select the video to be output as
Composite Video (CVBS), S-Video, or RGB video using the video
output switch.
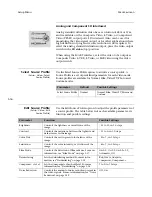
Select Source Profile
(Setup : Video : Select
Source Profile)
Use the Select Source Profile option to activate a source profile. A
Source Profile is a set of predefined parameters for each video mode.
Source profiles are available for Normal, Film, Video/TV, Photo and
Custom modes.
Edit Source Profile
(Setup : Video : Edit
Source Profile)
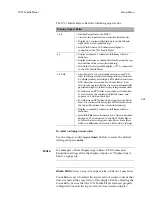
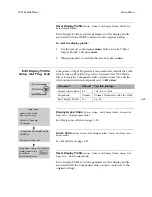
Use the Edit Source Profile option to adjust the profile parameters of
a source profile. The table below lists each available parameter, its
function and possible settings.
Parameter
Default
Possible Settings
Select Source Profile
Normal
Normal, Film, Video/TV, Photo and
Custom
Parameter
Function
Possible Settings
Brightness
Controls the lightness or overall tone of the
image.
- 32 to 31; in 1.0 steps
Contrast
Controls the variations between the lightest and
darkest areas in the image.
- 15 to 0; in 1.0 steps
Color Tint
Controls the red-to-green color balance of the
image.
- 8 to 7; in 1.0 steps
Saturation
Controls the color intensity, or vividness of the
image.
- 8 to 7; in 1.0 steps
Film Mode
Controls the detection of film cadence. For more
information, see “Film Mode” on page 3-17.
On 2-2, On 3-2, On 2-2+3-2,
Automatic, Off
Deinterlacing
Sets the deinterlacing method. For more infor-
mation, see “Deinterlacing” on page 3-18
Bob, Weave, Adaptive,
Compensat., Com
Compensat. + level
Sets the Com threshold level. For more
information, see “Deinterlacing” on page 3-18
7 to 0; in 1.0 steps
Noise Reduction
Controls the amount of noise reduction present in
the video signals. For more information, see “Noise
Reduction” on page 3-19
Off, On


