background image

8

N

0

52 RefeReNce PReamPlifieR


/


Owner’s Manual

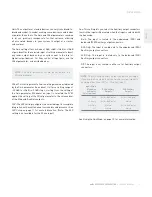
The Power Management parameters let you customize power-
related functions.

Standby: This setting lets you set the Standby mode to one of 
the following options:

Green:  This  mode  removes  power  from  almost  all  of  the 
N

0

52’s circuits, allowing the unit to be activated only via an 

IR  control  signal,  a  5V  –  12V  trigger  voltage  or  a  press  of 
the  Standby  button.  This  mode  provides  maximum  power 
conservation and is the factory-default Standby mode.

Power Save: This mode removes power from the N

0

52’s audio 

circuits,  but  keeps  the  control  circuitry  powered  and  ready 
to  receive  commands  from  either  the  front-panel  controls 
or the remote control. This mode provides moderate power 
conservation.

Normal:  This mode shuts off the N

0

52’s display and mutes its 

audio outputs, but keeps all of its control and audio circuits 
powered.  This  mode  provides  the  least  amount  of  power 
conservation but allows the N

0

52’s audio circuits to remain 

warmed up to deliver optimal performance at all times.

Auto  Off:  This  setting  lets  you  engage  or  disengage  the  
Auto Off function, which puts your N

0

52 into the Standby mode 

after  20  minutes  of  inactivity  (no  audio  signal,  and  no  user-
control input).

setuP menu

poweR MaNageMeNt

Power Mgmt

Standby=XXX
Auto Off=XXX

Setup Menu

Input Setup

Power Mgmt

Volume Control

Advanced

Summary of Contents for N052

Page 1: ...Reference Preamplifier Owner s Manual N0 52...

Page 2: ...om Before you read this User Guide we recommend that you thoroughly read the N0 52 Quick Start Guide supplied with your N0 52 in printed form The Quick Start Guide contains all the information you wil...

Page 3: ...lously balanced circuits preserve all input signal information passing it to the associated power amplifier without the limitations of asymmetrical designs In addition to the above mentioned inputs th...

Page 4: ...used to feed powered subwoofers recording devices or a second zone The N0 52 represents the ultimate combination of compelling performance and almost limitless potential Its unique dual chassisstruct...

Page 5: ...Input Ph Gain XXX 20Hz HPF XXX R Load XXX C Load XXX Ph Bal XXX Aux XXX Setup Menu Input Setup Power Mgmt Volume Control Advanced The Input Setup menu allows you to customize the following parameters...

Page 6: ...e Offset parameter to the volume level of the Main and Auxiliary outputs SSP The SSP setting configures the selected input for complete integration with a multichannel surround sound processor See SSP...

Page 7: ...o menu to continue listening as normal Ph Gain This setting lets you choose from two preset gain settings 40 0dB or 60dB for the Phono input The 60dB setting is useful for boosting signals from moving...

Page 8: ...he previous time the unit was powered down is retained CAUTION Setting the Turn On parameter to Last can result in louder than expected power up volume if the N0 52 was set to a high volume level sett...

Page 9: ...ontrol circuitry powered and ready to receive commands from either the front panel controls or the remote control This mode provides moderate power conservation Normal This mode shuts off the N0 52 s...

Page 10: ...ng network related parameters Name N0 52_XXXXXX Displays your N0 52 s network name the X s represent the last six digits of the unit s unique MAC address This setting is informational only and does no...

Page 11: ...e gain The signal at the Main outputs is also routed to the Aux outputs at a level that mirrors the Main output volume setting This mode is useful in configurations where Main and Aux signals and leve...

Page 12: ...rround sound processor see illustration on next page 1 Make sure the N0 52 and all associated components are powered off and disconnected from electrical outlets 2 Connect the output connectors on the...

Page 13: ...s R Input Link Su round Back Remote Zone Left Left Right Right Left Right Left Right Left Right Left Cen er Front Analog Audio Outputs Mic ophone Inputs 1 2 R R R L L L 3 3 3 1 2 1 2 3 Y Y G Pb Pb B P...

Page 14: ...ontroller chassis is placed inside a glass cabinet tinted glass will reduce the remote control range Make sure the remote control signal is being received at the IR receiver on the Controller s front...

Page 15: ...u is not set to Off No connectivity via Ethernet Verify that the network cables are properly connected between the router switch or hub and the N0 52 If you have connected directly to a computer verif...

Page 16: ...ive 3 3 5 0 7 7 10 33 50 77 100 330 47k user selectable 50pF 100pF 150pF 200pF 250pF 300pF 350pF 0 01 F user selectable Output Impedance 20 ohms balanced XLR connectors 10 ohms unbalanced RCA connecto...

Page 17: ...on Other company and product names may be trademarks of the respective companies with which they are associated This document should not be construed as a commitment on the part of HARMAN Internationa...

Reviews: