background image

the team to trust

Interface

22

A40051-B

„

„

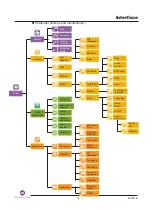
Information„bar

By„pressing„the„information„bar„button„

,„information„on„the„printer’s„operation„can„be„

accessed„(jet„status,„jet„speed,„motor„speed,„etc.).

Depending„on„its„colour,„the„information„bar„can„also„be„used„to„view„any„faults„or„

warnings,„and„provides„direct„access„to„a„list„of„faults„or„warnings„and„how„to„resolve„

them.„For„more„details,„refer„to„the„section„on„viewing„faults„and„warnings.

The„table„below„gives„a„summary„of„the„different„statuses„and„the„corresponding„back-

ground„colour„according„to„the„printing„status:

Warning

Fault

Print„

Paused„

Printer„shut„down

INFORMATION

STATUS

Ready

P

RINTER„

„

ST

AR

TED

P

RINTING„ ENABLED

Printer„ready

Printing„„

paused

Printer„„

stopped

Printing„„

started

Summary of Contents for 9232

Page 1: ... imaje com Markem Imaje S A S 9 rue Gaspard Monge B P 110 26501 Bourg lès Valence Cedex France Tél 33 0 4 75 75 55 00 Fax 33 0 4 75 82 98 10 the team to trust the team to trust 9232 9232 IP65 User manual A40051 B ...

Page 2: ...Menu structure 17 Organization of the menu tree structure 17 Selecting editing and managing jobs 18 Parameter settings and maintenance 19 Navigation 20 Communication 21 Dialog boxes 21 Printer status 21 Information bar 22 Viewing a job 23 Use 25 Starting up the printer 26 Shutting down the printer 28 Sending a job for printing 30 Managing consumables 32 Replacing a consumable cartridge 34 1 A40051...

Page 3: ...eld and modify a style 48 Moving a field 49 Modifying a field s content 49 Modify a field s font style 50 Delete a field 51 Locking Unlocking a field 51 Modifying a job Advanced modification 52 Creating a job 53 Modifying the main settings for the job 54 Modifying job settings 56 Adding Modifying a Text field 59 Adding Modifying a Date field 60 Modify the date format 61 Modifying Date field settin...

Page 4: ...ing a job or several jobs 86 Deleting a job from the selection list 86 Deleting one or more Jobs from the job management screen 87 Creating Modifying the printing list 89 Entering Chinese characters 90 Information History 91 Information 92 Printer status information 92 Printer configuration information 92 Operating history information 93 History 94 Printing history 94 Maintenance history 95 Availa...

Page 5: ... 111 Operations on the print head 112 General 112 Remove the head cover 112 Description 112 Shutting down the jet 113 Jet troubleshooting 114 Starting up the jet 116 Cleaning the head 117 Adjusting the jet break off point 119 Performing a printing test 120 Inhibiting certain faults 121 Operations on the ink circuit 122 General 122 Description of maintenance kits 122 Accessing the ink circuit 123 D...

Page 6: ...tting the date and time 148 Setting the date 148 Setting the time 148 Calibrating the touch screen 149 Choosing the interface language 149 Start up and shutdown options 150 Configuring inputs and outputs 151 Configuring the warning output 151 Configuring the fault output 151 Configuring network connections 152 Configuring the serial link 152 Configuring the Ethernet connection 153 DHCP mode 153 Fi...

Page 7: ...ometric generator input ENCODER 168 Reverse job direction input INVERSE MESS 168 Job synchronisation output PRINTG 168 Counter 169 Counter reset input COUNTR RESETx COUNTR RESETy 169 Counter incrementation decrementation input COUNTR INCRMx COUNTR INCRMy 169 Counter end value output COUNTR END 169 Job selection by parallel interface 169 Direct selection by job number independent mode 169 Selection...

Page 8: ...ut blue connector 172 Warning fault output yellow connector 172 Technical Specifications 173 Physical description 174 Performance specifications 174 Connectivity 174 Different functions 175 Power sources 175 Inks 175 Operating limits 175 Installation conditions 175 Standards compliance 176 Standard accessories 176 Specific features 177 Industrial interface board optional 178 TRIGG signal 179 Recyc...

Page 9: ...the team to trust Contents 8 A40051 B ...

Page 10: ...t to fulfill your marking and coding needs Because of its architecture this printer can be used in many configurations Its opti mized design adapts to the user offering user friendly printing and easy maintenance Contact To examine your requirements please contact your nearest Markem Imaje representa tive Markem Imaje SAS 9 rue Gaspard Monge BP 110 26501 Bourg lès Valence Cedex FRANCE Tel 33 04 75...

Page 11: ...the team to trust 10 A40051 B ...

Page 12: ...the team to trust 11 A40051 B Description ...

Page 13: ...esigned to be user friendly and only provides the user with access to those parts that he needs to use on a daily basis It is built on two levels the components used by the operator during everyday use are easily accessible by simple action the parts used for the printer s independent operation are protected and access to them is limited to maintenance operations ...

Page 14: ...her connections Serial Parallel Link Access to the electrical compartment Ink cartridge Make up cartridge Plant air connector Connection interface detection cell black encoder blue warning yellow Ethernet cable gland Conduit outlet Manufacturer s plate 13 A40051 B Front view Back view ...

Page 15: ...the team to trust 14 A40051 B ...

Page 16: ...the team to trust 15 A40051 B Interface ...

Page 17: ...urrent print job accessing the various menus Colored background Printing status Name of the job being printed Colored bar Printer information Production infor mation Icon bar Start Stop printer Preview of the job being printed Time remaining indicator Start Pause printing The printer is fitted with a fully tactile and interactive interface which adapts to each of the operator s actions ...

Page 18: ...tree structure The printer s three main functions are accessed from the main screen Use and printing 1 Selecting editing and managing jobs 2 parameter settings and maintenance 3 Use and printing parameter settings and maintenance Modification of the job in production Selecting editing and managing jobs 1 2 3 ...

Page 19: ...Modify Jobs settings Delete Font Size Text Date Hour Counter Bar code Shift code Custom date time Symbol External Modify New Manage job Delete Delete jobs Library Job Message Tools Simple modification Font Size 18 A40051 B Selecting editing and managing jobs ...

Page 20: ...e Printer Running status Complete configuration Ink circuit Shift code Algorithm Fault override Font Logo Draining Flushing Jet start up Adjust break off point Additive introduction Check Stability Refreshing Unblock Nozzle ABC Printer Job Variables Variables Maintenance Transfer Tools Information Settings Maintenance Head Operations History Print Date Time Date Serial link Display Set up Network ...

Page 21: ...e buttons and fields used for operating the interface and navigating the menus are as follows Scroll through a list OR Screen path preceded by the function icon Printing is paused One click restarts printing Printing has started One click pauses printing ...

Page 22: ...rinting paused OR Printer shut down Printer status The top left part of the screen shows the printer s current status against a background colour that varies according to its status Yes Cancel the action go back to the previous screen Communication Dialog boxes A dialog box is shown to inform the user or request confirmation No Confirm the action ...

Page 23: ...lts or warnings and provides direct access to a list of faults or warnings and how to resolve them For more details refer to the section on viewing faults and warnings The table below gives a summary of the different statuses and the corresponding back ground colour according to the printing status Warning Fault Print Paused Printer shut down INFORMATION STATUS Ready Printer started Printing enabl...

Page 24: ...buttons to switch from one size to another The job is shown on the screen as it will be printed The size of the job on the screen will be the same size printed The job preview is adjusted to the display area The entire job is visible In production the job preview is enlarged for easier viewing Editing the job preview is enlarged to make it easier to select a field using a finger ...

Page 25: ... to trust Interface 24 A40051 B If the preview is too big for the display area scroll across the job using a finger The red block on the view bar scrolls across according to the part of the job it is displaying ...

Page 26: ...25 A40051 B Use the team to trust ...

Page 27: ...st be started up once it is switched on 1 40 s 2 The printer is on but not started up The ink circuit and jet are not started up The printer s status is shown at the top left of the screen Click on 3 Confirm the printer is starting up in the window displayed the team to trust Use ...

Page 28: ...If this option is disabled only the ink circuit will be started up when pressing The operator will then be able to start up the jet manually in the Head Operations screen Job Source WARNING it is recommended to always print a series between starting up and stopping the printer Repeatedly starting up and shutting down the printer without actually printing may result in abnormally low viscosity the ...

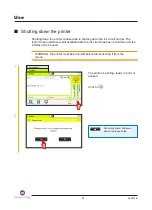
Page 29: ...ch screen interface is still available after the ink circuit has been shut down and the interface can be used WARNING the printer must be turned off before disconnecting it from the mains 1 The printer is printing ready to print or paused Click on 2 No Cancelling printer shutdown Return to previous step the team to trust Use ...

Page 30: ...he printer automatically after a certain period of inactivity Automatic shutdown WARNING in the event of an extended shutdown between 3 and 15 days it is recommended that this option is activated Extended shutdown An extended shutdown procedure will be run every time the printer is shut down If a shutdown lasts more than 15 days the ink circuit must be fully drained and flushed the team to trust U...

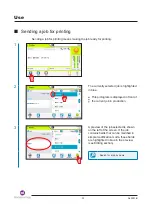
Page 31: ...ighted in blue This pictogram is displayed in front of the current job in production 3 A preview of the job selected is shown on the left of the screen If the job contains fields that can be modified in simple modification mode these fields are highlighted in blue in the preview see Editing section Search for a job by name the team to trust Use ...

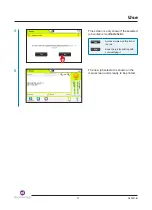
Page 32: ... if the selected job contains modifiable fields Yes No Access simple modification of the job Send the job for printing with out modifying it 5 The new job selected is shown on the main screen and is ready to be printed the team to trust Use ...

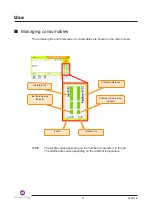
Page 33: ...n the main screen NOTE The ink life varies depending on the number of characters in the job The additive life varies depending on the ambient temperature Additive reference Ink life Additive life Ink reference Ink life remaining indicator Additive life remaining indicator the team to trust Use ...

Page 34: ...us Information Action Consumable OK The cartridge should NOT be replaced Level low A warning is displayed The cartridge can be replaced Level critical A warning is displayed The cartridge must be replaced quickly Consumable empty A fault is displayed Printing is impossible The cartridge must be replaced immediately the team to trust Use ...

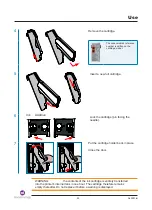
Page 35: ...consumables unless a Consumable warning or fault is signalled by the printer 1 Open the door Ink cartridge Make up cartridge 2 Remove the cartridge holder for the consumable to be changed 3 Ink Additive Unlock the cartridge pin in central position the team to trust Use ...

Page 36: ...Ink Additive Lock the cartridge pin facing the needle 7 Put the cartridge holder back in place Close the door WARNING the contents of the ink cartridge is entirely transferred into the printer s internal tank in one hour The cartridge therefore remains empty thereafter Do not replace it before a warning is displayed the team to trust Use ...

Page 37: ...36 A40051 B the team to trust ...

Page 38: ...37 A40051 B Editing the team to trust ...

Page 39: ...mode Managing usage profiles Profiles managing access to the different job modification levels and printer settings There are 2 types of profiles in the printer operator profile provides access to the simple modification level The operator can only change those fields in a job that are not locked advanced profile provides access to both modification levels simple and advanced An advanced user can ...

Page 40: ...he advanced profile Enter the password then confirm NOTE The default password is 0000 Job Source It can be changed in advanced profile in 4 A confirmation is displayed The new profile is activated Password Changed 1 The advanced profile must be activated before the password can be changed The password can therefore be changed by Click on the team to trust Editing ...

Page 41: ...ge the content of certain fields in a job 1 Modify the current print job Access the selection list to modify another job 2 Type in the new password then confirm Confirm the new password by typing it in again 3 A confirmation is displayed The password has been successfully changed the team to trust Editing ...

Page 42: ... in blue Press one of the blue fields to modify it e g a text field 3 Modify the content of the text field 4 The change to the text field is shown Click on to save the changes 5 Confirm the change made to the job in the window displayed the team to trust Editing ...

Page 43: ... be modified 2 3 1 2 Modify the Deferred Date field by changing the interval Define the interval value Select the interval unit day week month or year The changes instantly appear in the preview area 3 The change to the deferred Date field is shown in the job the team to trust Editing ...

Page 44: ...f a Counter field 1 Select the Counter field to be modified 2 Reset the counter to its starting value 010080 OR Reset the counter to the desired value 3 The modification made to the counter is shown in the job the team to trust Editing ...

Page 45: ... Cursor mode moving the cursor defining a style and adding a field This is the default mode if no field has been selected In cursor mode a red cursor flashes in the editing field and there are red arrows around the editing field In this mode the following actions are possible Moving the cursor Defining a field s font style before creating it Adding a field at the cursor position Red cursor movemen...

Page 46: ... The cursor can be moved in two ways Marker lines Press the editing field in the desired location for an approximate movement with magnetism to the marker lines OR Use the red arrows for a precise movement the team to trust Editing ...

Page 47: ...the desired field type The new field is shown at the cursor position Display the following field types Text Date Hour Counter Bar code Shift Time stamp Symbol External variable For more information on how to add a particular type of field refer to the section concerned the team to trust Editing ...

Page 48: ...he screen Click on 2 Three style attributes can be modified the font the font size the bolderization of the characters The font sizes available will depend on the choice of font 3 Once the modifications have been made click on 4 Changes to the style come into effect at the cursor position The next field created will have the font style defined the team to trust Editing ...

Page 49: ...ys around the editing field and the font style indicator turn blue In this mode the following actions are possible Moving a field Modify a field s content Modifying the font style of an existing field Delete a field Blue field movement arrows Selected field highlighted in blue Font style applied to the field Field type Click in this area to change the scale unit mm inches or points the team to tru...

Page 50: ...automatically be aligned with it by magnetism OR 2 2 1 End movement 1 Press the field to select it 2 Use the blue arrows to move the field Modifying a field s content Select the field to be modified then click on the icon at the bottom of the screen to access the modification screen The type of selected field is shown in blue under the font style indicator For more details on how to modify a parti...

Page 51: ...hown in blue in the top right corner of the screen Click on 2 Three style attributes can be modified the font the font size the bolderization of the characters The font sizes available will depend on the choice of font 3 The style changes made in the field are shown Once the modifications have been made click on 4 the team to trust Editing ...

Page 52: ...ication of certain fields to be authorized without affecting the overall layout of the job In advanced modification mode certain fields may be locked or unlocked The content of unlocked fields may be modified in simple modification mode Example for a Counter field The field is unlocked click to lock the field The field is locked click to unlock the field When a field is created it is unlocked by d...

Page 53: ...1 Select the job to be modified 3 The simple modification screen is shown For more information on how to use this screen refer to the section on simple modifications Access the job settings Click on 4 The editing screen for the job is shown The fields can be modified moved or deleted New fields can be added the team to trust Editing ...

Page 54: ...made up of different types of fields Each field type corresponds to a data type text date counter etc 1 In the main screen click on 2 In the job selection screen click on 3 Enter the name of the new job Click on the team to trust Editing ...

Page 55: ...n the job s editing Access the full list of job parame ters Modifying the main settings for the job Selecting the object speed by leaving the algorithm selection on Auto the object speed can be modified Choosing a specific algorithm NOTE For more details about algorithms see the technical characteristics at the end of this manual If a specific algorithm is selected the maximum object speed is limi...

Page 56: ...nes the default font used in the job The choice of number of marker lines depends on the algorithm or speed selected With a multi line algorithm the number of marker lines is fixed 5 The editing screen is shown The first field can be created the team to trust Editing ...

Page 57: ...the following paths from the main screen OR Head direction the value for this setting depends on where the printer is installed on the production line and on the desired reading result The printer offers a choice from the following four configurations the team to trust Editing ...

Page 58: ...certain zones may not be printable If this occurs the affected zones are shown in orange Any fields that overlap unprintable zones are also shown in orange Speed measurement this setting defines whether or not speed measurement is inactive constant speed if it is made using an encoder tachometer or with 1 or 2 cells Constant speed no speed measurement the speed is assumed to be constant Encoder se...

Page 59: ...mber of Multitops setting from 1 to 255 The print spacing can be defined in the Repetitive Interval setting from 2 to 9999 mm Unit this setting is used to define the unit of the Forward Margin Return Margin and Repeated Interval values This selection can be in millimetres meters or inches TRIGG filtering μs this parameter corresponds to the minimum time that the object detection signal must reach ...

Page 60: ...add a Text field to the cursor s position Define the field s font style before its creation 2 Enter the text Click on The Text field is unlocked only the content of the text can be changed in simple modification mode Press to lock the field 3 The new Text field is shown in the job the team to trust Editing ...

Page 61: ...2 to 6 are different 1 Position the cursor at the desired position then press to add a Date field to the cursor s position Define the field s font style before its creation If there are one or more dates already in the job a list of the existing dates is dis played It will then be possible to reuse one or create a new one 2 3 1 2 Define the interval value To enter the current date leave the interv...

Page 62: ...te in the job 4 The new Date field is shown in the job Modify the date format To add an element at the cursor position select it from one of the dropdown lists underneath Access the Date field parameters Access other deferred Date formats Click on to validate the format return to Screen 2 WARNING if a date is present both in the body of a job and in a bar code of the same job its format must be co...

Page 63: ...2 6 setting See the description of the Modulo Date 2 6 setting for more details week ww week of the year number from 01 to 53 month mm month of the year number from 01 to 12 mmm month of the year first three letters for Dates 2 to 6 mmm1 month of the year in Language 1 first three letters mmm2 month of the year in language 2 first three letters year y last digit of the year 0 to 9 yy last two digi...

Page 64: ...or n the integer quotient and dyprog the remainder of the integer division The dyprog element is therefore used to encode the date according to the Modulo using the following formula dyprog Interval n Modulo Date 1 For example an operator enters a deferred date with an interval of 1 000 days dyprog will vary according to the Modulo value Modulo dyprog 365 1000 2 365 270 600 1000 1 600 400 730 1000...

Page 65: ...s defined as the first day of the week Wednesday will be the last day Date change time used to define the time at which the date changes to the next day For example if the time is set to 05 00 the day s date will change at 5 00 a m not at midnight Month language 1 for selecting the language in which the month for the date and Date 1 will be written item mmm1 from the Month drop down list Month lan...

Page 66: ...move within the time Click on Delete to remove the element preceding the cursor Click on one of the possible elements below the preview line to insert it The AM PM element is added to the possible choices if the machine s time is defined using the 12 hour format in the time setting screen Click on to validate the format and insert the field OR 3 The new Time field is shown in the job the team to t...

Page 67: ...rting value or any other value Press to lock the field Modifying the counter s characteristics Select the counter number The printer can contain a maximum of 15 WARNING if the counter selected is already being used in another job its characteristics will be replaced by the default settings For this reason if the same counter has to be used in more than one job it is recommended that its characteri...

Page 68: ...unter s incrementation value For example if the counter step is set to 10 the counter goes up by 10 with each incrementation Select the batch value between 0 and 999 999 This is the number of items in a batch The counter is incremented when the batch value is reached For example if the batch value is set to 5 the counter will only increment by the counter step value after 5 items have been detecte...

Page 69: ... B 3 Changes made to the counter are shown in the preview line Click on to insert the counter in the job 4 The new Counter field is shown in the job Modifying the Counter field settings the team to trust Editing ...

Page 70: ...b the counter is incremented when the printer prints a job Linked the counter is incremented when the previous job is completed External reset used for selecting the industrial interface board input through which the counter can be reset to its starting value None no input can be used to reset to the starting value Input x reset to the starting value by the industrial interface board COUNTR RESETx...

Page 71: ...le in the counter s editing screen Reset Object signal if this option is enabled the counter will be reset to its starting value when each new item is detected by the photocell Auto RZ determines whether the counter is reset to its starting value as soon as the job is no longer active NOTES For the references to the industrial interface board connections see the External Connections section The de...

Page 72: ...from a PLC or from a bar code reader If no information is transmitted the reserved locations are shown in the printed job by a selected character visible on screen 1 Position the cursor at the desired position then press to add an external Variable field to the cursor s position Define the field s font style before its creation 2 The field characteristics may be modified in this screen Select the ...

Page 73: ... This is also the number of characters reserved for the external variable 3 The preview line shows the external variable as it would be printed if no information is transmitted 4 The External variable field is displayed in the job the team to trust Editing ...

Page 74: ...e it must first be imported to the printer using the Transfer font symbol function The font containing the symbol must be selected 1 Position the cursor at the desired position then press to add a Symbol field at the cursor s position 2 1 2 Select the symbol to insert then confirm 3 The new Symbol field is shown in the job the team to trust Editing ...

Page 75: ...e date and time information to encode To add an element at the cursor position select it from the list below dow day of week 7 values dom day of month 31 values doy day of year 366 values www week of year 52 values mon month of year 12 values yyy year 10 values hhh hour 24 values min minutes 60 values separators _ 3 This example shows the preview of a Time stamp field comprising the Day of month a...

Page 76: ...own in the job Time stamp table settings This screen is used to access the various time stamp tables corresponding to date and time items that can be inserted in a Time stamp field Example table for the Day of month item the team to trust Editing ...

Page 77: ...as been modified the new value can be copied to all boxes by pressing NOTE In a given Time stamp table all boxes contain the same number of characters as the longest box If a box needs to contain fewer characters than the longest box the missing characters must be replaced with spaces the team to trust Editing ...

Page 78: ...r code type and the position of the plain text transcription A preview of the selected options is displayed Access the Bar code field set tings 3 Create the bar code content using the items on the icon bar The available items depend on the type of bar code selected The cursor can be moved within the bar code content using the red arrows To insert an item at the cursor position press the icon corre...

Page 79: ... bar code items are identical to those for creating and modifying fields in a job 5 This example shows a bar code after inserting a Text item and a Date item Confirm the content to insert the bar code in the job 6 The new Bar code field is shown in the job WARNING if a date or counter is present in both the body of a job and a bar code its format must be compatible with the type of bar code used t...

Page 80: ...Narrow bar enter a value from 1 to 4 frames Narrow bar must be strictly less than Wide bar Narrow space enter a value from 1 to 4 frames Narrow space must be strictly less than Wide space Wide bar enter a value from 2 to 9 frames Wide space enter a value from 2 to 9 frames Inverse print enable this option to print the bar code in reverse video Black and white areas will be inverted Check byte enab...

Page 81: ...Industrial codes 2 5 interleaved This bar code may only be used to represent numerical characters May contain variables counter date etc May contain a maximum of 32 characters If a check byte is not used the number of characters entered must be even If a check byte is used the number of characters entered must be odd Alphabetic representations of dates postdates and shift codes are impossible Code...

Page 82: ...dth number of cells 18 32 10 12 26 36 14 16 36 48 18 20 22 24 26 32 Number of numeric char acters encoded 10 20 6 10 32 44 16 24 64 98 36 44 60 72 88 124 Number of alphanumeric characters encoded 6 13 3 6 22 31 10 16 46 72 25 31 43 52 64 91 Expansion 1 Height of the printed code number of drops 8 8 10 12 12 12 14 16 16 16 18 20 22 24 26 32 Width of the printed code number of drops 18 32 10 12 26 3...

Page 83: ...ss to add a Shift code field to the cursor s position Define the field s font style before its creation 2 1 3 2 3 4 Select the type of information to be used as the shift code in the job alphabetic 26 letters A to Z alphabetic 24 letters excluding I and O numeric 0 to 99 Select the format in which the starting time will be expressed 24 hours AM or PM Next define the starting time and the interval ...

Page 84: ...n screen 2 4 The new Shift code field is inserted in the job The shift code corresponding to the current time is shown Modifying the Shift code field settings The default settings applied to all Shift code fields may be modified in This screen is similar to the one that is displayed when a Shift code field is created or modified It is used in exactly the same way To access the advanced settings pr...

Page 85: ...be modified alphabetic 26 letters alphabetic 24 letters excluding I and O numeric Press a box to modify it and enter a new value using the keyboard that is displayed Once the box has been modified the new value can be copied to all boxes by pressing the team to trust Editing ...

Page 86: ... The name of the job is shown Confirm to save the changes to the job To create a new job using the changes enter a different name before validating 3 An overwriting confirmation request is displayed or a message confirms the creation of a new job the team to trust Editing ...

Page 87: ...ement screen Deleting a job from the selection list 1 Access the job selection list 2 1 2 Select the job to delete then press the Delete button 3 Confirm the deletion by pressing Yes NOTE If a job in the printing list is deleted from the selection list it will be also deleted from the printing list the team to trust Editing ...

Page 88: ...en 1 Press the Manage jobs button in the job selection screen 2 Press Delete job s 3 Select one or more jobs to delete by pressing the corresponding rows A cross is displayed opposite each job selected Select all Jobs Search for a job by name the team to trust Editing ...

Page 89: ... OK to delete the selected job s 5 Confirm the deletion by pressing Yes NOTE If a job in the printing list is deleted from the job management screen it will be also deleted from the printing list the team to trust Editing ...

Page 90: ...lect or deselect them Press to include the jobs selected in the printing list 2 1 2 The right hand column shows the jobs currently included on the printing list Press one or more jobs to select or deselect them Press to exclude the jobs selected from the printing list NOTE Jobs on the printing list retain the same number as on the main list and are sorted in ascending order This number is used by ...

Page 91: ...on to access the Chinese keyboard 2 3 1 2 Use the alphabetic keyboard to enter the phonetic equivalent of the Chinese text The list of possible characters or character sequences is displayed above Press one of the possibilities to add it to the text field If there are more than 9 possibilities press to view all the options the team to trust Editing ...

Page 92: ...the team to trust 91 A40051 B Information History ...

Page 93: ... B Information Printer status information This function shows the printer status and operating settings in real time Printer and ink circuit counter values are shown together with filter change and maintenance dates Printer configuration information ...

Page 94: ...scosity meter filling time s Ad number of additive additions Sol duration of solvent addition Vjet jet speed T1 temperature of main board in C T2 temperature of ink circuit in C When a fault occurs the values recorded minute by minute for the ten minutes preceding the fault are displayed together with the fault code Pressing saves this data and the configuration data to an external medium NOTE it ...

Page 95: ...ata about the printer printing maintenance availability consumption and warnings faults Printing history Pressing displays the print total counter This history screen shows jobs printed over the last two months The following is displayed for each job the period in which it was printed and the number of prints counted ...

Page 96: ...intenance actions For each maintenance action recorded the screen shows the date and time at which it was recorded the total printer running time and ink circuit running time when the action occurred the kit identification number batch number NOTE Maintenance actions must be saved in to be shown in the history ...

Page 97: ...ready to print over the period shown It is expressed as a percentage The average additive consumption in mL h and average ambient temperature in C are also shown for each period NOTE to ensure that the availability and consumption data are correct the time and date must always be correctly set from the first time the printer is used NOTE the availability and additive consumption data are reset at ...

Page 98: ...intenance it may be helpful to view warnings and faults previously acknowledged in chronological order Transferring history data This function available n the various history screens can be used to transfer the data being displayed onto an external medium Each transfer file includes the main printer configuration data and the data being displayed After the transfer is selected a transfer confirmat...

Page 99: ...the team to trust 98 A40051 B ...

Page 100: ...the team to trust 99 A40051 B Troubleshooting ...

Page 101: ...A40051 B Warnings and faults The printer interface alerts the user to the presence of a warning or fault with a full screen pop up When a fault is reported printing is no longer possible When a warning is reported printing remains possible ...

Page 102: ... all warnings and faults on the list Clear the warning or fault In certain cases gives access to a warning or fault resolution wizard NOTE Certain preventive maintenance warnings cannot be acknowledged without following a specific procedure see the Maintenance section Summary of the warning fault in the information bar ...

Page 103: ...ain warnings and faults Just follow the steps shown on the screen The warning or fault will be cleared automatically once it it resolved Straightforward solution If a detailed procedure is not available the interface gives a simple solution for resolving certain faults and warnings Once the fault or warning is resolved it can be acknowledged in this screen ...

Page 104: ...oad supply failure 2030 F Drop deviation supply failure 2040 F Solenoid valve supply failure 2050 F Head cover absent or not detected 2060 F Jet out of gutter or not detected 2070 F Drop phase detection 2500 W Communication error with printhead 2510 W Jet not well positioned 4000 F Time out emptying measurement chamber 4010 F Time out viscosity measurement 4020 F Ink level too high 4030 F Viscosit...

Page 105: ...isation 5020 Unable to save production settings 5030 Invalid printer settings file Use Default 5040 Unable to save printer settings 5050 Printer initialisation FAILURE 5060 Unable to initialise the PU system DATA 5070 Unable to initialise the PU Machine DATA 5080 Printer can t execute the command here 5090 Unable to save printer functioning data 5100 W Critical additive level 5110 W Critical ink l...

Page 106: ...eck Possible anomalies Print module Dirty electrodes Ink leak Cartridge holder and cartridges Leak Damaged cartridge Use by date exceeded see cartridge label Industrial interface board Connectors Poor connection of external accessories Power supply Utilities Poor connection of power cord Poor connection of air network Air filters Dirty or clogged filters Check operating settings Click on A dialog ...

Page 107: ...ontact Markem Imaje technical support 3 Internal communication error 3a Disconnect the printer from the mains power and reconnect 3b Contact Markem Imaje technical support 4 Font used not available 4a Transfer the fonts used in the job in production to the printer OR Delete the job and create a new one using the existing fonts 5 Algorithm used not available 5a Check and correct the print parameter...

Page 108: ...5 Head cover absent or not detected 15a Replace the head cover to restart printing 16 Jet out of gutter or not detected 16a Clean and dry the printhead 16b Use the Unblock Nozzle function in the head operations screen if the jet is not in the gutter 17 Drop phase detection 17a Clean and dry the printhead 17b Use the Adjust break off point function in the head operations screen 18 Jet poorly positi...

Page 109: ...e is not empty check that it has been inserted correctly 24b Replace the additive cartridge if it is empty 25 Low ink level The printer starts using the ink circuit s ink tank The remaining life is calculated and displayed on the screen 25a If the ink cartridge is not empty check that it has been inserted correctly 25b Replace the ink cartridge if it is empty NOTE this warning may also be caused b...

Page 110: ...nting 31b Check the print Trigger Mode Margin Object Speed Speed Measurement Encoder Division settings 31c Perform a printing test Check the connections and operations on the cell s and encoder 32 Poor printing quality Tutorial 1 Example 2 Example 3 Example 4 32a Clean the print head including the cover and check that there are no obstacles on the jet trajectory 32b Check the stability of the head...

Page 111: ...the team to trust 110 A40051 B ...

Page 112: ...111 A40051 B Maintenance the team to trust ...

Page 113: ...n chamber Gutter 112 A40051 B Operations on the print head General Remove the head cover Description Loosen the knurled screw swivel the head cover and pull it downwards For IP65 heads unscrew the 2 clips and open the cover downwards the team to trust Maintenance ...

Page 114: ...intenance or cleaning operations on the print head the jet must first be shut down 1 The jet is on The jet status is displayed in the first line on the left Press Jet Off 2 The jet is off The ink circuit is still started the team to trust Maintenance ...

Page 115: ...is absent or deviated various actions are used to re centre it in the gutter 1 Shut down the jet 2 Position the head on the maintenance stand Remove the head cover Press Unblock Nozzle Observe the jet in the gutter then turn off nozzle unblocking If the jet is already in la gutter go to step 4 If not go to step 3 the team to trust Maintenance ...

Page 116: ...introduction 4 Press Stability Control Once the jet is aligned and in the gutter turn off the jet s stability control Clean the head see the head cleaning procedure 5 After cleaning the head restart the jet see the jet start up procedure Check that the jet is in the gutter Replace the head cover and acknowledge the faults the team to trust Maintenance ...

Page 117: ...cleaning or manual jet shutdown operation proceed as follows to restart the jet Access the Head Maintenance screen 1 The jet is off The ink circuit is still started Press Jet start up 2 The jet is starting up 15 s 3 The jet is on the team to trust Maintenance ...

Page 118: ...WARNING The print head should be cleaned every two weeks for standard inks and every week for semi pigmented inks and head movement applications Access the Head Maintenance screen 1 Shut down the printer see procedure 2 Position the head on the maintenance stand Remove the head cover see procedure the team to trust Maintenance ...

Page 119: ...olution from top to bottom WARNING never use any solution other than the cleaning solution recommended by Markem Imaje 4 Dry carefully with the squeeze blower from top to bottom 5 Start up the printer 6 Closing the head cover again 7 Acknowledge the cover fault if necessary by pressing the team to trust Maintenance ...

Page 120: ... The jet break off point adjustment screen is accessible from the main screen as follows 1 Position the head on the maintenance stand 2 Start up the jet if it was stopped 3 Press the Adjust break off point button The adjustment is carried out automatically 4 Acknowledge any faults then perform a printing test see procedure the team to trust Maintenance ...

Page 121: ...omatically after the job has been printed once In repetitive trigger mode press again to stop the printing test In multitop trigger mode the printing test is stopped automatically once the number of prints defined in the Number of Multitops setting have been completed NOTES The Speed Measurement setting must be defined in the job settings For more details about trigger modes see the job settings s...

Page 122: ...n faults In other words these faults will not be signaled but will be ignored by the printer The following faults can be inhibited cover open jet recovery in gutter printing speed NOTE Fault inhibition is disabled whenever the printer is started up Faults should only be inhibited on an exceptional basis for specific maintenance operations NOTE When the jet is off the Cover Open fault is automatica...

Page 123: ...ption of maintenance kits 1 pressure pump One 3 L drum hose cap 1 ink filter enclosure 1 air filter foam surround 1 flushing adapter 1 pair of gloves 1 drain pump Filter kit Draining flushing kit Maintenance kit x 2 2 nozzle caps the team to trust Maintenance ...

Page 124: ...w the ink circuit Lift the lever in order to be able to fully remove the ink circuit from the console Ensure that a flat surface is available at the same height as the printer on which to place the ink circuit WARNING the two retaining screws must be put back into place once work on the ink circuit is complete the team to trust Maintenance ...

Page 125: ...tion board Pressure pump motor Pressure cell anti pulse system Ink Filter Measuring sensor Transfer pump Solenoid valve compartment 124 A40051 B Description of the ink circuit WARNING the condensate outlet must never be blocked the team to trust Maintenance ...

Page 126: ...rt thereby avoiding any overheating pf the compartment which could lead to excessive additive consumption Equipment required Latex gloves Protective goggles Air filter foam surround 2 min WARNING before performing any servicing operations the printer must be shut down and disconnected from the mains power supply 1 bottom view Remove the filter and its surround by pressing on each side of the surro...

Page 127: ...d its surround in place of the old one by pressing on each side of the surround through the side openings and pushing upwards NOTE this maintenance action must be recorded in the function for optimal tracking of the printer the team to trust Maintenance ...

Page 128: ... Latex gloves Protective goggles draining flushing kit 2 additive cartridges 1 h 30 min 1 Replace the air filter see procedure Turn on the printer Access the Drain Flush function Confirm draining 2 Remove the ink circuit from the printer see procedure Remove the machine drain hose from its retaining guide Slide the sleeve that protects the stopper toward the base of the hose and then remove the st...

Page 129: ...m inlet must run above a cartridge holder or above the printer door 4 Check that the transfer pump outlet hose is correctly connected to the waste drum NOTE the transfer pump and waste drum must not be removed from the carton 5 Unwind the extension already connected to the ink circuit connection board Connect this extension to the transfer pump power supply cable The draining flushing kit is conne...

Page 130: ...additive cartridge In the ink cartridge s cartridge holder Lock the cartridge by pointing the cartridge holder stub toward the nozzle Install the flushing adaptor on the nozzle through the cartridge holder 8 Put the cartridge holder back in place normally on the ink side Click on to go to the next stage the team to trust Maintenance ...

Page 131: ...raining Flushing Kit procedure Close the printer Press to confirm Clean the head if necessary It is recommended to replace the ink filter See the ink filter replacement procedure NOTE if the printer has just been drained flushed in order to be stored or not used for a long period of time it is recommended that the 2 supplied caps be placed on the ink and additive inlet nozzles the team to trust Ma...

Page 132: ...ollowing the procedure below Equipment required Latex gloves Protective goggles 5 min 1 Disconnect the transfer pump from the extension connected to the ink circuit board Replace the extension on the top of the ink circuit without disconnecting it from the connection board so it can be used next time the team to trust Maintenance ...

Page 133: ...ack to the cap for better sealing Remove the two empty cartridges and the flushing adaptor and put them in the box in the location provided Put the ink circuit back in its compartment Replace the 2 retaining screws and close the console door 4 Remove the transfer pump outlet hose from the waste drum Replace the pierced cap on the drum with the new cap supplied the team to trust Maintenance ...

Page 134: ...133 A40051 B 5 Connect the inlet and outlet hoses of the transfer pump by means of the connector to make sure the pump does not leak the team to trust Maintenance ...

Page 135: ...tex gloves Protective goggles 3 mm Allen key Ink filter enclosure 3 mm 5 min WARNING before performing any servicing operations the printer must be shut down and disconnected from the mains power supply 1 Slide the ink circuit outwards from the cabinet until the limit stop on the rail 2 Loosen the two M4 screws holding the filter in place without removing them 3 Swivel the filter on the right hand...

Page 136: ...rectly inserted in the foolproofing mechanism WARNING Check that the O rings are fitted correctly around the two inlet apertures and the new filter s outlet 6 Swivel the support ring in the opposite direction to return it to its initial position Tighten the two M4 screws WARNING Restart the ink circuit outside the printer to check for leaks NOTE this maintenance action must be recorded in the func...

Page 137: ...13 mm 10 min WARNING before performing any servicing operations the printer must be shut down and disconnected from the mains power supply 1 Remove the ink circuit from the printer see procedure 2 If the circuit has not been drained the 2 hoses at either end of the pump need to be pinched and a holding tank put into position Use the open ended wrench to remove the nuts from the banjo couplings at ...

Page 138: ... the sealed bags supplied 5 Replace the three M3 screws in the pump motor module Replace the banjo couplings with their O rings then tighten the nuts WARNING Restart the ink circuit outside the printer to check for leaks NOTE this maintenance action must be recorded in the function for optimal tracking of the printer the team to trust Maintenance ...

Page 139: ...oid valves 6 to 9 in the head open closed the three pumps P1 to P3 All the solenoid valves are initially closed They can be controlled individually by pressing the button open or closed for the head solenoid valves in position 1 3 2 or 1 3 2 de energized for the ink circuit s solenoid valves Likewise the pumps may be enabled or disabled This function can also be used to adjust the pressure bar and...

Page 140: ...solenoid valves open closed pressure pump transfer pump solenoid valves 2 way solenoid valve 2 way solenoid valve 2 way transfer pump additive cartridge ink cartridge head filter Ink Filter the team to trust Maintenance ...

Page 141: ...er supply unit Techno board Remove the 9 screws located around the removable panel at the rear of the printer Operations on the electrical compartment Accessing the electrical compartment Before accessing the electrical compartment shut down the printer and disconnect the power cord Description the team to trust Maintenance ...

Page 142: ...t be acknowledged using a specific procedure 1 When the warning appears press the button to launch the procedure Leave the warning screen The help is then accessible via the status bar 2 Follow the procedures in this manual to replace items as required Once the operations are complete press 3 1 2 Check the replaced item Press to confirm This screen is also accessible from the maintenance menu the ...

Page 143: ...confirms that the operation has been taken into account The corresponding warning is acknowledged The replacement is shown in the maintenance history NOTE preventive maintenance operations are not taken into account in the availability rate calculation the team to trust Maintenance ...

Page 144: ...enu A summary of the last 30 maintenance operations can be displayed in the maintenance history 1 Select the area containing the item s replaced 2 2 1 Select the item s replaced Press to confirm 3 A message confirms that the replacement has been recorded The operation is then displayed in the maintenance history the team to trust Maintenance ...

Page 145: ...laced The list of other parts can be accessed as follows Other parts The replacement of non predefined parts can be recorded by accessing the list of other parts 1 Select the part s replaced If the part replaced is included in the list press this button to add it 2 Press to confirm the selection The replacement of the part s is recorded in the maintenance history the team to trust Maintenance ...

Page 146: ...d a part to the list Remove a part from the list 2 Enter the part number ENMxxxxx or Axxxxx Press to confirm 3 Enter the description of the part Press to confirm 4 The new part is shown in the list the team to trust Maintenance ...

Page 147: ...146 A40051 B the team to trust Maintenance ...

Page 148: ...the team to trust 147 A40051 B Configuration Transfer ...

Page 149: ...date and time Setting the date Setting the time and select the month and year Select the day from the calendar and select the hours minutes and seconds Select 24h or 12h mode If 12h mode is chosen also select whether the current time is a m or p m Preview of the time ...

Page 150: ...the screen to calibrate the touch screen Choosing the interface language Language currently selected Desired choice of language The printer must be restarted to take the change of language into account NOTE When selecting the language English United States the date will be displayed in US format month day year ...

Page 151: ... be started manually before printing Automatic shutdown disabled by default Enabled the printer is shut down automatically after a specified idle time no objects detected Enter the idle time after which the printer should shut down in the field that is shown Extended shutdown disabled by default Enabled the printer runs an extended shutdown procedure every time it is shut down An extended shutdown...

Page 152: ... Indicates that the corresponding warning output is enabled Pressing enables Pressing disables Indicates that the corresponding fault output is enabled Pressing enables Pressing disables This function selects the sta tuses during which the warning output is activated This function selects the status es during which the fault output is activated ...

Page 153: ...Configuring network connections Configuring the serial link Transmission speed in baud 300 600 1200 2400 3600 4800 7200 9600 19200 38400 57600 115200 Number of data bits Type of parity none even or odd Number of stop bits 1 or 2 Return to default settings ...

Page 154: ... DHCP mode Fixed IP address mode NOTE consult the network administrator to determine how to configure the network Modify the printer name optional Define the port number to be used Modify the printer name optional Define the port number to be used IP address subnet mask and default gateway ...

Page 155: ... the object to be printed The available options depend on the maximum printing speed algorithm selected in job settings d NOTE the physical distance between the head and the object must be adjusted to suit the font and ink used as set out on the ink data sheet Object signal mode Stop printing stops if there is no TRIGG information even if the message has not been printed in full Continue printing ...

Page 156: ...ing edge falling edge Number of photocells used to define whether the object movement speed is measured with a single photocell or two cells Photocell distance enter the distance from 10 to 9999 mm between the photocells if the speed is measured with two photocells or the object length if the speed is measured by just one photocell Encoder step corresponds to the distance travelled between two enc...

Page 157: ...g data This function transfers data between the printer and an external medium USB key or SD card Open the printer door to access the SD card reader and USB port USB ports SD card reader Various types of data may be transferred Jobs fonts symbols algorithms languages ...

Page 158: ...rget medium 2 and the destination folder on the medium where applicable Languages may only be transferred from an external medium to the printer 3 1 2 The content of the source medium is displayed Select one or more directories or data items to transfer Pressing a the root of a folder tree structure selects the entire structure Press to copy the data in the transfer list ...

Page 159: ...158 A40051 B 1 2 To delete one or more data items from the list click on them to select them then press to delete them from the list 4 When the data list is complete pressing transfers it to the target medium 5 A message confirms the transfer ...

Page 160: ...tination folder 1 To create a new folder press The new folder is created in a folder selected from the list 2 Gives the new folder a name then press The newly created folder will automatically be selected as the destination folder 3 Confirm to go to the job selection screen ...

Page 161: ...figuration Transfer 160 A40051 B Enabling disabling overwriting of data 1 Press to access the data overwriting option 2 This function is used to select whether the content is overwritten and replaced by the data transferred ...

Page 162: ...the team to trust 161 A40051 B External connections ...

Page 163: ...ncrementation initialisation of counters etc Additional detection photocell input Job number increment input Programmable and synchronization inputs outputs Connection The wiring for these signals may be connected Either to the terminal blocks on the industrial interface board optional with cables routed via IP65 sealed cable glands located on the rear panel of the printer Use shielding cable to m...

Page 164: ...the team to trust External Connections J5 J2 J3 J6 J4 163 A40051 B Marking of industrial interface board terminals optional ...

Page 165: ... NO Fault Make contact relay O FAULT NC Fault Break contact relay O TXD 2 Serial link 2 V24 RS232C data output O GND Common I RXD 2 Serial link 2 V24 RS232C data input J2 O GND Common O 24 V I ENCODER COMMON Common encoder I ENCODER CH B Encoder Input B I ENCODER CH A Encoder Input A I TRIGG a Start printing top object Cell 1 I COMDATA b Common job selection I TRIGG b Start printing top object Cel...

Page 166: ... Job increment or decrement I COUNTR INCRMx b Counter increment set with input x I COUNTR INCRMy a Counter increment set with input y I COUNTR INCRMy b Counter increment set with input y J4 O GND Common O 24 V I COUNTR RESETx a Counter reset set with input x I COUNTR RESETy a Counter reset set with input y I COUNTR RESETx b Counter reset set with input x I COUNTR RESETy b Counter reset set with in...

Page 167: ...ady to print O PRINTG Job synchronization O FAULT Fault optocoupled output O OUT 3 Not assigned O FAULT Fault optocoupled output O OUT 3 Not assigned O ALARM Warning optocoupled output O COUNTR END Counter end value O ALARM Warning optocoupled output O COUNTR END Counter end value O OUT 1 Not assigned O OUT 2 Not assigned O OUT 1 Not assigned O OUT 2 Not assigned ...

Page 168: ...haracteristics of a high speed photocoupler with open collector phototransistor Maximum output current 50 mA Maximum operating voltage 50 V Warning and fault outputs A beacon column may be connected to the printer via the M12 connector yellow on the left hand side or via one of the following outputs on the industrial interface board Relays The relay outputs are potential free dry contacts The cont...

Page 169: ... b inhibit the TRIGG detection signal The principle is shown on the diagram below INHIBIT TRIG 30 µs printing inhib ited printing of ac tive job TRIGG PRINTING 30 µs printing inhib ited Tachometric generator input ENCODER A tachometric generator or encoder can be connected to the blue M12 socket or to the industrial interface board s ENCODER CH A and ENCODER COMMON terminals The tachometric genera...

Page 170: ...Job selection by parallel interface Direct selection by job number independent mode The MODE signal determines the type of coding used to address the job number if MODE 0 the job number has a hexadecimal code if MODE 1 the job number is BCD coded Terminals D0 D1 D2 D3 D4 D5 D6 and D7 are used to address the job number selected for printing using the coding defined by the MODE signal The INC TRG ME...

Page 171: ...via the parallel interface see the network interface manual Warnings and faults Warning output This output signals a non critical printer malfunction which does not prevent printing The warning is generated to attract the operator s attention so that the anomaly can be corrected The relay output has two types of dry contacts De energized normally closed Energized normally open ALARM NO ALARM COM A...

Page 172: ...zed FAULT COM FAULT NC NOTE The WARNING and FAULT outputs are configured in the menu Other functions Printer On Off input ON OFF Information sent between the ON OFF a and ON OFF b terminals shut down or start up the printer Output ready to print PRINTER READY This output is active when the printer is ready to print jet started and job selected Serial Ethernet links Information about the V24 RS232 ...

Page 173: ...lable via female M12 connectors located on the left of the printer The pins on these connectors are numbered as follows Photocell input black connector 1 24 V 2 TRIGG b 3 GND 4 TRIGG a Encoder input blue connector 1 24 V 2 ENCODER COMMON 3 GND 4 ENCODER CH A Warning fault output yellow connector 1 PRINTER READY green 2 FAULT red 3 GND 4 WARNING orange ...

Page 174: ...the team to trust 173 A40051 B Technical Specifications ...

Page 175: ... positions Up to 4000 characters per message 1 to 5 lines of information Height from 1 7 to 10 7 mm depending on font and head Choice of 5 7 9 11 16 24 32 dot character heights Choice of numerous fonts Latin column etc Possibility of printing all types of characters and graphics bar codes two dimensional codes etc Maximum speed 3 pt mm G head 5 5 or 6 6 m s with high speed option Head movement Lin...

Page 176: ...r Inks Quick medium and slow drying Average consumption 72 million lower case characters 7x5 per cartridge G head Operating limits Operating temperature 5 C to 40 C The use of certain inks may restrict the temperature range as specified on the ink technical data sheets Humidity 10 to 90 without condensation Protection index IP55 IP65 depending on model Installation conditions Printer s operating p...

Page 177: ...47 bare product EN 60068 2 29 bare product Impacts falls NF EN 22248 bare product NF H00 60 packed product NF H00 41 47 58 59 packed product Electromagnetic Compatibility Emission EN 61000 6 4 Immunity EN 61000 6 2 Standard accessories Head mounting Printer table or support Object detector s cell Speed detector tachometer External warning visual Head movement Head pressurization kit standard on pr...

Page 178: ...tric generator input External warning fault outputs Algorithms and head object distances Standard 10 mm font 24 pt 12 mm font 24 pt 30mm Fast 10 mm font 24 pt 12 mm font 24 pt Ultra fast Bar codes 2 5 interleaved Code 39 Two dimensional Code Datamatrix ECC 200 Extended library up to 880 jobs up to 30 logos Serial link RS232C V24 suitable for current loop operation RS422 Non double printing A given...

Page 179: ...ry The bottom LIBRARY SENSE input selects the previous job in the library Industrial interface board optional Programmable output Programmable output depending on the final value of a counter Counter increment input The counters increment via this input instead of the top objet Counter reset input Counters may be reset to their initial value by a pulse on this input ...

Page 180: ...ard Margin setting in Modifying Job Settings for more detail b duration of the TRIGG signal The duration of the TRIGG signal must be more than 200 µs and longer than the TRIGG filtering See the TRIGG Filtering setting in Modifying Job Settings for more detail c time between two printing jobs without bar code 3 ms with bar code between 10 and 50 ms ...

Page 181: ...the team to trust Technical Specifications 180 A40051 B ...

Page 182: ...ismantling is not carried out on site this information should be passed on to the service provider responsible for this operation Recycled elements Procedures 1 Stainless steel console 100 recyclable material by any metal processing business 2 Consumables cartridges and ink circuits These are made of plastic materials metals impreg nated composites or contain ink Recommended procedure energy recov...

Page 183: ...the team to trust 182 A40051 B ...

Page 184: ... Photographs and drawings are not binding in detail This document was originally written in French The French text of this document shall alone be authentic and shall prevail in the event of a dispute Markem Imaje reserves the right to modify the specifications of its products without prior notice Any reproduction even partial of this document is prohibited Translation of the original manual the o...

Page 185: ...the team to trust 184 A40051 B ...

Reviews: