background image

METAL X PRINTER USER GUIDE

74

10. 

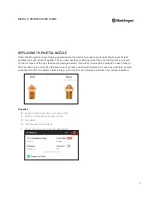
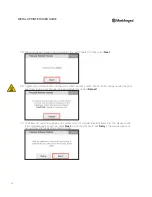
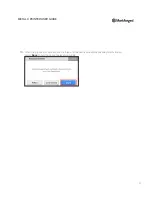
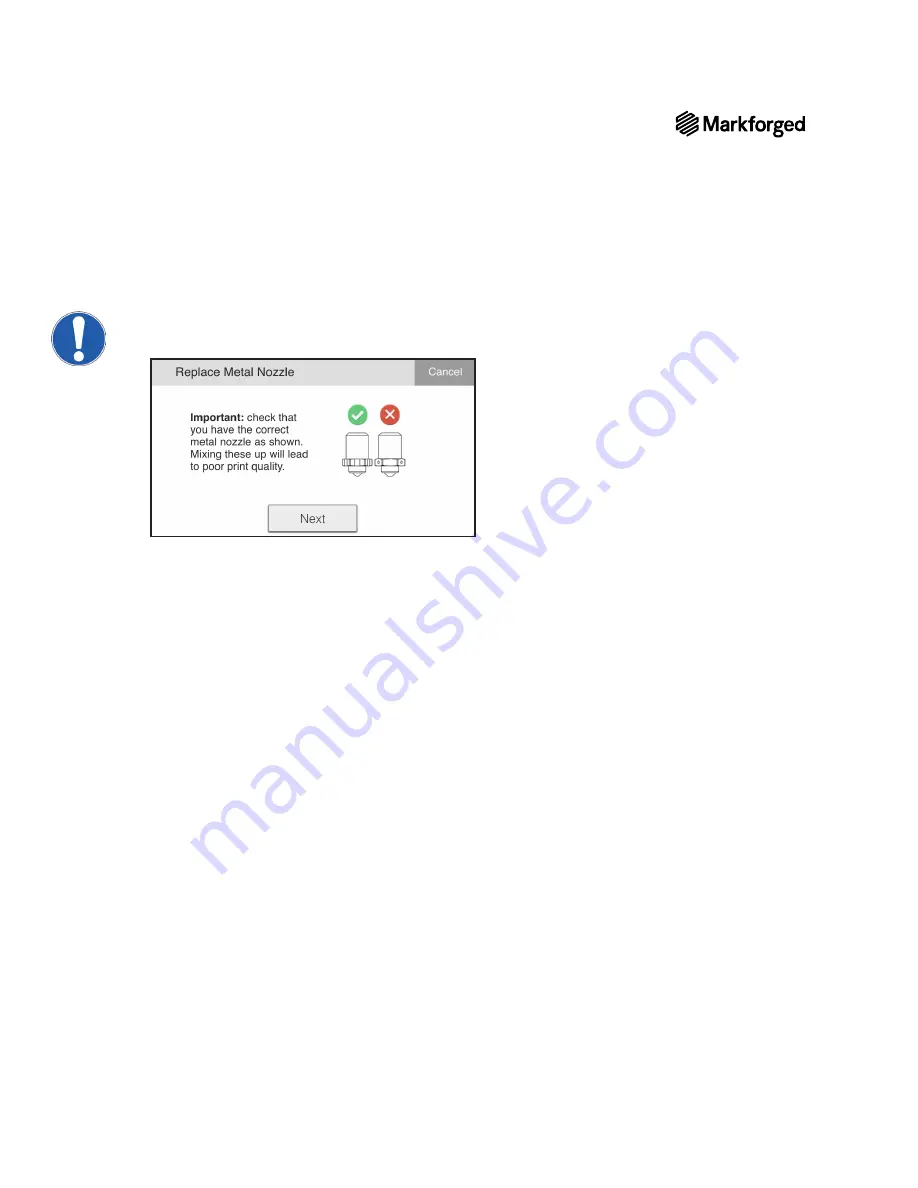
Check your replacement metal nozzle to ensure that you are inserting the correct type of nozzle. The 

most up-to-date metal nozzle has a vertical groove on each of the six sides of the hex feature, while the 

release nozzle has three dimples on alternating sides. 

Summary of Contents for Metal X

Page 1: ...1 METAL X PRINTER USER GUIDE METAL X PRINTER USER GUIDE ...

Page 2: ...of this document visit our support website Copyright 2019 Markforged Inc All rights reserved Changesareperiodicallymadetotheinformationherein which will be incorporated in revised editions of this publication Markforged may make changes or improvements to the product s described in this publication at any time and without notice ...

Page 3: ...ILAMENT 37 METERED LOAD QUICK LOAD UNLOADING METAL FILAMENT 47 UNLOADING RELEASE FILAMENT 50 MATERIAL STORAGE DISPOSAL 52 PRINTING A METAL PART 54 SAFELY REMOVING METAL PARTS 59 CLEARING METAL MATERIAL JAMS 60 PRINT HEAD OBSTRUCTION 66 CLEANING YOUR METAL X PRINTER 67 REPLACING THE METAL NOZZLE 69 REPLACING THE RELEASE NOZZLE 79 REPLACING WIPING STATION BRUSHES 88 ADJUSTING BELT TENSION 89 ADJUSTI...

Page 4: ...ent This equipment generates uses and can radiate radio frequency energy and if not installed and used in accordance with the instruction manual may cause harmful interference to radio communications Operation of this equipment in a residential area is likely to cause harmful interference in which case the user will be required to correct the interference at his or her own expense Changes or modif...

Page 5: ... instructions in the next section Reducing Burn Risks when doing so Do not use any other cleaning solvents or chemicals on the inner or outer surfaces of the printer REDUCING BURN RISKS Do not touch the nozzles and print head when hot unless explicitly instructed to do so in the user or service manuals During a print run leave all doors closed Do not touch the heating elements in the upper chamber...

Page 6: ...N 1 Navigate to https www eiger io register in a Google Chrome browser 2 Input all of the required information to create an Eiger organization 3 You will receive an email from Eiger after creating your organization Please click on the link within the email to complete the sign up process 4 After logging in Eiger will prompt you to register a device Find your printer s ID and access key on the stic...

Page 7: ...ter to it at any time with the ID and access key You can find this information by selecting the menu icon from the dashboard and navigating to Settings System Info 1 Sign into your Eiger account in a Google Chrome browser 2 Navigate to https www eiger io devices 3 Select the Register Device button on the screen 4 Enter a new name for your printer along with its ID and access key into the fields on...

Page 8: ... up your printer before adding your printer to your Eiger account you will need to power cycle the printer before it can connect to your account CONNECT VIA WI FI 1 Select the Wi Fi icon from the dashboard 2 Press the Wi Fi tile 3 Press the Configure button to enter your network information ...

Page 9: ...to finish connecting CONNECT VIA ETHERNET LAN 1 Plug your Ethernet cable into the Ethernet port Note Make sure your LAN Local Area Network uses DHCP 2 Select the Ethernet icon from the dashboard OBTAIN YOUR PRINTER S MAC ADDRESS Your printer does not inherently have a way to view its IP address but it does allow you to find the MAC address for either Ethernet or Wi Fi ...

Page 10: ...ch MAC address you d like to access Note Your printer will display the MAC address of whichever connection option is currently enabled even if the printer is unable to connect to the Internet Only one MAC address can be displayed at a time 3 When the Network status reads Online press the Done button 4 Select the menu icon from the dashboard ...

Page 11: ...GUIDE 5 Select the Settings tile from the available options 6 Select the System Info tile from the available options 7 Select the Wi Fi icon at the bottom of the screen 8 View your MAC address for the enabled connection option ...

Page 12: ...METAL X PRINTER USER GUIDE 12 DISABLE WI FI AND ETHERNET 1 Select the Wi Fi icon from the dashboard 2 Select the Offline tile 3 Select Done ...

Page 13: ...N s3 amazonaws com 443 TCP yes device operation mfeiger production s3 amazonaws com 443 TCP yes device operation cdn eiger io 443 TCP yes device operation www eiger io 443 TCP yes device operation pool ntp org 123 UDP yes network time protocol ipv4 connman net 80 TCP no online status check data logentries com 443 TCP no remote logging data logentries com 10000 TCP no legacy remote logging BROWSER ...

Page 14: ...ollow the instructions below 1 Unload metal and release filament For more information see the relevant sections of this User Guide Note If you attempt to power on the printer with print material already loaded the temperature change will likely cause the material to break potentially jamming the print head 2 Use the switch on the back of printer to power off your Metal X ...

Page 15: ...f the drive Note The update must be the only file in the root directory otherwise the firmware update will fail 1 Log into your eiger io account and navigate to the About Eiger page 2 Click the Download button under Printer Firmware to download the USB update 3 Copy the USB update to the root directory of an otherwise empty FAT32 formatted USB drive Insert the USB drive into your printer 4 Begin t...

Page 16: ...n be updated via Wi Fi or Ethernet Before beginning make sure your printer is connected to a wired or wireless network The process should take 5 10 minutes For more information see Connecting Your Printer 1 Select the menu icon from the dashboard 2 Select Settings 3 Select Update Manager ...

Page 17: ...e update will take a few minutes to install after which your printer will restart Do not turn your printer off during the update process Note An update is available if the Cloud Update tile is blue If the icon is gray your system is either up to date or not connected to the Internet ...

Page 18: ...eveled Afterward the bed should remain level under normal printer use and you should not need to run the leveling utility as part of routine maintenance However the utility must be run during initial printer installation and any time the machine is moved 1 Select the menu icon from the dashboard 2 Select Utilities 3 Select Bed Level to begin the routine ...

Page 19: ... for the leveling process When it reaches its maximum height and the progress bar reads 100 press Start Note If your nozzle accumulates some residue during the heating process you do not need to remove it The print head will pass through the wiping station during this utility 6 If the Metal X is newly installed and the bed has never been leveled press Reset Otherwise press Skip and move directly t...

Page 20: ...n the rightmost end of the bed and state the current leveling of the right hand bed leveling screw If you are not within 20µm 20 micrometers of deviation i e not in the green area of the leveling bar use your hex key to adjust the height of the bed at that corner The touchscreen will specify which direction to rotate the hex key After making a slight adjustment select Retry to have the print head ...

Page 21: ...nt instructions for the left and back bed leveling screws When the screws are in the correct positions press Next 11 The printer will complete a final reading to verify that the bed is fully level When the check is 100 complete select Done to exit the utility ...

Page 22: ...accessory kit 1 Using the brush from the Metal X accessory kit brush all metal and support debris from the print bed Note Keeping the print bed channels clean allows for a quality vacuum seal between the print bed and the print sheet 2 On your touchscreen toggle the Vacuum slider to the On position 3 Allow the bed to lower and heat then press Next ...

Page 23: ... to center it on the bed 5 Place the sheet press on top of the print sheet The sheet press aligns with the Z rails at the rear of the chamber 6 Wait a moment to allow the vacuum to create an engaged stable vacuum seal Note If the vacuum is taking a significant amount of time to engage the print sheet may not be covering the entire vacuum grid This will prevent the vacuum from creating a proper sea...

Page 24: ... 8 The printer will confirm that the vacuum seal is on with the Vacuum toggle highlighted green TURN OFF VACUUM SEAL The vacuum seal can be disabled by toggling the Vacuum slider on your printer s dashboard When the slider turns grey instead of green the seal is disabled ...

Page 25: ... the new spool from its packaging Note The material is brittle and the spool should be placed vertically at all times once removed from its packaging Check the spool to ensure that the filament is not broken If your material is damaged please contact Markforged Support METERED LOAD Material metering is a process carried out by your printer to track how much material is used during printing and to ...

Page 26: ... remove the print head cover by sliding it up forward and off the mounting screws Note Always take extra care when working near the print head Hold the print head from the top and do not touch the nozzles fan or sensors 2 Select the menu icon from the dashboard 3 Select Materials from the menu options ...

Page 27: ...change 7 Indicate whether you are loading a full or partial spool Note Only select Full Spool if you are loading an entirely new spool of material if any material on the spool has been used please select Partial Spool 8 If you selected Full Spool skip to step 9 If you selected Partial Spool please follow the additional steps below to provide your printer with accurate weight information Remove you...

Page 28: ...ial in an upright position and note the weight in grams Note The printer will automatically subtract the weight of the plastic spool to obtain the weight of the remaining material itself Enter the weight of the spool at the prompt and press Done Press Next ...

Page 29: ...and press Next 10 Close the door and wait for the spools to warm up You can skip this step if they have already been in the chamber for more than five minutes When ready press Next Note This wait time is critical the heated metal filament is more flexible and easier to work with ...

Page 30: ...e the brush pan from your accessory kit and position it under the print head This will prevent material from being extruded onto the bed during the next step Then press Next 12 Remove any material expelled from the print head then press Next ...

Page 31: ...15 Replace the print head cover QUICK LOAD If you do not want your printer to track the amount of material that is left or don t have a scale handy you can instead run the Quick Load routine If you do so your printer will not track material usage and will be unable to alert you when your printer is running low on material Instead it will pause the print when material runs out and alert you by emai...

Page 32: ...METAL X PRINTER USER GUIDE 32 2 Select the menu icon from the dashboard 3 Select Materials from the menu options 4 Select Load Metal to begin the metal loading routine ...

Page 33: ...33 METAL X PRINTER USER GUIDE 5 Select Quick Load 6 Select the type of metal material that you are loading ...

Page 34: ...s shown and press Next 8 Close the door and wait for the spools to warm up You can skip this step if they have already been in the chamber for more than five minutes When ready press Next Note This wait time is critical and allows the metal material to be loaded properly ...

Page 35: ...TAL X PRINTER USER GUIDE 9 Retrieve the brush pan from your accessory kit and position it under the print head This will prevent material from being extruded onto the bed during the next step Then press Next ...

Page 36: ...truder begins to draw material through the print head When the filament begins to extrude from the nozzle press Stop Press Stop to exit the utility or Retry to continue extruding material 12 Remove the brush pan from the print bed and discard the extruded release material Note Never leave foreign objects in the print chamber or on the heated print bed 13 Replace the print head cover ...

Page 37: ...r for material metering to work the printer has to be told how much material is on the spool when the filament is loaded into the printer With your Metal X you can use the Metered Load routine to tell the printer how much material you are starting with From there the printer will keep track of the rest and can even warn you when your print may require more release filament than you have loaded 1 M...

Page 38: ...METAL X PRINTER USER GUIDE 38 2 Select the menu icon from the dashboard 3 Select Materials from the menu options 4 Select Load Release to begin the utility ...

Page 39: ...ial Spool 7 If you selected Full Spool skip to step 8 If you selected Partial Spool please follow the additional steps below to provide your printer with accurate weight information Remove your material spool from its packaging but do not unspool it Weigh the spool of material in grams Note The printer will automatically subtract the weight of the plastic spool to obtain the weight of the material...

Page 40: ...METAL X PRINTER USER GUIDE 40 Press Next 8 Mount the spool on the spool holder as shown and press Next ...

Page 41: ...41 METAL X PRINTER USER GUIDE 9 Retrieve the brush pan from your accessory kit and hold it under the print head This will prevent material from being extruded onto the bed Then press Next ...

Page 42: ...he print chamber 12 Replace the print head cover QUICK LOAD If you do not want your printer to track the amount of material that is left or don t have a scale handy the printer allows you to run a Quick Load routine If you use the Quick Load routine when loading filament your printer will be unable to alert you when your printer is running low on material 1 Manually move your print head to the cen...

Page 43: ...43 METAL X PRINTER USER GUIDE 3 Select Materials from the menu options 4 Select Load Release to begin the utility 5 Select Quick Load ...

Page 44: ...METAL X PRINTER USER GUIDE 44 6 Mount the spool on the spool holder as shown and press Next ...

Page 45: ...45 METAL X PRINTER USER GUIDE 7 Retrieve the brush pan from your accessory kit and position it under the print head This will prevent material from being extruded onto the bed Then press Next ...

Page 46: ... from the nozzle for a few seconds press Stop Press Stop to exit the utility or press Retry to continue extruding material Note The release filament extrudes very slowly and will take longer than loading metal filament 9 Remove the brush pan from the print bed Never leave foreign objects in the print chamber 10 Replace the print head cover ...

Page 47: ...enter of the printing area then remove the print head cover by sliding it up forward and off the locating features Note Always take extra care when working near the print head Hold the print head from the top and do not touch the nozzles fan or exposed electronics 2 Select the menu icon from the dashboard 3 Select Materials from the menu options ...

Page 48: ...al to begin the routine 5 Allow the printer to heat its nozzles completely then select Start 6 Allow a few seconds for the printer to expel used filament and select Stop You should be able to gently pull the filament out from the top of the print head ...

Page 49: ...new spool of metal material Note f you cannot pull the metal filament out of the print head press Retry and continue from step 5 8 Press Load Metal to load a different metal spool or Not Now to exit the routine For instructions on loading a replacement metal spool see the Loading Metal Filament section ...

Page 50: ...e print head cover by sliding it up forward and off the locating features Note Always take extra care when working near the print head Hold the print head from the top and do not touch the nozzles fan or sensors 2 Select the menu icon from the dashboard 3 Select Materials from the menu options 4 Select Unload Release to begin the routine ...

Page 51: ...from the top of the print head 7 Press Cool Down to cool the print head or Next if you wish to load a new spool of release material Note If you cannot pull the release filament out of the print head press Retry and continue from step 5 8 Select Load Release to load a different release spool or Not Now to exit the routine For instructions on loading a replacement spool please see the Loading Releas...

Page 52: ...to changes in temperature growing increasingly brittle at low temperatures and potentially beginning to thermally debind in high heat We recommend storing material and operating the printer within the temperature range given in the Facilities Guide 19 30o C 66 85o F Spools should be kept under 40o Celsius for long term storage Do not store spools in direct sunlight even inside their original packa...

Page 53: ...kaging store them vertically Avoid exposing print material to dust dirt and debris Cover material in storage to prevent exposure to contaminants SHELF LIFE When stored safely in its original packaging at a moderate temperature metal material can potentially be kept safely on the shelf for a year However we recommend against over purchasing or using old material STORAGE INSIDE PRINTER The upper cha...

Page 54: ...en sintering For very large parts Eiger offers an External Sintering setting See the Metal X Design Guide for information on designing your parts for successful printing washing and sintering with the Metal X System IMPORTANT NOTE ABOUT MATERIAL BUILDUP Note that some material buildup on the side of the nozzle is normal during the first few layers of a print the raft There is no need to pause or c...

Page 55: ... the MFP print i e slicing the part remotely on our servers instead of in your browser This means you can minimize the browser while the print is being generated Note If you send a very large and complex part to be sliced using Cloud Print Generation the process will time out after 15 minutes In the rare event that you need to print such a part disable Cloud Print Generation to slice the part on y...

Page 56: ...drop down menu listed under Busy 2 Press the Print button 3 Verify the print details and address any material warnings listed in the pop up window 4 Select Add to Queue to add the print to the end of that printer s queue or select Print Next to add the print to the top of that printer s print job queue ...

Page 57: ...the right side of the screen 2 Press the Export Build button 3 Save the file that downloads to a FAT32 formatted USB drive and plug the USB drive into your printer Note Do not use the factory reset USB drive that came with your printer The USB port can be found on the right side of the printer 4 Select the menu icon from the dashboard ...

Page 58: ...METAL X PRINTER USER GUIDE 58 5 Select Storage and then Print From Storage from the menu options 6 Select the part file on the screen to initiate the print ...

Page 59: ...ture in Eiger 4 Select Clear Bed to change the printer s status to Ready in the Eiger queue Note At this point the part and print bed should be safe to handle but may still feel warm to the touch especially the print bed 5 Carefully slide the print sheet and printed parts off of the print bed 6 Gently remove the part s from the print sheet You should be able to peel the flexible print sheet away f...

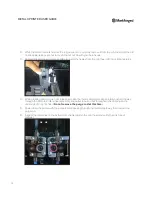
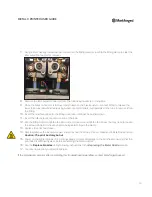
Page 60: ... printer jams can be resolved without canceling your print in progress After each section of this troubleshooting workflow resume the print If the jam has been remedied you are finished troubleshooting If not proceed to the next section The Unload and reload print material clean nozzle tip Remove nozzle clear material pathway using purge rod reinstall old nozzle Install replacement nozzle Remove a...

Page 61: ...re not to touch the hot nozzle with your bare hands 3 While pressing down on the front release arm use the thin metal purge rod to carefully push all the way through the inlet tube idler wheel assembly and outlet tube and out through the opening on the underside of the print head Then withdraw the purge rod 4 Carefully clean the nozzle tip with the included wire brush 5 Carefully apply Anti Seize ...

Page 62: ...e nozzle enough to safely remove it without damaging the print head 1 Follow the instructions in the Unloading Metal Filament section to clear the loaded metal filament from the print head Do not attempt to manually move the print head 2 While the nozzle is hot use the torque wrench to carefully remove it from the print head Set the old nozzle aside taking care not to touch the hot nozzle with you...

Page 63: ...er of print material residue on the inner surface of the lower feed tube which can lead to additional print jams later Therefore you should always replace the lower feed tube after using the purge rod either immediately or after your print completes successfully Note that during this procedure you must insert the purge rod into the material pathway see diagram above before powering down the printe...

Page 64: ...ng features 4 While pressing down on the front release arm use the thin metal purge rod to carefully push all the way through the inlet tube idler wheel assembly and outlet tube and out throughout the opening on the underside of the print head Do not remove the purge rod at this time 5 Power down the printer with the purge rod still passing through the material pathway then remove the purge rod 6 ...

Page 65: ...on top of the tube 12 Flip the fitting clamp to tighten the idler output connector and tighten the screw You may need to loosen the screw using a 2mm hex key before being able to flip up the clamp 13 Replace the print head cover 14 Carefully remove the incomplete part and print sheet from the print bed Clean and reinstall the print bed Caution The print bed may be hot 15 Power on the printer Steps...

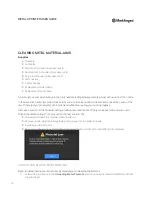
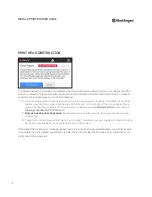
Page 66: ...This is more likely to be a problem during longer prints For more information please review the Wiping Station subsection of Cleaning Your Metal X Printer below Only use each print sheet once Reusing sheets may cause issues with the vacuum seal causing prints to fail Finally try to include fewer distinct parts in your builds This will improve part quality and make print head obstructions less like...

Page 67: ...king the material down into the wiping station itself Regularly dispose of accumulated material by dumping the contents of the wiping station into an appropriate waste container For more information on wiping station maintenance see Replacing Wiping Station Brushes BUILD CHAMBER COVER Do not use Windex or other ammonia or alcohol based cleaners on the polycarbonate cover of the build chamber Inste...

Page 68: ...n the side of the nozzle is normal during the first few layers of a print i e the raft There is no need to pause or cancel your print when you observe this behavior which should resolve after the initial layers and should not cause problems with the part itself In case of error the printer will pause automatically and prompt you for input rest of page intentionally left blank ...

Page 69: ...e six faces of the hex feature see image below If an older nozzle with a dimple on each face of the hex feature is currently installed in your printer you should replace it as soon as possible Future enhancements to the Metal X and to Eiger will only function properly with the new nozzle installed Supplies Nozzle wrench included in accessory kit Brush pan included in accessory kit Anti Seize Tweez...

Page 70: ...METAL X PRINTER USER GUIDE 70 2 Select Utilities from the menu options 3 Select Maintenance from the menu options 4 Select Replace Nozzles to begin the nozzle replacement routine ...

Page 71: ...o heat Press Start when the nozzles are 100 heated 6 Select Metal as the type of nozzle you are replacing 7 Select Unload to retract the metal material from the print head Doing so will ensure that excess material does not enter the threads and nozzle channel ...

Page 72: ...METAL X PRINTER USER GUIDE 72 8 Clear excess material from the nozzle using tweezers Keep in mind that both nozzles are quite hot ...

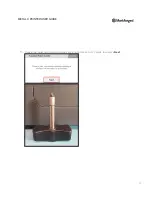
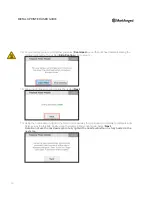
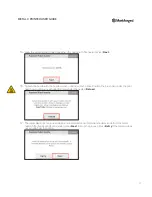
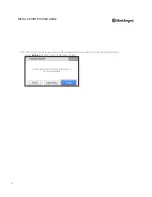
Page 73: ...AL X PRINTER USER GUIDE 9 Using the included nozzle wrench unscrew the metal nozzle Note that the metal nozzle is the one closest to the front of the printer When the nozzle is completely removed select Next ...

Page 74: ...eplacement metal nozzle to ensure that you are inserting the correct type of nozzle The most up to date metal nozzle has a vertical groove on each of the six sides of the hex feature while the release nozzle has three dimples on alternating sides ...

Page 75: ...75 METAL X PRINTER USER GUIDE 11 Prepare the replacement metal nozzle by applying Anti Seize to its threads then press Next ...

Page 76: ...ing skip to step 14 13 Allow the print head to cool entirely then select Next 14 Using the nozzle wrench tighten the metal nozzle partway then unscrew it completely to distribute Anti Seize across the threads Finally screw the nozzle in finger tight again Select Next Note Do not use the nozzle wrench to fully tighten the nozzle until after it is fully heated in the next step ...

Page 77: ...until the wrench clicks Position the brush pan under the print head now to catch any extruded metal material then select Reload 17 The metal filament should now reload and a small amount of material should extrude from the metal nozzle After five seconds of extrusion press Next to stop the process Press Retry if the material does not extrude from the nozzle ...

Page 78: ...METAL X PRINTER USER GUIDE 78 18 When the process is complete and the metal filament successfully reloaded and extruded select Done to exit the nozzle replacement utility ...

Page 79: ...E REPLACING THE RELEASE NOZZLE Supplies Nozzle wrench included in accessory kit Brush pan included in accessory kit Anti Seize Tweezers recommended 1 Select the menu icon from the dashboard 2 Select Utilities 3 Select Maintenance ...

Page 80: ...R USER GUIDE 80 4 Select Replace Nozzles to begin the nozzle replacement routine 5 Both nozzles will begin to heat Press Start when the nozzles are 100 heated 6 Select Release as the type of nozzle you are replacing ...

Page 81: ...load to unload the release material from the print head Doing so will ensure that excess material does not enter the threads and nozzle channel 8 Clear excess material from the nozzle using tweezers Keep in mind that both nozzles are quite hot ...

Page 82: ...ER GUIDE 82 9 Unscrew the release nozzle using the included nozzle wrench Note that the release nozzle is the one closest to the rear of the print head furthest from you When the nozzle is completely removed select Next ...

Page 83: ... your replacement release nozzle to ensure that you are inserting the correct type of nozzle The release nozzle has three dimples on alternating sides of the hex feature while the metal nozzle has a vertical groove on each of the six sides ...

Page 84: ...METAL X PRINTER USER GUIDE 84 11 Prepare the replacement release nozzle by applying Anti Seize to its threads and press Next ...

Page 85: ...ng skip to step 14 13 Allow the print head to cool entirely then select Next 14 Using the nozzle wrench tighten the release nozzle partway then unscrew it completely to distribute Anti Seize across the threads Finally screw the nozzle in finger tight again Select Next Note Do not use the nozzle wrench to fully tighten the nozzle until after it is fully heated in the next step ...

Page 86: ...wrench clicks Position the brush pan under the print head now to catch any extruded release material then select Reload 17 The filament should now reload and a small amount of material should extrude from the release nozzle If the material begins to extrude press Next to stop the process Press Retry if the material does not extrude from the nozzle after a few moments ...

Page 87: ...87 METAL X PRINTER USER GUIDE 18 When the process is complete and the filament has been successfully reloaded and extruded select Done to exit the nozzle replacement utility ...

Page 88: ...taching the wiping station to the printer frame Note One or two turns will suffice Do not remove the screws 3 Lift the wiping station from its mounting screws and remove it from the machine 4 Using a 2mm hex key unscrew and remove the brush bracket from the wiping station Set the two screws aside 5 If the brushes are only half worn turn them around and reinstall them in the bracket If they re comp...

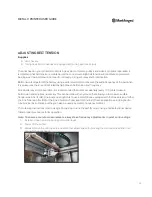
Page 89: ...users occasionally every 100 prints measure belt tension and adjust as necessary This can be done with any device that allows you to measure audible frequencies in hertz Hz One inexpensive option is to use a smartphone equipped with the free version of either the Fine Tuner app for iOS or the Fine Chromatic Tuner app for Android These applications are designed to tune musical instruments but they ...

Page 90: ...e center of the belt as if it were a guitar string Using a 3mm hex key adjust the belt tensioner until a frequency of 82 84Hz is read by the app The belt tensioner is located on the front right corner of the printer as seen in the picture below Once the belt is properly tuned you may proceed with normal printer operation ...

Page 91: ... fully automatic and requires no operator intervention once it begins Unlike the previous version of the XY Offset utility there RUNNING THE XY OFFSET UTILITY 1 Prepare the printer for a print by applying a print sheet to the print bed and establishing a proper vacuum seal For information see Applying a Print Sheet 2 Select the menu icon from the dashboard 3 Select Utilities from the menu 4 Select...

Page 92: ...ver you change the belt tension or as a troubleshooting step when you experience repeated dislocations The utility must also be run in the unlikely event of a pulley or motherboard replacement 1 Select the menu icon from the dashboard 2 Select Utilities from the menu options 3 Select Maintenance from the menu options ...

Page 93: ...ibrate Encoders to begin the routine 5 Ensure that there is nothing touching the print head before selecting Next 6 Allow the printer to calibrate its encoders for a few minutes When the calibration is completed select Done to exit the utility ...

Page 94: ...ng near the print head or print bed as many of their components can reach high temperatures Allow the Metal X to cool down before opening the print chamber doors or before reaching inside the printer The Metal X has moving parts that can cause damage or injury Do not place items beneath the print bed as they can get pinched or be crushed 1 Select the menu icon from the dashboard 2 Select Manual Co...

Page 95: ...ile the printer is powered up To heat or cool the metal nozzle toggle the Metal Nozzle slider to the Hot or Idle position To heat or cool the release nozzle toggle the Release Nozzle slider to the Hot or Idle position PRINT BED HEIGHT The Metal X print bed cannot be moved in any direction by hand doing so requires the use of the Manual Control system which moves at a slow pace to ensure your safet...

Page 96: ...E 96 To lower the print bed press and hold the Lower Bed button The print bed will lower slowly as long as you hold down the button or until it reaches its minimum height To raise the print bed to its full height press Home Bed ...

Page 97: ...to handle the material The purpose of this test is to determine how well the extrusion system is performing The test extrudes a known quantity of material Based on the behavior of the machine during the test the printer will determine whether you re having extrusion problems Supplies Tweezers Brush pan from accessory kit EXTRUSION FLOW CHECK FOR METAL CHANNEL 1 Select the menu icon from the dashbo...

Page 98: ...RINTER USER GUIDE 98 3 Select Maintenance from the menu options 4 Select Extrusion Flow Check to begin the utility 5 Allow the printer to prepare for the Calibration Extrude Test When it reaches 100 press Start ...

Page 99: ... The printer will then prime the nozzle and a small amount of filament will be extruded Press Continue if metal filament came out of the nozzle Otherwise press Reprime 8 Allow the printer to run the Calibration Extrude Test This will take over 30 seconds and extrude material Once the calibration extrude test is 100 complete select Done 9 Download your printer logs and contact Markforged Support ...

Page 100: ...METAL X PRINTER USER GUIDE 100 EXTRUSION FLOW CHECK FOR RELEASE MATERIAL 1 Select the menu icon from the dashboard 2 Select Utilities from the menu options 3 Select Maintenance from the menu options ...

Page 101: ...he utility 5 Allow the printer to prepare for the Calibration Extrude Test When it reaches 100 press Start 6 Select Release as the nozzle that will be tested and place a brush pan underneath the print head This brush pan will catch all upcoming extrusion flow test filament ...

Page 102: ...nue if release filament came out of the nozzle Otherwise press Reprime 8 Allow the printer to run the Calibration Extrude Test Release filament extrudes very slowly this test will take a few minutes to complete Once the calibration extrude test is 100 complete select Done 9 Download your printer logs and contact Markforged Support ...

Reviews: