background image

WASH-1 USER GUIDE

10

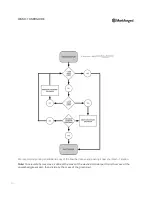
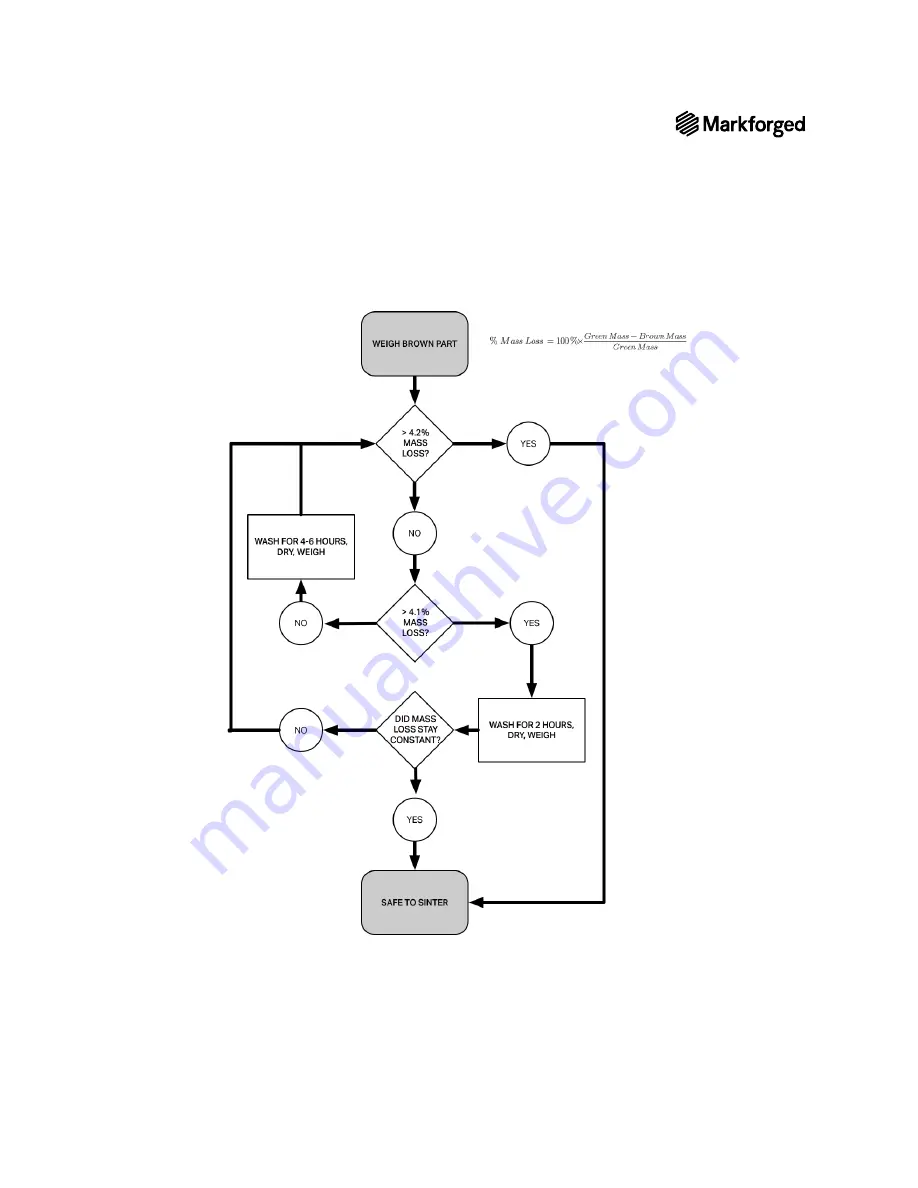
We recommend printing an additional copy of the flowchart above and posting it near your Wash-1 station.

Note: To calculate % mass loss, subtract the mass of the washed (brown) part from the mass of the 

unwashed (green) part, then divide by the mass of the green part.

Summary of Contents for WASH-1

Page 1: ...1 WASH 1 USER GUIDE WASH 1 USER GUIDE ...

Page 2: ...of this document visit our support website Copyright 2019 Markforged Inc All rights reserved Changesareperiodicallymadetotheinformationherein which will be incorporated in revised editions of this publication Markforged may make changes or improvements to the product s described in this publication at any time and without notice ...

Page 3: ... USER GUIDE TABLE OF CONTENTS INTRODUCTION 4 SAFETY NOTES 5 LOADING SOLVENT 6 WASH OVERVIEW 9 LOADING GREEN PARTS 18 UNLOADING PARTS 20 SOLVENT MAINTENANCE 23 DRAIN PROCEDURE 25 ADJUSTING WASH 1 TEMPERATURE 26 ...

Page 4: ...part is removed air dried and weighed to determine mass loss If a sufficient amount of wax binder has been dissolved out by the solvent the debound brown part is ready to sinter in the Sinter 1 furnace If not additional wash dry cycles are necessary The Wash 1 is the simplest of the three Metal X System components to install operate and maintain The user must periodically replenish the boil chambe...

Page 5: ...power on the Wash 1 without solvent loaded into the tank USE SAFE LIFTING TECHNIQUE Follow safe lifting procedures Never attempt to lift the Wash 1 unit alone See Pre Install Guide for details HAZARDOUS VAPORS Immediately clean up and dispose of any spilled solvent observing any local regulations for disposal of chemical waste Avoid breathing in vapors Wear protective equipment when cleaning up sp...

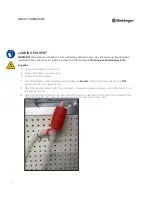
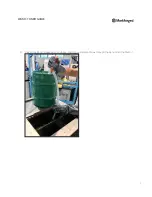
Page 6: ... Wash 1 accessory kit Chemical resistant gloves 1 Turn off the Wash 1 heating elements by toggling the Heater switch on the dashboard to the Off position but do not unplug the unit 2 Carefully open the Opteon SF79 near the Wash 1 station and place container on top of the Wash 1 on the right hand side 3 Open the lid of the immersion chamber Place the smooth inlet tube of the siphon into the solvent...

Page 7: ...7 WASH 1 USER GUIDE 4 Close the siphon release valve and begin to pump until solvent flows through the siphon into the Wash 1 ...

Page 8: ... immersion chamber with solvent and let overflow into the boil chamber until the boil chamber is full to the MAX FILL line If the Wash 1 station is empty to start this will take about 8 gallons of solvent 6 Turn on the Wash 1 heater ...

Page 9: ...he Opteon SF79 solvent will not damage the part and a printed part cannot be over washed It is important to fully debind each part in the Wash 1 to avoid potentially damaging wax buildup in the Sinter 1 unit However a part that remains in the immersion chamber for an extended period may be jostled and damaged by contact with other parts or by the Wash 1 operator We recommend carefully tracking was...

Page 10: ...ting an additional copy of the flowchart above and posting it near your Wash 1 station Note To calculate mass loss subtract the mass of the washed brown part from the mass of the unwashed green part then divide by the mass of the green part ...

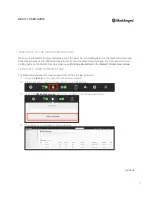
Page 11: ... information on printing parts on the Metal X machine please see Printing a Metal Part in the Metal X Printer User Guide LOCATE THE WASH OVERVIEW PAGE The Wash Overview tool can be accessed from within the Eiger software 1 Log in to eiger io in a Google Chrome browser window 2 Click the Wash 1 icon in the upper banner of the Eiger page 3 Select the Wash Overview button from the Wash 1 icon drop do...

Page 12: ... parts that are ready to be washed The Wash Time column indicates how long each part should remain in the Wash 1 station to be completely debound 1 To begin tracking a part through the wash process first select which part s you want to wash then click Wash Selected in the upper right corner of the screen 2 The Eiger software will then prompt you to place your selected parts into your Wash 1 statio...

Page 13: ...R GUIDE 3 Once all parts have been loaded in the Wash 1 station press Next Note For more detailed information on how to properly load parts into the Wash 1 station please see the section entitled Loading Green Parts ...

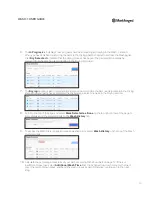
Page 14: ...click Next each part will be moved to the In Progress tab with a timer indicating its wash duration Click Done to return to the Wash Overview main screen 5 To view the parts progress click In Progress on the Wash Overview main screen ...

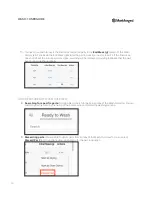
Page 15: ... drying state When your parts have completed the drying stage select the parts in the Drying section 8 Scroll to the top of the page and select Mark Selected as Done on the top right corner of the page to immediately send the selected parts to the Wash History tab 9 To access the Wash History page and see all washed parts select Wash History on the top of the Wash Overview page 10 Calculate the pe...

Page 16: ... a warning will be displayed providing feedback that the part has not been washed properly OTHER FEATURES OF WASH OVERVIEW Searching for specific parts You are able to search for parts in all tabs of the Wash Overview You can search by part name or by the name of the person who completed the washing printing Discarding parts You are able to delete parts from all tabs of the Wash Overview To do so ...

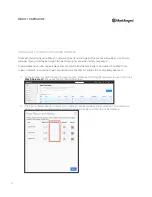
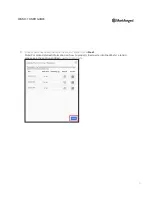
Page 17: ...m the Actions drop down menu Add a part to Washing List from library If you have a printed but unwashed part you can add it directly to the Washing list by clicking Add from Library and selecting it from the drop down menu Selecting a part multiple times will add multiple copies to the Washing list click the X at right to cancel one copy When you re finished click Done ...

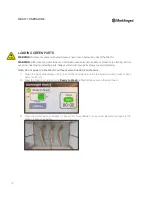
Page 18: ...rts Always add and remove parts slowly to avoid splashing Note Do not power on the Wash 1 without solvent loaded into the tank 1 Weigh the parts individually on a 0 01g resolution scale and inscribe the initial pre wash mass of each part onto its raft 2 Allow the Wash 1 to heat until the Ready to Wash notification appears on the dashboard 3 Place the printed parts in the Wash 1 basket For more det...

Page 19: ...tant to maintain the vertical orientation of your part throughout the printing and sintering processes but a different orientation may be necessary during the chemical debinding wash stage However when positioning green parts in the Wash 1 basket it s important to ensure that they will fully drain and drip dry For instance bowl shaped parts should be washed upside down if possible to drain any rec...

Page 20: ...cumulates Close the immersion chamber lid after loading and unloading parts in the Wash 1 Solvent can potentially splash onto clothing skin or eyes when loading or unloading parts Always add and remove parts slowly to avoid splashing 1 Check the Wash Overview to ensure that the parts have been in the debinding solvent long enough Note Completing the debinding process is a critical step You must ne...

Page 21: ...in here for at least 10 minutes Note This step allows excess solvent to drain from the washed parts and back into the immersion chamber the longer the parts drain the more solvent will be recovered You cannot over drain brown parts 4 Open the immersion chamber lid and fully remove the basket from the station then close the lid ...

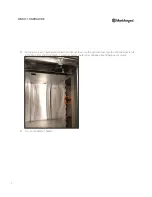
Page 22: ...the suggested minimum 6 Remove the basket with washed parts from the drying chamber compartment and close the lid 7 Weigh the fully dried parts on a 0 01g resolution scale and use a scribe to mark the parts masses on the backs of their rafts Find the percentage mass loss of each part following the instructions in the Wash Overview section If the percentage mass loss is too low The part still conta...

Page 23: ...l heat to 130O F at which point the HTC OVER LIMIT alarm will sound and the Wash 1 heater will shut off returning the solvent to ambient room temperature Follow the steps below to address the alarm 1 Press the Silence and Reset buttons on the dashboard to stop the alarm 2 Top off the boil chamber until the solvent level reaches the MAX FILL line 3 Restart the Wash 1 heater The boil chamber now con...

Page 24: ...y 2 3 degrees below the alarm temperature drain the boil chamber following instructions in the Solvent Drain subsection of the Drain Procedure section below and safely discard the wax saturated solvent then refill the boil chamber with fresh solvent Restart the heaters and proceed with washing ...

Page 25: ...hamber should be drained of solvent and refilled When the boil chamber is drained the heating elements should be turned off but the solvent must still be warm Otherwise the dissolved wax will harden and will not drain properly 1 Warm the solvent then turn off the Wash 1 heating elements by toggling the Heater switch on the dashboard to the Off position Never unplug the unit 2 Position a large solv...

Page 26: ...activated or deactivated Turn the Wash 1 heating elements on or off by toggling the Heater switch on the dashboard Note that the heaters in the Wash 1 should not be turned on without solvent loaded into the tank To determine whether the heating and cooling elements are functioning and to monitor temperature levels within the unit press the Utilities button on the dashboard to open the Temperature ...

Reviews: