background image

Registration
failed?

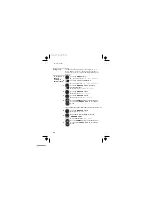
If registration has failed, the handset’s display will show

for a few seconds then return to

standby mode.

If this happens, try again, making sure you don’t leave
too long between steps. If you still can’t register the
handset, contact the Help Line for advice.

To de-register
a handset

You may need to do this in order to replace a
faulty handset.

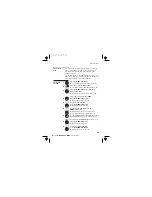
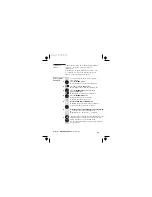
1

Press the

MENU

button

è

The display shows

Main Menu >Phonebook

2

Press the

â

button THREE times

è

The display shows

Main Menu >Advance Set

3

Press the

MENU/OK

button then the

â

button THREE times

è

Display shows

Advance Set >Unregister

4

Press the

MENU/OK

button

è


57

Color profile: Disabled
Composite  Default screen

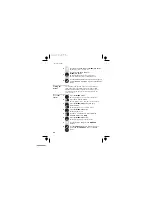
Display briefly shows

>Unregister 

è

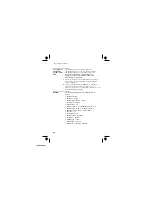
 Display then shows

>Enter PIN

Key in the PIN and press MENU/OK

è

Display shows

>Unregisterd  

and the numbers

of all other handset registered to the base.


è


Press the number of the handset to be unregistered

You will hear a long confirmation beep.

è

 Display shows


CANCEL button to exit the menu or press and hold 
HANG UP button to go to standby mode.

NOTE: The handset that has been unregistered shows
"' unregistered"'.

searching... 

Repeat from 4 to unregister another handset or use the

             Advance set >  Unregister 

Help Line:

(Local Call rate)

0845 671 0665

Summary of Contents for IDECT X2I TWIN

Page 1: ...nder of your guarantee period we will arrange for the product to be repaired Should a repair not be possible we will exchange the product for a new one or the nearest equivalent In the unlikely event...

Page 2: ...t up to four depending on which u ve bought the base unit and a battery compartment cover for each handset a telephone line cable for the base unit a mains power lead and adapter for the base unit up...

Page 3: ...ns to cancel what you re doing and return the display to Standby mode HANG UP ON OFF button Press to end a call Press and hold for 4 seconds to turn the handset off Last Number Redial Pause button Pre...

Page 4: ...ence Symbols on the display The handset s number if you have more than one handset on your The handset s name the default is HANDSET The time and date Intercom call Memory store Flashes while your han...

Page 5: ...k 18 To store a new number 18 To call a stored number 19 To delete all Phone Book entries 21 Caller Display 22 To check Caller Display records 23 To return a call 23 To store a Caller Display number i...

Page 6: ...53 Guarantee and service 54 Technical details 55 Registering new handsets 56 To register a new handset 56 To de register a handset 57 Connection and conditions for use You can connect your telephone t...

Page 7: ...microwave ovens fluorescent lights TVs etc Radio signals between handset and base unit To use your handset and base unit together you must be able to establish a radio link between them Be aware that...

Page 8: ...z mains socket with the switch on the socket set to OFF Switch on at the mains socket s If you have one or more charger pods 2 Use the telephone line supplied with your do not use any other telephone...

Page 9: ...ket at the top of the battery compartment C Place the battery in the compartment Always use the battery pack supplied never use any other kind of batteries in the handset D Fit the battery compartment...

Page 10: ...off power at the mains socket Insert the telephone line plug into the socket as shown Switch mains power back on 8 Use the plug to raise the shutter before pushing it into the socket NOTE the charger...

Page 11: ...hile on a call this is probably caused by interference between the handset and the base unit perhaps because you are too near to another phone or other electrical equipment Move to a different positio...

Page 12: ...pad Press the LOCK button and hold it for The display shows Keys Locked To unlock the keypad Press the LOCK button and hold it for base unit or charger pod Notes When the handset is switched off it ca...

Page 13: ...isplay shows Main Menu Personal Set 3 Press the MENU OK button Display shows Personal Set Handset Tones 4 Press the button ONCE Display shows Personal Set handset Name 5 Press the MENU OK button The d...

Page 14: ...1 00 00 Set Date Time 5 Key in the time and date in the format HH MM DD MM then press the MENU OK button Remember to use the 24 hour clock and to include any 0s zeroes for example 9 30 am is 09 30 6 0...

Page 15: ...tween low medium high or silence 7 Press the MENU OK button to select the new level Display shows Handset Tone Ring Volume The display shows the current melody Press the or button to play the melodies...

Page 16: ...on to select the new level then press the button once Display shows BS Ring Mel 7 Press the MENU OK button once to begin editing the melody Display shows 8 Press the or buttons to play each of the mel...

Page 17: ...the base unit and handset ring unless the handset s ringer is turned off If you subscribe to Caller Display see page 22 the caller s number or name may appear on the display otherwise the display sho...

Page 18: ...he other end can t hear you Press the MUTE CANCEL button To un mute the mouthpiece press the MUTE CANCEL button again Last Number Redial LNR 1 Press the Redial button Display shows Redial and the last...

Page 19: ...ress button once Making and answering calls 16 Color profile Disabled Composite Default screen 3 4 5 MENU OK to delete you will head a confirmation beep then return to Redial list mode To delete All r...

Page 20: ...haracters 5 Press the MENU OK button Display shows the number for editing Enter Number 6 If necessary edit the number 7 Press the MENU OK button You will hear a long confirmation beep and the redial l...

Page 21: ...The display shows Enter Name _ 3 Key in a name then press the MENU OK button The display shows Enter Number _ 4 Edit or Key in the new number 5 Press the MENU OK button You will hear a long confirmati...

Page 22: ...direct memory Long press key 1 to key 9 will automatic dial To add or delete the out the stored direct memory direct memory 1 Select key 1 to key 9 by and key Press the OK button TWICE to select the k...

Page 23: ...display shows Enter Name Eric 5 To edit the name use the MUTE CANCEL button to delete characters then key in the new ones Press the MENU OK button to confirm the changes Display shows Enter Number 89...

Page 24: ...UP button to go back to standby mode To delete all Phone Book entries 1 Press the MENU OK button twice then the button four times Display shows Phonebook Delete All 2 Press the MENU button The display...

Page 25: ...re stored in your Phone Book the full number Press the button again to see more details In this example the most recent call came 4 21 pm on 15th A call from someone who withheld their number A call f...

Page 26: ...low steps 1 to 3 above to display the record 2 Press the PHONE or SPEAKER button to dial the number To store a Caller Display number in the Phone Book 1 Use steps 1 to 3 above to display the record 2...

Page 27: ...ss and hold the HANG UP button to go back to standby mode To delete all caller display records 1 Use steps 1 to 3 top of page 23 to display the records 2 Press the MENU button then the button twice Di...

Page 28: ...om call 1 Press and hold the INT button for 2 seconds The INT symbol appears on the display and the numbers of the available handsets will be displayed INTERCOM 2 3 4 2 Press the appropriate number to...

Page 29: ...can transfer it to another handset 1 Press and hold the INT button until Intercom the number of the other handset The outside call is put on hold and the other handset rings When the other handset use...

Page 30: ...ct it To set up a three way conference 1 Make or answer an outside call 2 Press and hold the INT button to start intercom mode then key in the number of the other handset The outside call is put on ho...

Page 31: ...handset Using a multi handset system 28 Color profile Disabled Composite Default screen New Call tone When you are on an intercom call and an outside call comes in you ll hear New Call tone to tell y...

Page 32: ...Answ R To change answering mode 1 Press the MENU OK button ONCE then the button ONCE Display Shows Main Menu Answ Machine 2 Press the MENU OK button once then the button THREE times Display Shows Ans...

Page 33: ...recorded If you select Personalised you will then need to record a new message 1 Follow steps 1 to 5 on page 29 Display Shows Select mess Predefined 2 Press the button to select Personalised and press...

Page 34: ...adjust the ring delay between 3 and 8 rings or Toll Saver If you select Toll Saver the telephone will answer after 3 rings if there are new messages on 6 Press the MENU OK button to confirm the new s...

Page 35: ...hen the button FIVE times Display Shows Ans Machine Settings 3 Press the MENU OK button ONCE then the button TWICE Display shows Settings HS Screening 4 Press the MENU OK button Display Shows HS Scree...

Page 36: ...then the button ONCE Display Shows Main Menu Ans Machine 2 Press the button ONCE then the butto Display Shows Ans Machine Answer On Off 3 Press the MENU OK button Display Shows Answer On Off On 4 Pres...

Page 37: ...essage in its memory n To play back recorded messages 1 Press the MENU OK button ONCE then the button ONCE Display Shows Main Menu Ans Machine 2 Press the MENU OK button Twice Display shows Ans Machin...

Page 38: ...Delete All 3 Press the MENU OK button Display Shows Delete all Confirm 4 Press the MENU OK button to confirm 5 Use the CANCEL button to exit the menu or press and hold HANG UP to go to standby Answer...

Page 39: ...tton ONCE then the button ONCE Display Shows Main Menu Ans Machine 2 Press the MENU OK button ONCE then TWICE Display Shows Ans Machine Record Memo 3 Press the MENU OK button Display Shows Record Memo...

Page 40: ...Ans Settings Remote Access 4 Press the MENU OK button Display Shows Remote Access Deactivated 5 Press the button to select between Activated and Deactivated Display Shows Remote Access Activated 6 Pre...

Page 41: ...the buttons your telephone Remote operation 38 Default settings This option returns the answering machine to its default settings n n remote PIN n rings to answer unchange n call monitoring off Answer...

Page 42: ...press the HANG UP button at any point to cancel what you re doing and go back one step When you re keying in numbers if you make a mistake press the HANG UP button to delete digits and melody See pag...

Page 43: ...Press the MENU OK button ONCE and the button TWICE Display shows Handset tone Key Beep 3 Press the MENU OK button Display shows Key Beep On 4 Use the or button to select ON or OFF 5 Press the MENU OK...

Page 44: ...nal Set 2 Press the MENU OK button ONCE and the button TWICE Display shows Personal Set Auto Pick up 3 Press the MENU OK button Display shows Auto Pick Up Off 4 Use the or button to select ON or OFF 5...

Page 45: ...Registration See page Deregistering handsets See page 7 Custom settings 42 Color profile Disabled Composite Default screen 56 5...

Page 46: ...shows Language English 4 Use the or button to select between English Francais Deutsch or Italiano 5 Press the MENU OK button You will hear a confirmation beep 6 Use the CANCEL button to exit the menu...

Page 47: ...Advance Set 3 Press the MENU OK button then the button FIVE times Display shows Advance Set Reset 4 Press the MENU OK button Display shows Confirm Reset 5 press the MENU OK button The display shows R...

Page 48: ...ur times Display shows Advance Set Master PIN 4 Press the MENU OK button Display Shows Enter New PIN 5 Key in the new PIN and press the MENU OK button Display shows 6 Key in the new PIN and press the...

Page 49: ...utton Display Shows Off 5 Use the or button to select between Off ON Once or On Daily 6 Press the MENU OK button Display prompts for the alarm time 7 Key in the time and press the MENU OK button 8 Use...

Page 50: ...he button TWICE Display shows Clock Alarm Alarm tone 4 Press the MENU OK button Display Shows Alarm Tone Melody 1 5 Use the or button to select between melodies 1 2 or 3 6 Press the MENU OK button You...

Page 51: ...button to switch it back on Check that the base unit s mains power adapter is plugged in and power is switched on The base unit needs mains power for normal operation of the phone not just for chargi...

Page 52: ...does not ring Check that the base unit s mains power adapter is plugged in and power is switched on The base unit needs mains power for normal operation of the phone not just for charging the batteri...

Page 53: ...If it is low recharge the batteries The Caller Display feature isn t working You need to subscribe to the Caller Display feature Contact your service provider The caller may have withheld their number...

Page 54: ...wer socket I try to recharge the batteries but I still get a warning that they are low You need to replace the batteries To find out how to obtain replacements call 9 00 am and 5 00 pm Monday to Frida...

Page 55: ...n for a pause between the access code and the number If the fault persists Disconnect all other instruments connected to the same line as the make a call Disconnect the base unit from the telephone li...

Page 56: ...ility for your r if something does go wrong please do not try to repair it yourself consult your supplier or the Help Line 53 The protective requirements and objectives of EC R TTE Directive 1999 5 EC...

Page 57: ...mains adapter 3 Call our Service Department on for details of where to send your telephone for repair 4 Make sure you include with your your name and address 5 Return your Service Department 54 For t...

Page 58: ...9V AC 300mA Port specification The DC 7 5 port connected to the mains power supply is a SELV port with respect to EN41003 The port connected to the telephone line is a TNV port with respect to EN4100...

Page 59: ...Main Menu Advanced Set 3 Press the MENU OK button Display shows Advanced Set Recall Time 4 Press the button TWICE Display shows Advance Set Registration 5 Press the MENU OK button The display shows E...

Page 60: ...tton then the button THREE times Display shows Advance Set Unregister 4 Press the MENU OK button 5 57 Color profile Disabled Composite Default screen Display briefly shows Unregister Display then show...

Page 61: ...nit Your compatible base unit or you can register other GAP compatible handsets to your But we do not guarantee that all features or display messages will be available using other manufacturers equipm...

Page 62: ...ending a call 14 G guarantee 54 H HANDSET LOCATOR button 28 handset name 10 handset ringer 12 13 handset settings 39 47 I installation 5 7 intercom calls 25 interference 4 8 K key beep 40 L language...

Page 63: ...unit 4 site for the charger pod 4 switching on and off 9 T three way conference 27 time and day 11 transferring calls 26 troubleshooting 48 52 V volume control handset s earpiece 15 Index 60 Waste el...

Reviews: