background image

Menu Operation

1. Press 

VOL+/-

 to adjust the volume.

2. If you want to switch the sound OFF, press the 

MUTE

3. You can cancel this function by pressing MUTE or VOL+ button.

Basic TV operation

First time installation

1. Using the CH+/- on the front panel or PROG+/- on the remote control.

     Press 

CH+/PROG+

 to increase channel number.

     Press 

CH-/PROG-

to decrease channel number.

Press

-/--

 button, then the screen will display “-”, press again it will become “- -”.

When it displays “-”, you should then press a unmber of 0-9 to play the channel you desired;
When it displays “- -”, you should then press two unmbers to play the channel you desired.

 7

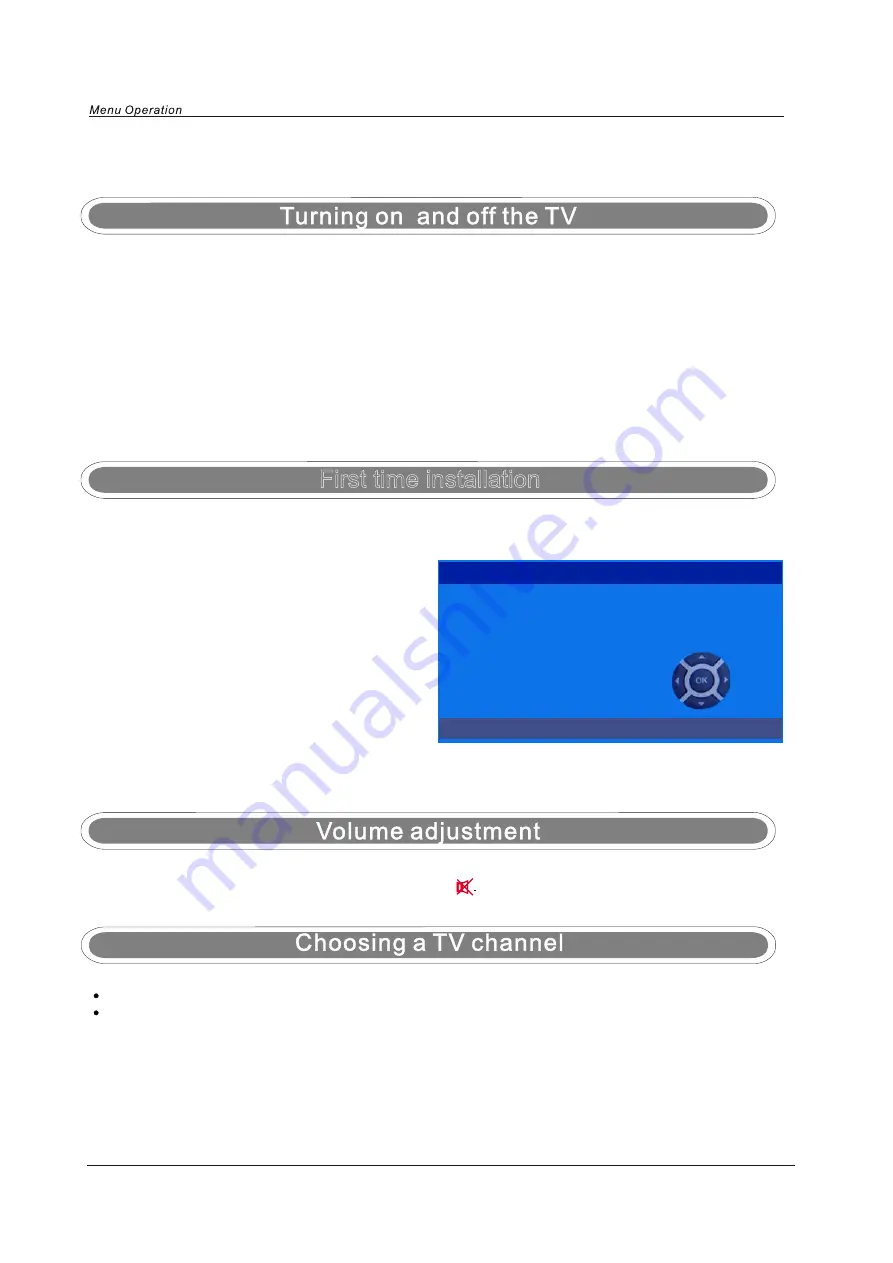
NOTE: When you initially use the TV, you will see the “

First Time Installation

” menu as below:

First Time Installation

Please make sure the TV aerial is plugged
into the RF socket at the rear of the TV.

NOW PRESS OK

Please make sure the TV aerial is plugged
into the RF socket at the rear of the TV.

Press the "OK" button on the remote control to
start the tuning procedure. This process will find 
all available 

ATV

 and 

DTV

 channels and store 

them.

By pressing the "Quick start" button, the first time
installation can be recalled at any time. 

TURN ON LCD TV

TURN OFF LCD TV

1.Connect power cable to mains supply and turn on the power by using the “ Switch” at the back of

 the TV on the right hand side. The standby indicator on the front of the TV will light up in red.

2.Use the 

POWER

 button

button

 on the front of the TV or 

STANDBY

button

STANDBY

V

T

e

h

t

n

o

n

r

u

t

o

t

t

e

s

d

n

a

h

e

h

t

n

o

the indicator will turn green.

 ,

Press  the 

POWER

 button on the front of the TV or

on the handset to turn the TV off

into standby mode,

.

d

e

r

n

r

u

t

ll

i

w

r

o

t

a

c

i

d

n

i

y

b

d

n

a

t

s

e

h

t

3. DTV using only 0-9 to select channel

for example: Channel 83 press buttons 8 and 3

2.

TV (ATV only) 

Using 0-9 digital buttons and -/-- button

Summary of Contents for MS2651DVB

Page 1: ...LCD digital colour TV MS2651DVB USER GUIDE ...

Page 2: ...ay appear or bright points of light red blue or green may appear constantly on the LCD screen and is not a malfunction If you have any problem setting up this Television trouble getting a signal or difficulties with the operation of the DVD player Please Contact our Helpline where we will be able to assist you Call 0845 6710665 HELP ...

Page 3: ...trol Key Functions Menu Operation Basic TV operation PICTURE menu options SOUND menu options TIMER menu options FUNCTION menu options SETUP menu options 3 4 4 5 6 7 7 8 9 10 10 11 12 13 SimpleTroubleshooting Techincal Specifications 14 15 1 2 Caution Safety Information ...

Page 4: ... within an equilateral triangle is intend to alert the user to the presence of important operating and maintenance servicing instructions in the literature accompanying the appliance Correct disposal of this Product This appliance complies with European Safety and Electrical directives Correct Disposal of Product Produced after 13 August 2005 Waste electrical should not be disposed of with househo...

Page 5: ...hrooms steamy kitchens or near swimming pools x Pull the plug out immediately and seek professional help if the mains plug or cable is damaged liquid is spilt onto the set or if it is accidentally exposed to water or moisture anything accidentally penetrates the ventilation slots the set doesn t work normally Do NOT remove the safety covers There are no user serviceable parts inside You may invali...

Page 6: ... Power cable Unit and Accessories User s Manual Easy Start Guide Easy Start Guide 3 PROG VOL TEXT HOLD MENU EXIT QUICK START MUTE EPG SUBTITLES PICTURE SOUND TIMER ASPECT DISPLAY FAV FUNCTION STANDBY OK 1 2 3 4 5 6 7 8 9 0 ...

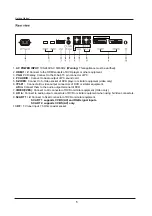
Page 7: ...s IR signals from the remote control Power on Standby LED Indicator Press POWER to turn on and off Press to display the input source menu see page 8 Remote Control Window keep clear SWITCH Power on off LED Indicator 4 Indicator on RED Standby mode Indicator on GREEN Power on mode skip ...

Page 8: ...or similar equipment video only 6 YPbPr L R in Connect them to the audio output terminal of DVD Connect all to video output connectors of DVD or similar equipment 7 VIDEO CVBS Connect to AV connector of DVD or similar equipment Video only 8 L R in Connect to audio output connectors of DVD or similar equipment when using S Video connectors 9 SCART 1 2 Connect to Scart connector of DVD or similar eq...

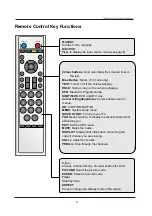
Page 9: ... DTV only Cursor left right up down Cursor buttons used in menus OK CONFIRM BUTTON MENU System setup menu QUICK START To tune in your TV FAV Means favorite to display the favorite channel list defined by you EXIT Exit the OSD menu MUTE Mutes the Audio DISPLAY Display brief information concerning the current channel you are viewing VOL Adjust the volume PROG Skip through the channels FUNCTION Press...

Page 10: ...S OK Please make sure the TV aerial is plugged into the RF socket at the rear of the TV Press the OK button on the remote control to start the tuning procedure This process will find all available ATV and DTV channels and store them By pressing the Quick start button the first time installation can be recalled at any time TURN ON LCD TV TURN OFF LCD TV 1 Connect power cable to mains supply and tur...

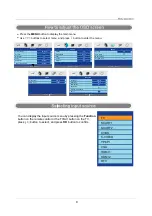
Page 11: ...SOUND Volume Sound Mode Bass Treble Balance 20 Music 60 52 50 SETUP Country Auto tuning Manual tuning Program Edit UK FUNCTION Language Video Size Blue Screen Child Lock First Time Installation Reset English Auto On Select Enter Select Enter Select Enter Select Enter You can display the input source menu by pressing the Function button on the remote control or the TV AV button on the TV press butt...

Page 12: ...to your viewing requirements by selecting Picture Mode in Picture menu You may select the picture mode directly by pressing the PICTURE button on the remote control Contrast Adjust the contrast of the picture Brightness Adjust the brightness of the picture Colour Adjust the colour of the picture NOTE This option is invalid in PC mode and it will be shown in gray Sharpness Select sharpness mode of ...

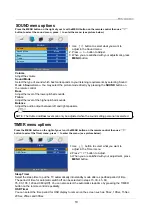
Page 13: ...dby mode after a specified period of time The period of time for automatic switch off can be selected in steps 15 30 45 60 75 90 105 120 and 0 Min Off You can also select the automatic sleep time by pressing the TIMER button on the remote control repeatedly OSD Timer You can select the time period for OSD display to remain on the screen such as 5Sec 10Sec 15Sec 20Sec 25Sec and 30Sec SOUND menu opt...

Page 14: ...et pin code Old PIN Code The default is no password press OK to confirm If the pin code is changed it must enter the old code to change New PIN Code Enter the new password Enter Again Enter the same password twice the password will be changed successfully FUNCTION menu options Select Adjust Child Lock Child Lock Key Lock Change PIN Code Off Off Select Adjust Change PIN Code Old PIN Code New PIN Co...

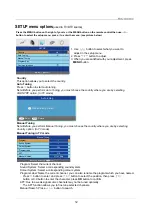
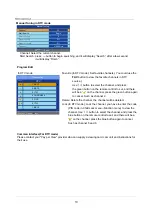
Page 15: ...P Country Auto Tuning Manual Tuning Program Edit Common Interface UK Select Adjust Auto tuning Press OK key to start Enter Return OK MENU Program Select the current channel Sound System Select a corresponding sound system Colour System Select a corresponding colour system Program Label Name the current channel you can also rename the program which you have named Press button to enter and press but...

Page 16: ...o view the favorite channels in DTV source Use button to select the channel and press the green button on the remote control to set and there will be a on the channel press the green button again to cancel Such as channel 2 Delete Delete the channel the channel will be deleted Lock In DTV mode Lock the channel you have to enter the code PIN code in Child Lock menu Function menu to view the channel...

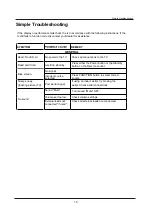
Page 17: ...ss FUNCTION button to select correct source Noisy snowy ghosting picture TV Poor aerial signal If using an indoor aerial try moving the aerial Check aerial connections Volume set too low Check volume settings No sound External leads not connected if used Check all external leads are connected Turn sound Mute OFF Sound Mute 14 If the display or performance fails check the tv in accordance with the ...

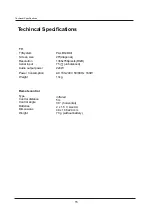
Page 18: ...Weight TV TVSystem PAL BG DK I Screen size 26 diagonal Resolution 1366x768pixels RGB Aerial input 75 unbalanced Audio output power 2x6 W Remote control Type Control distance Control angle Batteries Dimensions Weight infrared 5m 30 horizontal 2 x 1 5 V size AA 48 x 168 x24 mm 70 g without battery 15 ...

Page 19: ......

Page 20: ... change your mind or if you damage the goods after you buy them Should a repair not be possible we will exchange the product for a new or nearest equivalent product In the unlikely event of being unable to exchange we will offer a full refund This warranty is only valid within the United Kingdom Republic of Ireland and or Channel Islands This warranty excludes faults caused by accident neglect mis...

Reviews: