

Rutland Furlmatic 910-4 Windcharger Installation & Operation
Doc No: SM-138 Iss. A 29.01.13
12
Marlec Eng Co Ltd
Batteries
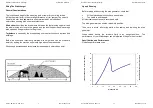
Leisure/Deep Cycle batteries are specifically designed for good performance in
terms of charge/discharge cycles. Batteries are the most important part of your
battery charging system and should be sized according to your load
requirements and provide at least 3 days reserve capacity. This will reduce
cycling, prolong the life of the battery and ensure system reliability during
periods of low wind
Permanent connections should always be made to the battery terminals. Never
use crocodile clips or similar devices. Battery terminals should be well greased
with petroleum jelly or similar.
We strongly recommend that one of the voltage regulators available from Marlec
is fitted to prevent batteries becoming overcharged in strong winds and is
essential with gel/sealed batteries.
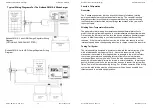
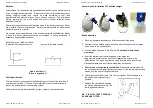
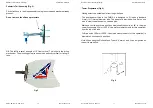
Batteries may be linked as follows:
In parallel to increase amp hours In series to increase voltage
Red is positive (+)
Black is negative (-)
Cable Specification
The cable used for connection of the Windcharger to the batteries should be in
accordance with table 1. The use of a smaller cable than recommended will
reduce the performance of the charging system.
Cable and connectors are available from your dealer or the manufacturer.
Rutland Furlmatic 910-4 Windcharger Installation & Operation
Doc No: SM-138 Iss. A 29.01.13
9
Marlec Eng Co Ltd
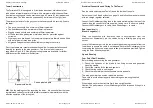
Assembly and Installation Of The Windcharger
Blade Assembly
1. Place the generator assembly on a flat surface hub-side down.
2. Unscrew the two nacelle halves as shown above to expose the rear blade
screw holes in the hub assembly.
3. Position blade as shown in Fig.4 below.
The blade will only fit one
way round.
4. Insert the protrusion at the trailing edge of the blade root
fixing first into socket to align with the corresponding recess in the
blade socket. The blade can then be easily inserted with a lever action.
Gentle assistance with a soft faced mallet may be required.
5.
Four screws are required for each blade.
First secure each blade with
two of the special self-tapping screws provided. Fit the remaining two blade
screws from the front of the generator hub.
6. Check tightness of all screws. (Do not over-tighten) Recheck again in a
few weeks time as loosening is
possible.
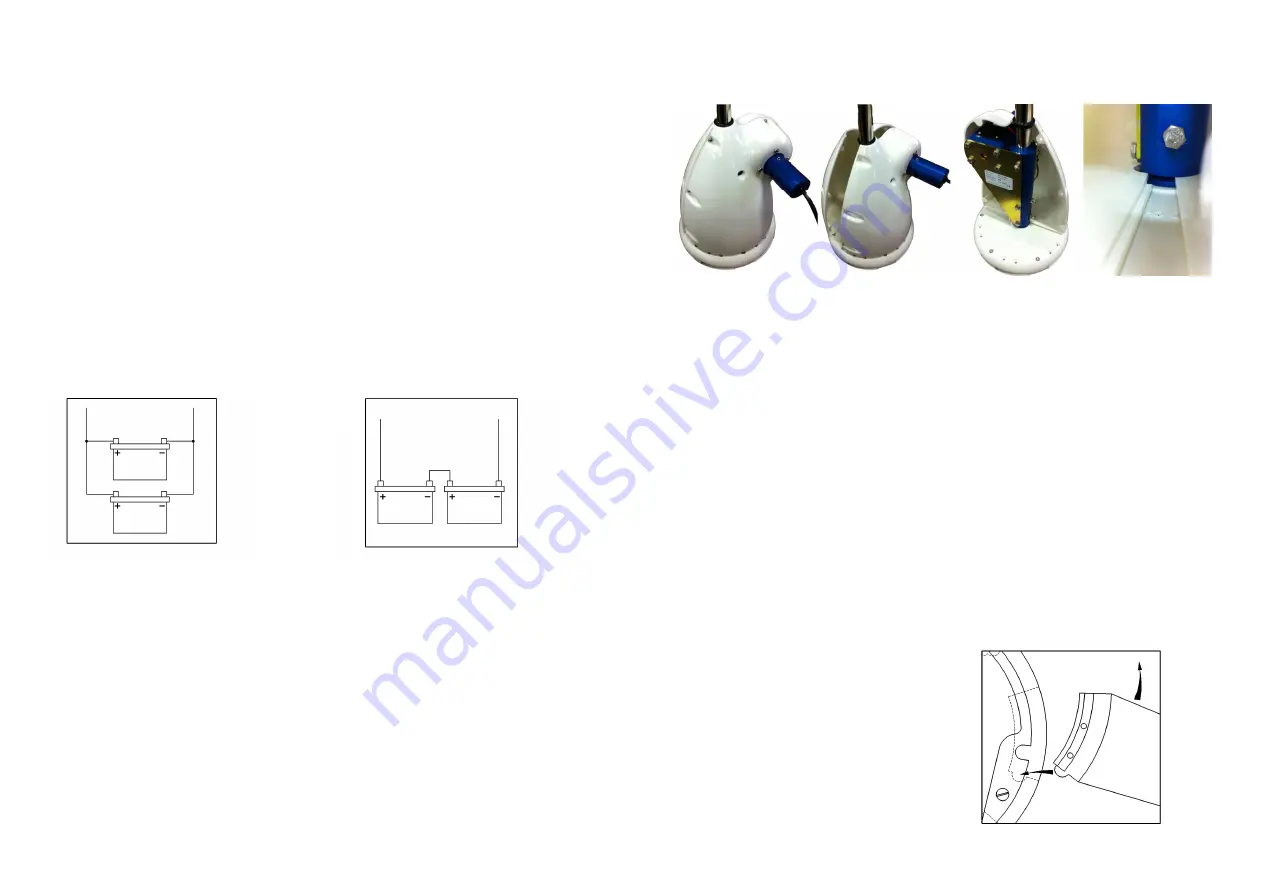
7. Replace the nacelle half, aligning
the slotted edges as shown in the
last image shown above.
NB. IT IS VITAL THAT 4 SCREWS/
BLADE ARE FITTED.