background image


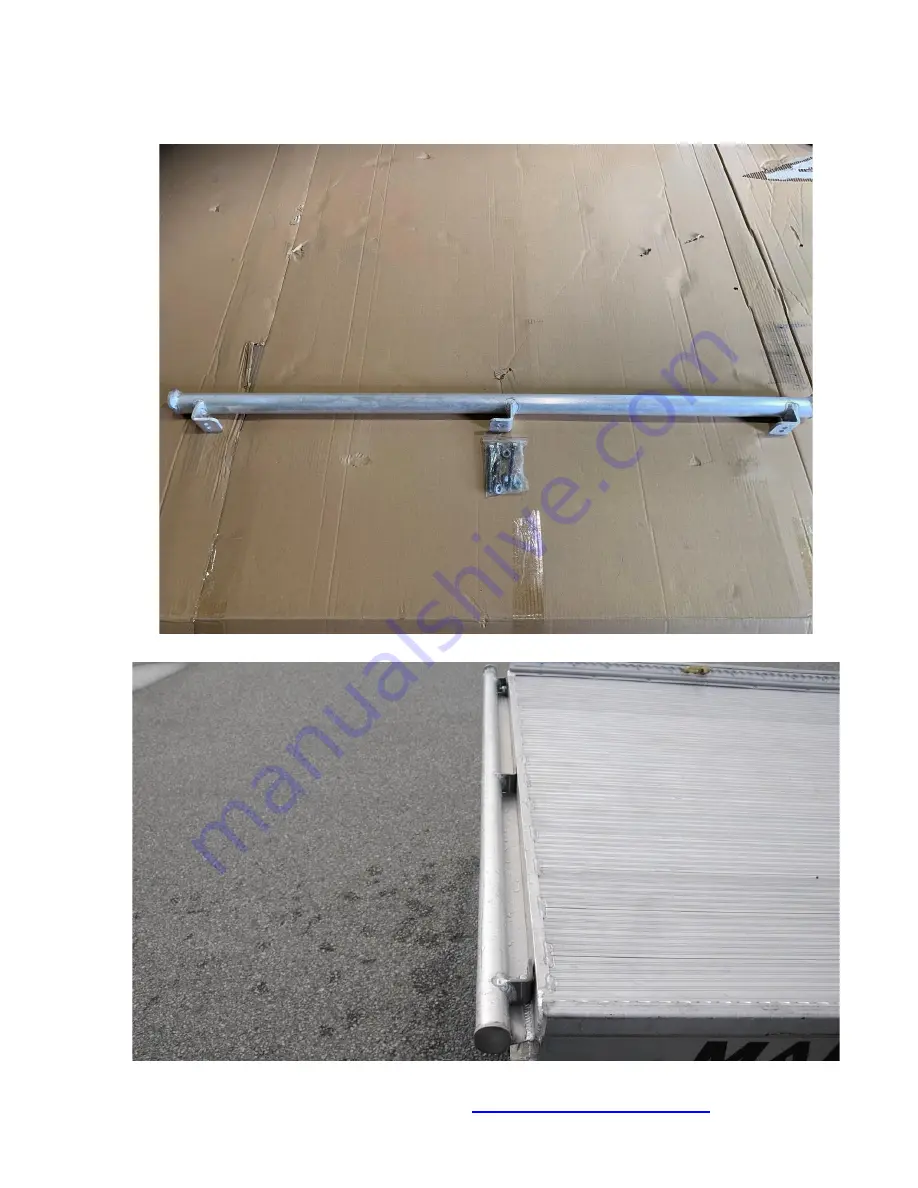
Rear load bar 

1.


The rear load bar comes with the required hardware, you simply bolt it to the back of the 
single trailer.  


OWNER’S MANUAL / 

www.marlonproducts.com 

Summary of Contents for 10' Single Multi Trailer

Page 1: ...10 Single Multi Trailer Assembly Instructions Owner s Manual Marlon Recreational Products www marlonproducts com 1 800 663 7367 ...

Page 2: ...o 95 ft lbs Re tighten after the first 50 miles 80 kilometers Check the tire pressure Maximum 80 PSI 552 KPA when carrying the maximum rated load Repack the wheel bearings every 2 000 miles 3 200 kilometers or a minimum of once every year The trailer ball must be a 2 ball Check that the trailer coupler is fastened securely onto the towing vehicles ball If your trailer has an optional side kit make...

Page 3: ...le it could pull away from the vehicle and detach Always check your tire pressure before transporting your trailer Secure trailer to the towing vehicle before transportation Make sure the coupler is locked and the safety chains are attached to the trailer and the vehicle Secure your cargo into the trailer properly and in compliance to local laws Always test your trailer lights before transporting ...

Page 4: ...feature also allows the trailer to use a tilt position B How to Use the Tilt Feature The Marlon trailer has a tilt feature to help with loading and unloading of cargo How to First make sure the trailer is attached to the towing vehicle Loosen the tongue clamp locking bolt enough to allow the brace to turn out of the way of the tongue this will allow you to tilt the trailer to the dump position CAU...

Page 5: ...s Turn on the corresponding vehicle operation i e running lights This will illuminate the tester light if the vehicle wiring is correct Follow the same procedure for the signal and brake lights To test the trailer wiring Once you have confirmed that the vehicle trailer plug is operating properly connect the trailer plug to your vehicle Proceed to test each of the lights and power leads using your ...

Page 6: ...OWNER S MANUAL www marlonproducts com ...

Page 7: ... trailer could cause serious damage to your trailer as well as to the towing vehicle Please refer to your trailer serial certification label located on the frame of the trailer for capacity details The Gross Vehicle Weight Rating G V W R is 1 850 lbs The weight of the trailer the maximum payload the trailer can carry The trailer weight and the payload must not exceed this G V W R weight rating Be ...

Page 8: ...ailer ball Make sure that the trailer ball is completely engaged in the coupler ball WHEEL HUB ASSEMBLY NOTE Bearings should be repacked every 2 000 miles 3 200 kilometers Your trailer dealer or any automotive shop is equipped and able to repack the bearings if you re unable to do yourself For your convenience a grease zerk fitting is located behind each wheel which only requires the use of a grea...

Page 9: ... the trailer from You must have both items when you go to your local insurance office or state department of motor vehicles to register and license your trailer Once you pay the appropriate fees you will be issued a title registration and a license plate If you require any further information regarding this issue please call your local insurance office or state motor vehicle department DMV or visi...

Page 10: ...ngue clamp bolt 270 x 12 5mm 1 1 1 4 Axle mounting bolts 180 x 10mm 4 8 4 5 Fender bracket mounting bolts 40 x 7mm 4 4 4 6 Fender mounting bolts 20 x 7mm 4 4 4 7 Adhesive backed barrier 270 x 50mm 2 0 0 8 License plate bracket bolts 20 x 7mm 4 4 4 9 Coupler mounting bolts 80 x 10mm 2 2 2 OWNER S MANUAL www marlonproducts com ...

Page 11: ...80 x 10mm bolts washers and nylocks Torque to 75 ft lbs of pressure Note There are 2 sets of holes in the frame The front set are used for carrying snowmobiles and the rear set are used when carrying 50 SXS UTV s Note it is imperative for proper towing safety to have the axle in the correct position OWNER S MANUAL www marlonproducts com ...

Page 12: ...gh the tongue flat 4 end to the front Then attach the tongue to the frame using the 100 x 10mm bolts Torque to 75 ft lbs of pressure Then connect the tongue wiring to the frame wiring connector OWNER S MANUAL www marlonproducts com ...

Page 13: ...forward position sled then use the 2 sets of forward fender bracket holes If you mounted the axle in the back position SXS UTV then use the rear holes for the fender mounting brackets 5 Mount the fenders to the fender brackets using the 20 x 7mm bolts Make sure the bracket orientation matches the picture below OWNER S MANUAL www marlonproducts com ...

Page 14: ...is is a requirement when using the trailer to carry 50 SXS UTV due to the weight of the machines Optional SXS UTV ramps must be used in place of the tilt option 7 Attach the coupler to the tongue and the safety chains at the same time Use the coupler mounting bolts 80 x 10mm The center link of the safety chain slides through the front bolt Torque to 95 ft lbs OWNER S MANUAL www marlonproducts com ...

Page 15: ...8 Install the tires ST175 80R13C and torque to 95 ft lbs of pressure Now install the license plate holder and test lights OWNER S MANUAL www marlonproducts com ...

Page 16: ...usion 2 Rivet the extrusion down 1 inch from each end Then starting at the back of the trailer at 29 5 then 59 then again at 88 5 for a total of 5 rivets per length of SuperGlide extrusion Then rivet the end of the front and rear glide as per picture below it is not necessary to rivet any of the middle 2 glides OWNER S MANUAL www marlonproducts com ...

Page 17: ...alt shield completely first All required parts to assemble and attach the shield come in the kit Start with bolting the sides on Then bolt on the angle pieces to the bottom of the side as shown in the picture OWNER S MANUAL www marlonproducts com ...

Page 18: ...ps slide all the way over the aluminum 2 Position the shield over the leading edge of the trailer Center it between the siderails and forward so that the leading edge of the trailer is inline with the bottom bend on the shield See pic below OWNER S MANUAL www marlonproducts com ...

Page 19: ...3 Screw down the shield with the self tapping stainless steel screws there are 10 pre drilled holes to use as guides OWNER S MANUAL www marlonproducts com ...

Page 20: ...Rear load bar 1 The rear load bar comes with the required hardware you simply bolt it to the back of the single trailer OWNER S MANUAL www marlonproducts com ...

Page 21: ...SXS Ramps and Tray 1 The 4 SXS ramp trays bolt on to the tabs under the trailer The required hardware comes with the trays OWNER S MANUAL www marlonproducts com ...

Reviews: