background image

M A R Q U I S   S P A S   •   R E L A X I N G   Y O U R   W O R L D   6 1

S P A   M A I N T E N A N C E

(CONTINUED)

Dura Base

™

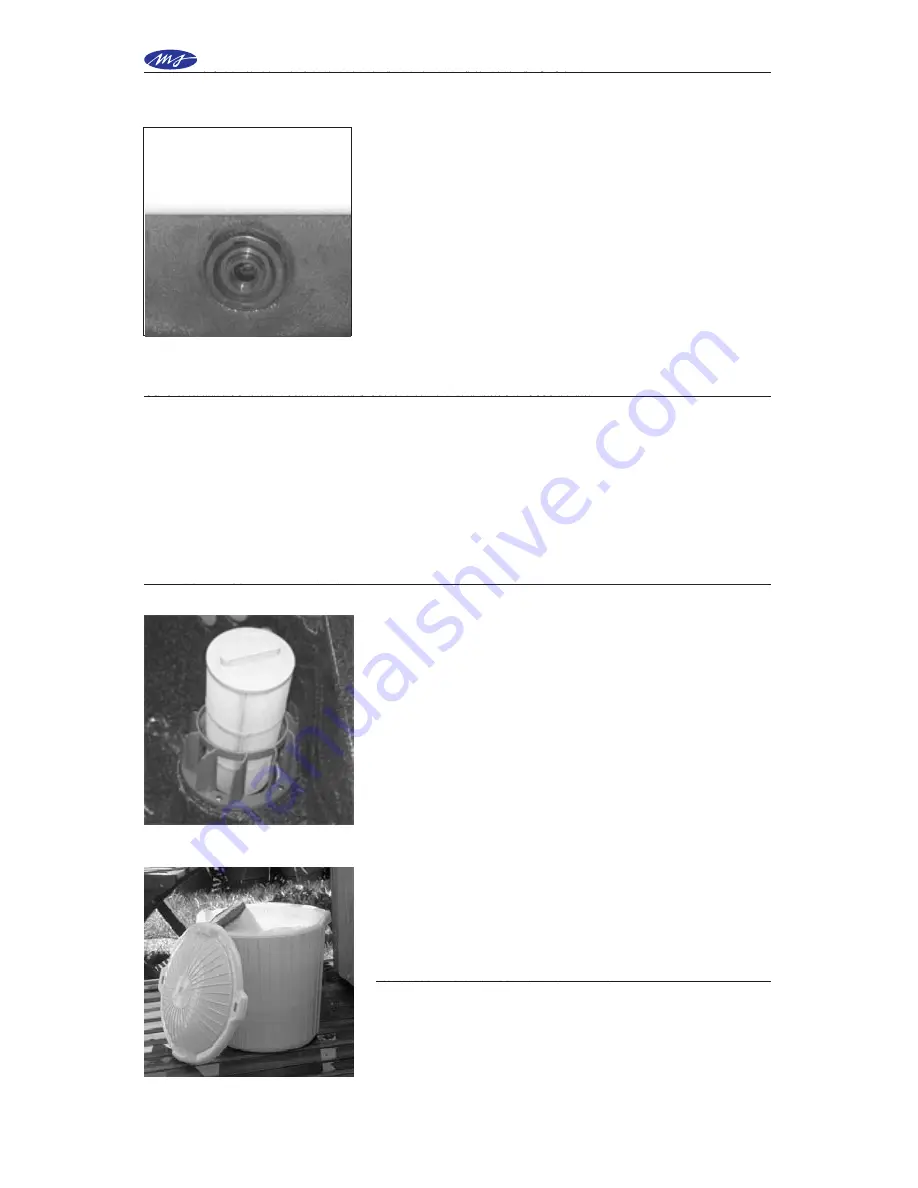
 External Drain and Fill Valve

1. Remove plug from the external Drain and Fill valve.

2. Attach a hose to the external drain and fill valve on the

DuraBase

™

.  

A Fill Filter

 is recommended when filling.

Attach to the end of a garden hose to filter out any grit

and sediment that may accumulate in the spa and

potentially scratch the spa surface during the process.

3. Open the valve by turning the ring counterclockwise.

Gravity will cause the water to drain out of the hose.

4. When the spa is empty, close the valve by turning the

ring clockwise and remove the hose.

5. Replace the plug in the drain and fill valve.

6. Follow step five above to refill your spa.

CLEANING THE SPA AND SAFETY ENERGY COVER

Should the DuraShell

®

 interior become soiled, it can be cleaned with a soft sponge, cloth

Scumbug Duramitt #6875

 or

 Tub Scrubber #6000

. Do not use any abrasive cleaners as

they can scratch or dull the spa surface.

Your Safety Energy Cover can be cleaned with 

Marquis Spa Care

™

 Cover Cleaner

 on both

top and bottom sides.  

Marquis Spa Care

™

 Cover Cleaner

 is a good quality NON-

SILICONE based vinyl restorer that will help protect the surface from the sun’s rays.

REMOVING THE FILTER

Refer to the SPA MAINTENANCE SCHEDULE section

for cleaning frequency and instructions. Follow these

instructions when performing routine maintenance.

Vortex Filtration:

1. Grasp the edge of the dome-shaped Vortex filter

top, pull up firmly, but gently, to remove it.

2. Use the filter handle and turn the filter cartridge

counterclockwise to unscrew it from its base.

3. Lift out the filter cartridge.

Maintenance Reminder will show CL every 30 days to

remind you to clean your filter.  Use 

Marquis Spa Care

™

   Filter Revive and Filter Soak Canister.  

It’s recom-

mended that you keep a spare filter on hand for

cleaning.  Replace your filter once a year.  Filters are

available through Marquis Essentials.

REINSTALLING THE FILTER

Repeat the steps above in reverse order to reinstall the

filter.  Do not overtighten the filter as it may cause

failure of the filter cartridge.  When replacing the

Vortex filter top, center the top over the raised filter

ring, and press down firmly until the top snaps into

place.

J

J

J

Summary of Contents for Coastal Destiny

Page 1: ...L E I S U R E S E R I E S S P O R T S E R I E S C O A S T A L S E R I E S U L T I M A T E S E R I E S O w n e r s M a n u a l...

Page 2: ...aser Date of Purchase __________________________________________________________________________ Address _________________________________________________________________________ City State Zip Code _...

Page 3: ...25 500 LX 26 600 27 600 LX 28 700 29 700 LX 30 SS Controls 31 33 Zoned Jetting Operation 34 38 COASTAL SERIES MODELS EQUIPMENT DIAGRAMS Destiny 39 Reward 40 Euphoria 41 Voyage 42 CS Controls 43 46 Zo...

Page 4: ...orced steel should also be bonded to the ground terminal 8 WARNING Your spa is equipped with a ground fault circuit interrupter GFCI on the end of the power supply cord Before each use of the spa with...

Page 5: ...xceeding 10 minutes and for young children Since excessive water temperatures have a high potential for causing fetal damage during the early months of pregnancy pregnant or possibly pregnant women sh...

Page 6: ...cheveux ou une partie du corps puissent tre aspir s ne pas utiliser une cuve de relaxation si les grilles de prise d aspiration ne sont pas toutes en place AVERTISSEMENT Pour viter l vanouissement et...

Page 7: ...orrectly use a licensed contractor Disconnect the spa from the power supply before draining the spa or servicing the electrical components Test the GFCI monthly Test the water temperature with your ha...

Page 8: ...pa CAUTION Never try to move a spa that has not been fully drained To do so could result in damage to the spa and physical injury to the mover IMPORTANT DO NOT LET AN EMPTY SPA REMAIN EXPOSED TO DIREC...

Page 9: ...l of your spa These are openings through which the jet pumps draw water They have been equipped with safety covers Suction through the fittings can be strong The safety covers must remain in place and...

Page 10: ...ol box cover Connections should be made with copper conductors only aluminum wiring should not be used with this system All conductors circuit breakers and or fuses must be sized in accordance to the...

Page 11: ...CONTROLS section listed under your particular spa series model To start your spa you will need a spa water test kit and an underwater thermometer It is important to follow each of these steps when sta...

Page 12: ...ng if necessary Normal use is between 98 and 102 F Sport Coastal and Ultimate Series Models Start up 1 Follow steps one through three of Leisure Series Models Start up 2 Check to make sure the freeze...

Page 13: ...approximately one minute of water flow to deter mine the water temperature After one minute of water flow the temperature will be displayed as actual water temperature F Press the TEMP SET pad to adju...

Page 14: ...rn it POWER SWIRL JET Large rotating jets provide a firm broad area of circular massage action The water flow can be adjusted by using the four tabs on the face of the jet to turn it CYCLO BOOST JET T...

Page 15: ...x84 x33 h 32 deep 78 x84 x33 h 32 deep 84 x84 x35 5 h 34 deep 84 x84 x35 5 h 34 deep 84 x84 x35 5 h 34 deep 84 x84 x35 5 h 34 deep 84 x84 x35 5 h 34 deep 84 x84 x35 5 h 34 deep 90 x90 x35 5 h 34 deep...

Page 16: ...l 1 14 Floor Drain 1 15 Filter Canister 1 22 Ozone Injector Fitting 1 MaximumTherapy System 1 Control Box Heater 1 2 Pump Unions 2 3 Pump 1 4 Shut Off Valves 2 5 Motor Mounts 8 Pump Plug 1 9 120V GFCI...

Page 17: ...gs 2 11 Bather s Panel 1 12 Auxiliary Control Panel 1 14 Floor Drain 1 15 Filter Canister 1 16 Jet Selector Valve 1 22 Ozone Injector Fitting 1 MaximumTherapy System 1 Control Box Heater 1 2 Pump Unio...

Page 18: ...12 Auxiliary Control Panel 1 13 Cascade Neck Jets 3 14 Floor Drain 1 15 Filter Canister 1 16 Jet Selector Valve 1 18 Neck Jet Control Valve 1 20 Geyser Jets 3 22 Ozone Injector Fitting 1 MaximumTherap...

Page 19: ...Auxiliary Control Panel 1 14 Floor Drain 1 15 Filter Canister 1 16 Jet Selector Valve 1 22 Ozone Injector Fitting 1 MaximumTherapy System 1 Control Box Heater 1 2 Pump Unions 2 3 Pump 1 4 Shut Off Val...

Page 20: ...Cascade Neck Jets 3 14 Floor Drain 1 15 Filter Canister 1 16 Jet Selector Valve 1 18 Neck Jet Control Valve 1 20 Geyser Jets 3 22 Ozone Injector Fitting 1 MaximumTherapy System 1 Control Box Heater 1...

Page 21: ...the spa light or jet pump has been deactivated the pump runs on high speed for five minutes then on low speed to filter the water for four hours See PROGRAM FILTER to adjust cycles Heat Demand Operati...

Page 22: ...er a short pause the actual temperature will again be displayed Repeating the above procedure will allow you to decrease the set temperature SOAKTIMER AND SOAK FEATURE Pressing the SOAK TIMER pad will...

Page 23: ...white area indicates jets OFF For clarity a compass is used as a directional tool Most jets are adjustable for flow Many are also adjustable for direction See OPERATING THE SPA section for explanation...

Page 24: ...trol Valve by turning the lever counterclockwise J A 6 2 2 5 A B D E 6 2 5 2 s p i r i t Z O N E D J E T T I N G s p i r i t l x Z O N E D J E T T I N G ZONE 1B JETS Geyser jets G plus Cascade Neck je...

Page 25: ...ll jets including Wrist Jets W and Cascade Neck jets C except Geyser jets G Turn the Jet Selector Valve 6 to the south Press ZONE 1 JETS pad 2 on either panel to turn pump on low speed Press either ZO...

Page 26: ...rol Panel 1 12 Auxiliary Control Panel 1 15 Filter Canister 1 22 Ozone Injector Fitting 1 MaximumTherapy System 1 Control Box Heater 1 2 Pump Unions 4 3 Pumps 2 4 Shut Off Valves 2 5 Motor Mounts Phys...

Page 27: ...entification 2 Power Boost Jets 6 3 Power Swirl Jet 1 4 Personal Therapy Jets 15 5 Cyclo Swirl Jet 1 6 Light 1 7 Air Control Valves 2 8 Heat Sensor 1 10 Suction Fittings 4 11 Bather s Control Panel 1...

Page 28: ...ntrol Valves 2 8 Heat Sensor 1 10 Suction Fittings 5 11 Bather s Control Panel 1 12 Auxiliary Control Panel 1 15 Filter Canister 1 22 Ozone Injector Fitting 1 MaximumTherapy System 1 Control Box Heate...

Page 29: ...ttings 4 11 Bather s Control Panel 1 12 Auxiliary Control Panel 1 13 Cascade Neck Jets 3 15 Filter Canisters 2 16 Jet Selector Valve 1 18 Neck Jet Control Valve 1 20 Geyser Jets 3 22 Ozone Injector Fi...

Page 30: ...rol Panel 1 12 Auxiliary Control Panel 1 15 Filter Canister 1 22 Ozone Injector Fitiing 1 MaximumTherapy System 1 Control Box Heater 1 2 Pump Unions 4 3 Pumps 2 4 Shut Off Valves 2 5 Motor Mounts Phys...

Page 31: ...1 Bather s Control Panel 1 12 Auxiliary Control Panel 1 13 Cascade Neck Jets 3 15 Filter Canisters 2 16 Jet Selector Valve 1 18 Neck Jet Control Valve 1 20 Geyser Jets 3 22 Ozone Injector Fitting 1 Ma...

Page 32: ...es after the spa light or jet pump has been deactivated the pump runs on high speed for five minutes then on low speed to filter the water for four hours Heat Demand Operation In addition to those sit...

Page 33: ...a time up to 104 F After a short pause the actual temperature will again be displayed Repeating the above procedure will allow you to decrease the set temperature SOAKTIMER AND SOAK FEATURE Pressing...

Page 34: ...ff Pressing the ZONE 2 pad will activate the jets in the remainder of the spa Zone 2 PumpTimeouts Operating sequence is low speed high speed then off If left running the low speed will turn off after...

Page 35: ...N G 5 0 0 Z O N E D J E T T I N G ZONE 1A JETS All jets in seats E F H and Cascade Neck jets C Turn the Jet Selector Valve 6 to the north Press JETS LOW HIGH pad 2 to turn pump on low speed Press JET...

Page 36: ...pump on high speed Adjust the jet pressure with the Air Control Valve 5 Open the Air Control Valve by turning the lever counterclockwise ZONE 1A JETS All jets in seats E F Wrist jets W and Geyser jet...

Page 37: ...jets with Neck Jet Valve 7 ZONE 1B JETS Geyser jet G and Cascade Neck jets C Turn Jet Selector Valve to the south Press JETS LOW HIGH pad 2 to turn pump on low speed Zone 1A Press JETS LOW HIGH pad 2...

Page 38: ...rning the lever counterclockwise ZONE 2 JETS All jets in seats K L M Press JPress JETS LOW HIGH pad 2 to turn pump on high speed Adjust the jet pressure with the Air Control Valve 5 Open the Air Contr...

Page 39: ...ser jet G and Cascade Neck jets C Turn Jet Selector Valve 6 to the south Press JETS LOW HIGH pad 2 to turn pump on low speed Press JETS LOW HIGH pad 2 again to turn pump on high speed Adjust Cascade N...

Page 40: ...rs 2 16 Jet Selector Valves 2 17 Whirlpool Geyser Jets 9 18 Cascade Neck Jet Valve 1 19 Bather s Control Panel 1 20 Auxiliary Zone 1 Panel 1 21 Auxiliary Zone 2 Panels 2 22 Ozone Injector Fitting 1 Ma...

Page 41: ...9 18 Neck Jet Selector Valve 1 19 Bather s Control Panel 1 20 Auxiliary Zone 1Panel 1 21 Auxiliary Zone 2 Panels 2 22 Ozone Injector Fitting 1 MaximumTherapy System 1 Control Box Heater 1 2 Pump Union...

Page 42: ...anisters 2 16 Jet Selector Valves 2 17 Whirlpool Geyser Jets 9 18 Neck Jet Selector Valve 1 19 Bather s Control Panel 1 20 Auxiliary Zone 1 Panel 1 21 Auxiliary Zone 2 Panels 2 22 Ozone Injector Fitti...

Page 43: ...isters 2 16 Jet Selector Valves 2 17 Whirlpool Geyser Jets 9 18 Neck Jet Selector Valve 1 19 Bather s Control Panel 1 20 Auxiliary Zone 1 Panel 1 21 Auxiliary Zone 2 Panels 2 22 Ozone Injector Fitting...

Page 44: ...art a 59 minute timer The timer will display the elapsed time in one minute increments 1 14 After 15 minutes the display will flash the minute 15 59 for ten seconds before switching to a steady displa...

Page 45: ...nomy Mode In this mode the spa will only heat to the set temperature during a programmed filter cycle LCD display will alternately flash Ecn with actual temperature when spa is up to set temperature L...

Page 46: ...has a battery backup Maintenance Reminders will be stored in memory for 30 days If power does not resume after that time memory will reset to factory default settings and history lost ZONEDTHERAPY SY...

Page 47: ...MPERATURE DISPLAY AND ADJUSTMENT LCD DISPLAY See COASTAL SERIES LCD DISPLAY MESSAGES MAINTENANCE REMINDERS See COASTAL SERIES MAINTENANCE REMINDERS Heat On Illuminates when heat is on LCD Display Show...

Page 48: ...turning Neck Jet Valve 7 ZONE 1B JETS Geyser jet G and Cascade Neck Jets C Turn the Jet Selector Valve 6 to the south and press ZONE 1 JETS pad 2 to turn pump on low speed Press ZONE 1 JETS pad 2 aga...

Page 49: ...turn pump on high speed Cascade Neck Jets C are independent of other jets Control pressure by turning Neck Jet Valve 7 r e w a r d Z O N E D J E T T I N G E C G C l N S W E ZONE 2 A JETS All jets E F...

Page 50: ...Jets C are independent of other jets Control pressure by turning Neck Jet Valve 7 M A R Q U I S S P A S R E L A X I N G Y O U R W O R L D 4 9 e u p h o r i a Z O N E D J E T T I N G ZONE 2B JETS Six W...

Page 51: ...e Neck Jets C Turn the Jet Selector Valve 6 to the east and press ZONE 1 JETS pad 2 to turn pump on low speed Press ZONE 1 JETS pad 2 again to turn pump on high speed Adjust the jet pressure with Air...

Page 52: ...16 Jet Selector Valves 4 17 Whirlpool Geyser Jets 15 18 Neck Jet Selector Valves 2 19 Bather s Control Panel 1 20 Auxiliary Zone 1 Panel 1 21 Auxiliary Zone 2 Panel 1 22 Auxiliary Zone 3 Panel 1 23 Oz...

Page 53: ...lpool Geyser Jets 12 18 Neck Jet Selector Valves 2 19 Bather s Control Panel 1 20 Auxiliary Zone 1 Panel 1 21 Auxiliary Zone 2 Panel 1 22 Auxiliary Zone 3 Panel 1 23 Ozone Injector Fitting 1 MaximumTh...

Page 54: ...will start 12 hours after power up Press FILTER CYCLE pad to scroll through theselections and press TEMP SET pad to enter The display will now show either SL4 four hour cycle SL3 three hour cycle SL2...

Page 55: ...g a programmed filter cycle LCD display will alternately flash Ecn with actual temperature when spa is up to set temperature LCD will steadily display Ecn when spa is below set temperature Sleep Mode...

Page 56: ...ELS Pressing the ZONE 1 JETS pad will activate the Power Therapy Seat see spa diagram for exact location The ZONE 1 JETS pad will cycle the jet pump from low speed to high speed to off This sequence w...

Page 57: ...r Control Valve 5 Open Air Control Valve 5 by turning the lever counterclockwise Cascade Neck Jets C are independent of other jets Control pressure by turning Neck Jet Valve 7 ZONE 1B JETS Two Whirlpo...

Page 58: ...s ZONE 3 JETS pad 4 again to turn pump on high speed C Turn Neck Jet Valve 7 to the southwest m a r q u i s Z O N E D J E T T I N G ZONE 3C JETS Four Whirlpool jets P and Cascade Neck jets C P Turn th...

Page 59: ...JETS pad 3 to turn pump on low speed Press ZONE 2 JETS pad 3 again to turn pump on high speed ZONE 1B JETS Four Geyser Whirlpool Jets G and Cascade Neck Jets C Turn the Jet Selector Valve 6 to the sou...

Page 60: ...n to turn pump on high speed Adjust the jet pressure with Air Control Valve 5 Open the Air Control Valve 5 by turning the lever counterclockwise Control Cascade Neck jet pressure with valve 7 j o u r...

Page 61: ...you to change water More frequent draining may be required depending on use If the water is not changed regularly the water becomes chemically saturated and won t respond to regular chemical addition...

Page 62: ...can be cleaned with Marquis Spa Care Cover Cleaner on both top and bottom sides Marquis Spa Care Cover Cleaner is a good quality NON SILICONE based vinyl restorer that will help protect the surface fr...

Page 63: ...NOTE During long periods of inactivity damage can occur to equipment from condensation within the equipment 1 Turn off the power to the spa 2 Drain the spa See DRAINING AND REFILLING THE SPA 3 Remove...

Page 64: ...a and completely refill with water and replenish the chemicals See DRAINING AND REFILLING YOUR SPA Open the equipment door and check for signs of water leakage around the pump s Pump seals will wear o...

Page 65: ...__________________________________________________________ ________________________________________________________________________________________________________________ ____________________________...

Page 66: ...tely open Check that the air control valve is open push lever counterclockwise to open LCD DISPLAY MESSAGES Depending on spa models the technology allows it to perform a number of self diagnostic syst...

Page 67: ...isplay for desired temperature setting NOTE Do not expect instant hot water from the jets It will take the heater 12 24 hours to heat the spa to the temperature you desire Check for obstructions or re...

Page 68: ...m Chlorine 2 3 ppm Chlorine 3 5 ppm Alkalinity 80 150 ppm Alkalinity 100 120 ppm pH Level 7 2 7 6 pH Level 7 4 7 6 CLOUDYWATER Cause C and Solutions S to Water Maintenance C Inadequate filtration or d...

Page 69: ...ate high speed jets and Air Control Allow jets to run for 30 minutes Test water with a Water Test Strip to see if desired level has been reached EYE OR SKIN IRRITATION C Contaminants or excessive amou...

Page 70: ...Marquis Corp 596 Hoffman Road Independence OR 97351 800 275 0888 www marquisspas com R E L A X I N G Y O U R W O R L D COPYRIGHT MARQUIS CORP 1 2001 710 0812...

Reviews: