Warning!Warning!
Disconnect power supply before installation and change the bulb only when
cold.
Atención!
Desconectar la conexión a red antes de ser manipulada y realizar el cambio
de bombilla sólo cuando esta se haya enfriado.
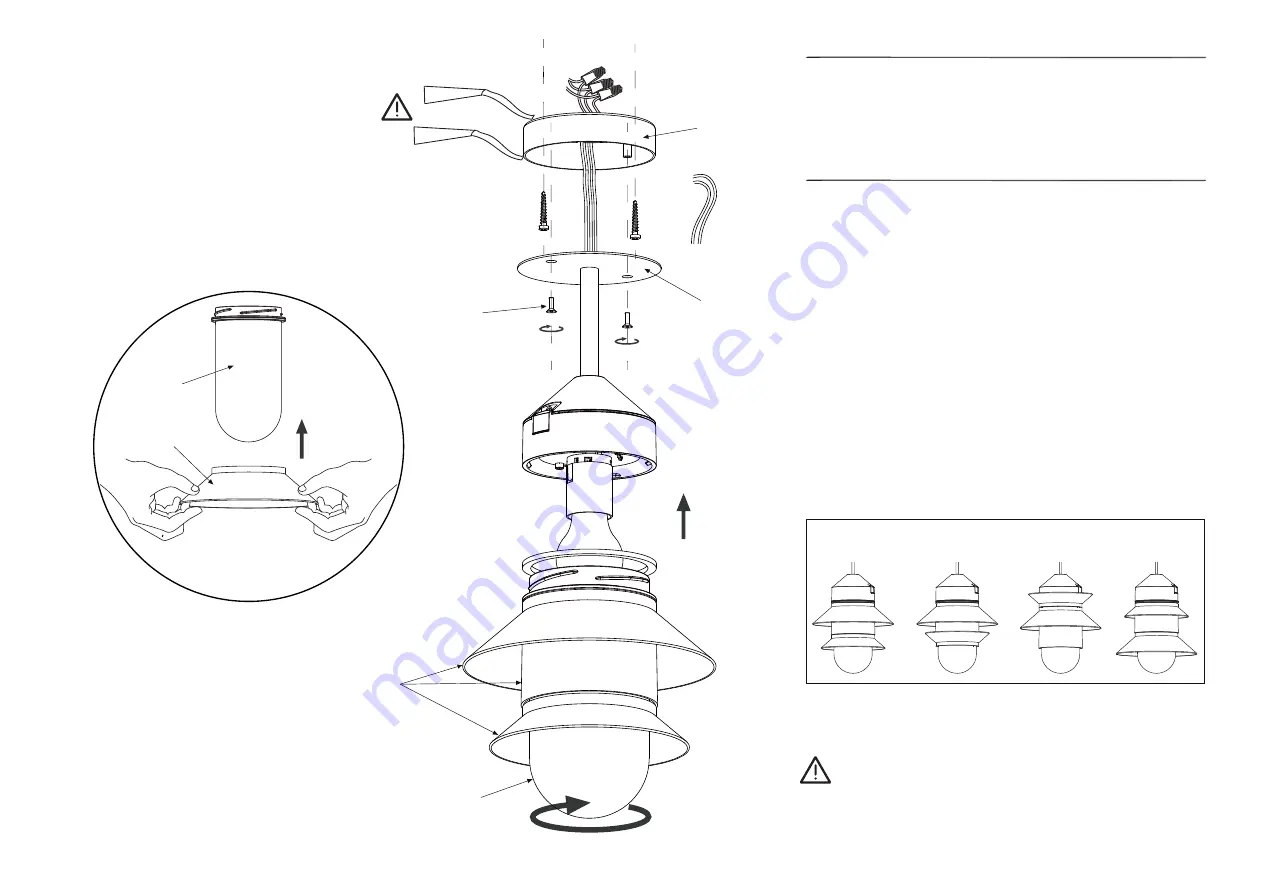
1. Unscrew the glass (A).
2. Position the plastic shades (B) to complete your own motif. To
facilitate this, moisten the glass with a damp cloth.
3. Make the electrical connections into the outletbox. Fix the wall
plate (C) to the outletbox with screws and silicone it to the ceiling
.
4. Put silicone in all the edge of the wall plate and fix the wall lamp
(E) to it, fixing it by means of the screws (F).
5. Insert an approved bulb and screw the glass in place
.
1. Desenroscar el cristal (A).
2. Colocar las pantallas de plástico (B) en la posición deseada. Para
facilitar su posicionamiento, humedecer el cristal con un trapo
húmedo.
3.Hacer las conexiones eléctricas en la caja de empalmes. Fijar la
placa (C) a la caja de empalmes y sellarla con silicona al techo.
4. Poner silicona en el contorno del florón y fijar sobre él el conjunto
(E) mediante los tornillos (F) suministrados.
5. Colocar la bombilla recomendada y roscar el cristal.
SOME DESIGN ALTERNATIVES
/ ALGUNAS CONFIGURACIONES
Attention
: Use silicone to seal the rose to the wall and to seal the
lamp to the wall plate/
Sellar con silicona el florón a la pared y
también la lámpara al florón.
C
A
B
A
B
E
F


