4
STEP 3
Door Section Placement.
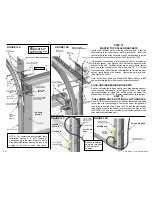
Refer to page 2 for correct placement
of door sections. If the door has a Spring Latch Lock, the #2 door
section is the best location for the outside T-lock handle.
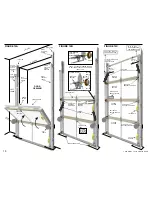
Bottom Reinforcing Angle and Weather Seal.
If not already
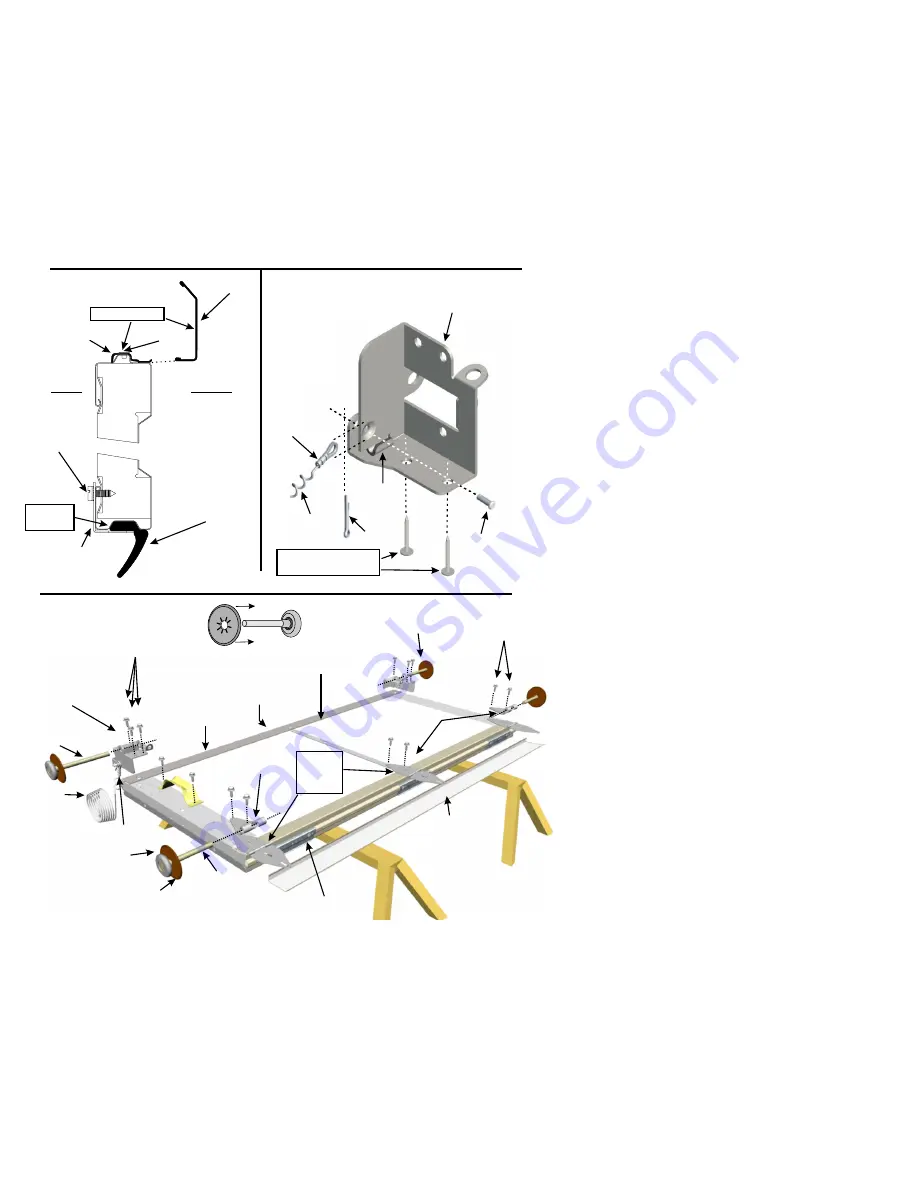
installed, loosely fasten the 1-1/2" X 1-1/2" bottom reinforcing
angle to the bottom inside edge of the #1 door section with 1/4" X 1"
thread forming screws. Fasten along the bottom of the door
section, on each stile location. Tuck the bottom weather seal under
the reinforcing angles, fitting into the configuration of the door
section. Tighten the thread forming screws to hold the bottom
weather seal tight, under the reinforcing angle. (See Figure 3)
The bottom reinforcing angle also acts as a full length step plate on
non-insulated metal doors.
STEP 4
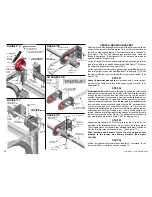
If not already assembled, attach the lift cables to the right and left
lock-on bottom roller brackets with clevis and cotter pins. The Lift
Cable Tension Adjuster helps equalize the right and left lift cables
even if the door hits an object causing side twist. (See Figure 3A)
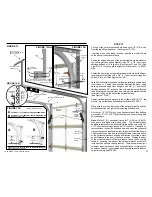
STEP 5
Fasten
the right and left lock-on bottom roller brackets tight
against the bottom corners of the #1 door section. Make sure the
hook on the inside of the lock-on bottom roller bracket is hooked
under the end stile on steel doors. Screws are required to lock-on
bottom roller brackets to wood doors. (See Figure 3A)
The thread forming screws go through the lock-on bottom roller
bracket, the bottom reinforcing angle, the inside return of the steel
door section, and fasten tight into the 1/8" holes in the steel or
wood stile. (See Figures 4 and 4A)
Do not
remove the plastic fasteners that are pressed into the
center stile hinge holes on metal doors. The ¼“ x 1” thread forming
screws easily penetrate and fasten through the thin plastic heads.
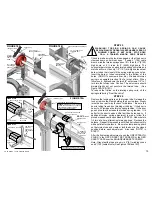
Fasten
the bottom half of the hinges and the #1 roller brackets to
the top of the #1 door section. Wood doors requires hinges to be
fastened face down. Insert all 4 rollers. (See Figure 4)
Note:
The “longer stem” bottom rollers add strength to the door
during earthquakes and high winds.
Also
see “Wood Door Notes” on page 22.
“RIGHT” AND “LEFT” ARE VIEWED FROM INSIDE LOOKING OUT
THROUGH THE DOOR OPENING
FIGURE 3
FIGURE 4
FINGER SHIELD™
FINGER SHIELD CLIP
RIVET
OUTSIDE
INSIDE
¼“ X 1”
THREAD
FORMING
SCREW
1“ (25) BOTTOM
WEATHER SEAL
(2 ½“ (64) OPTIONAL)
1 ½“ X 1 ½”
BOTTOM REINFORCING
ANGLE
LOCK-ON BOTTOM
ROLLER BRACKET
LIFT CABLE
ROLLER
ROLLER
SHAFT
ROLLER
SHIELD
FINGER SHIELD CLIP
(FOR STEEL DOORS)
BOTTOM
WEATHER
SEAL
#1 ROLLER
BRACKET
FINGER SHIELD™
(STEEL DOORS ONLY)
¼“ X1” THREAD
FORMING SCREWS
#1 DOOR SECTION
1 ½“ X 1 ½” BOTTOM
REINFORCING ANGLE
¼“ X 1” THREAD
FORMING SCREWS
HINGE
LIFT CABLE
TENSION ADJUSTER
LONGER STEM
ROLLER
LONGER STEM ROLLER
COPYRIGHT © 2004 MARTIN DOOR
FOR STEEL DOORS
FOR STEEL
AND WOOD
DOORS
ALL HINGES
FASTEN
FACE DOWN
ON WOOD
DOORS
FIGURE 3A
CLEVIS
PIN
COTTER PIN
HOOK
LIFT CABLE
LOCK-ON BOTTOM
ROLLER BRACKET
(INSIDE VIEW)
LIFT CABLE
TENSION ADJUSTER
SCREWS REQUIRED TO
LOCK-ON BOTTOM ROLLER
BRACKETS TO WOOD DOOR


