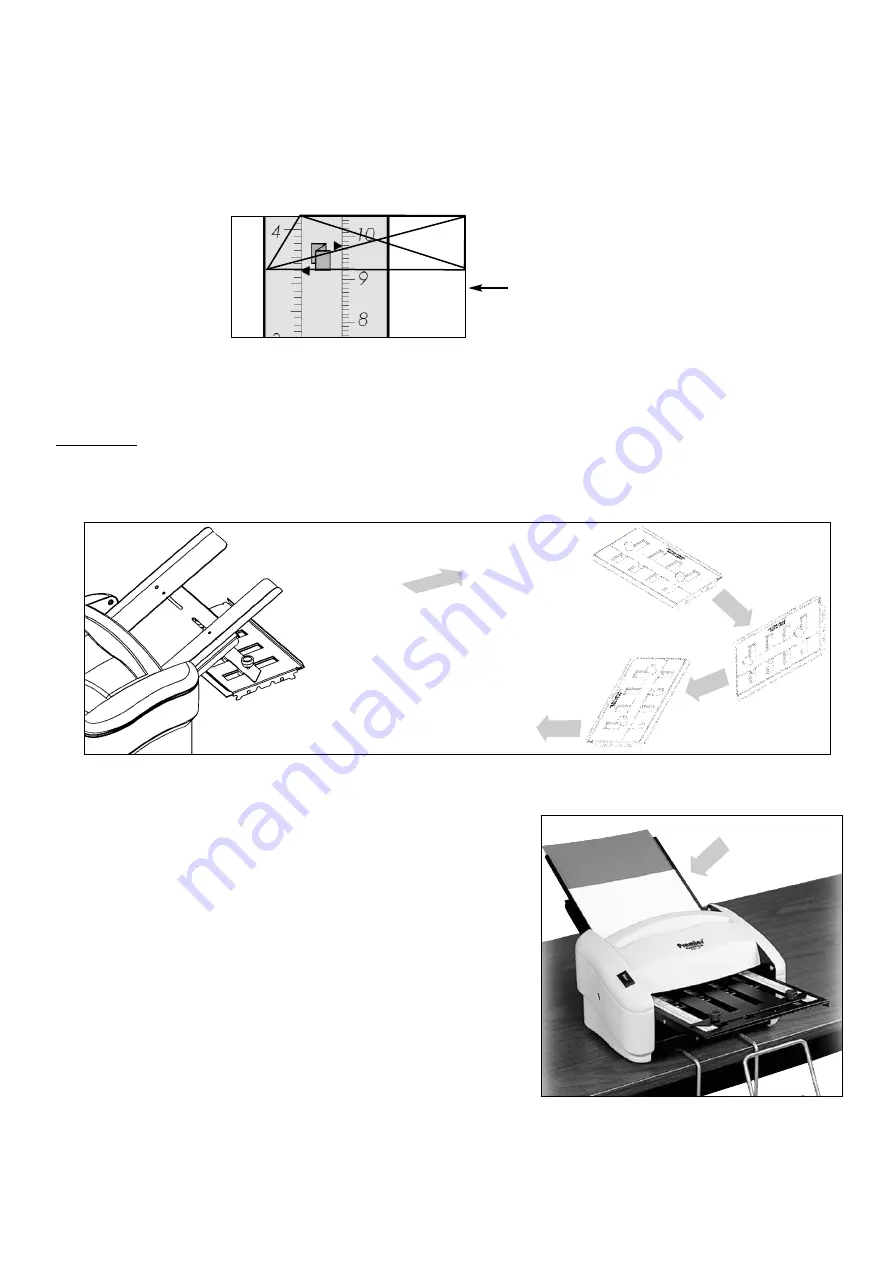
1. Loosen both locking knobs on both folding tables to loosen the paper stops.
2. Locate the icons on the fold table rulers that are the type of fold that the operator desires. Note: The
icons are color coded for clarity as indicated above.
3. Move the Paper stops to the corresponding arrows next to the desired icons.
8 1/2” X 11” paper uses
the inch scale on
the left side of the
rulers. A4 paper
uses the metric
scale on the
right side of the
rulers (see
figure 10).
4. Tighten the paper
stop locking knobs
down to lock the
paper stops into
position.
Half Fold
To set the machine for half fold, you will need to take out the Back Fold Table, reverse it, and re-insert it
(closed end first) see Figure 11. Adjust the Front Fold Table as described in step 3 above.
AUTOMATIC FEEDING OF SINGLE SHEETS
Follow the below steps for clean automatic paper feeding:
1. Square stack of up to 50 sheets of paper by tapping it on all
sides on a flat surface such as a table.
2. Load squared stack of paper into the P7200 feed table, the
top sheet of paper should be in contact with
the black feed tire.
NOTE: In loading the paper, the
stack need only be “pushed” into the feed mechanism
with a light touch. Jamming the stack of paper into
the folder with force will result in feeding problems.
See figures 12 and 13.
3. Turn the folder ‘ON’ by pushing the ‘I’ portion of the ‘I-O-II’
rocker switch. Folding should initiate.
*
Note: Use Martin Yale Static Eliminator
(model 300)
to
remove static and improve machine performance.
Figure 10
Example of a Z-FOLD setting for US Letter 8.5” x 11” paper.
Place stack of
paper here
1. Take out Back Fold Table
Lift up and pull out
from machine
2. Reverse Table
Knobs should
be facing up
3. Insert back into machine
Closed end first,
knobs still facing up
U.S.
8 1/2” X 11”
Metric
A4 Scale
Figure 11
Figure 12
Summary of Contents for RapidFOLD P7200
Page 38: ......


