3
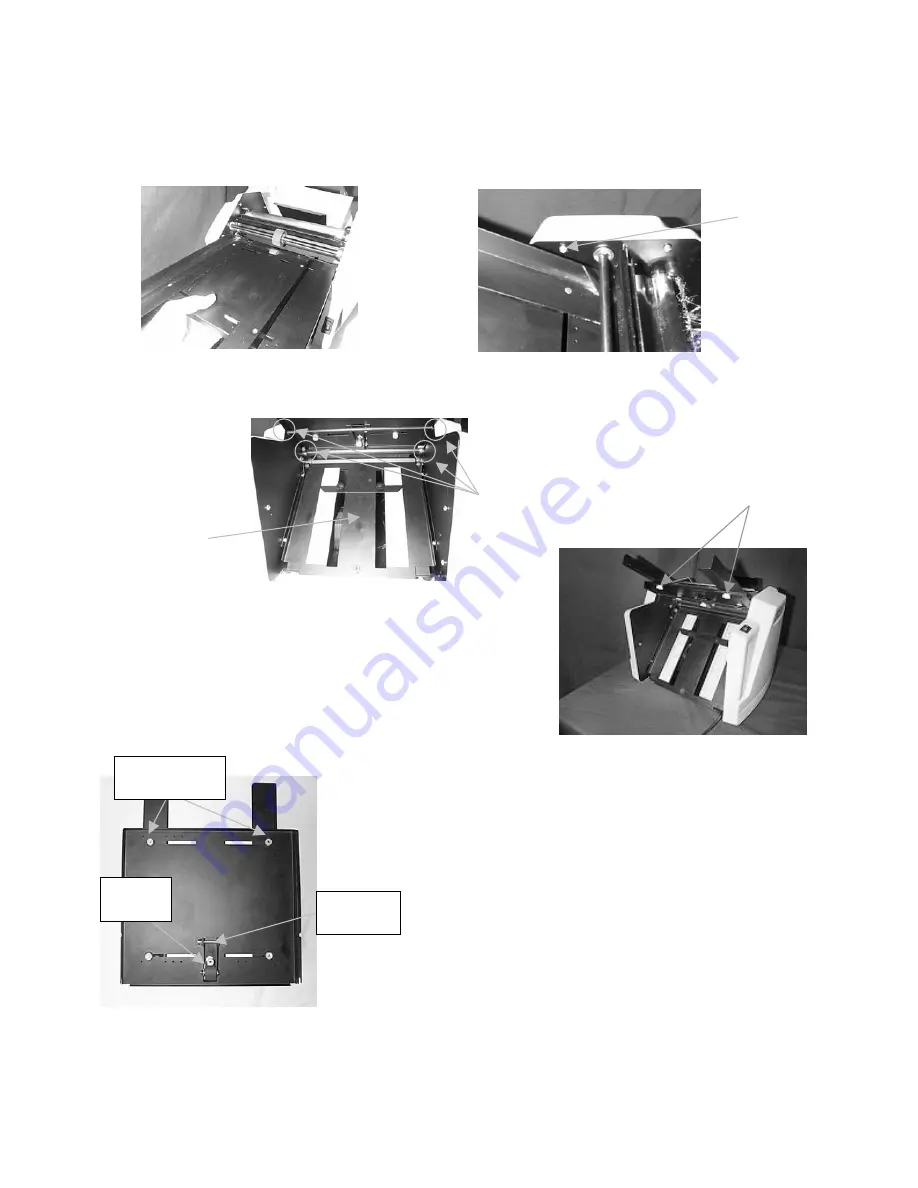
Paper Guide
Thumbscrews
Figure #8
Figure #9
Bottom of Feed Table
Paper Guide
Thumbscrews
Retarder
Assembly
Retarder
Wheel
Figure #5
Starting feed table into folder
Figure #6
Close-up of feed table
Figure #7
View from under feed
pins. Table should be mounted so that it clears the silver Philips head screws on the side frames
(see
figure #6)
. Lower the back of the feed table onto the support bar.
Note: Installing the feed table
requires the red retarder press against the black feed wheel. This is normal and will not damage
the unit. Do not attempt to adjust red retarder to assist feed table installation.
Third
-Verify feed table is seated properly onto support pins and support rod
(see figure #7)
.
2.3 Paper Guides
Note: The folder is preset and tested for a standard 8½” X
11” letter fold.
To adjust the paper
guides, loosen the
four thumbscrews
(see figures #8 and #9)
under the feed table
and slide them outward. Center a single sheet of paper under
the feed wheel. Slide the paper guides in so they are 1mm
away from the sides of the paper, and tighten the thumbscrews
into place. The paper should be between the guides with a
small amount of clearance to feed freely. If necessary, adjust
the angle of the paper guides slightly for straight feeding.
Small locating holes are in the feed table to assist in paper
guide placement
(see figures #10 and #11)
. For example, an
8½” wide sheet of paper results in the outermost holes
intersecting with the edges of the paper guides.
NOTE: Align
locating holes on the
outside
edges of the paper guides
. For
odd widths of paper, these holes can be used as an aid in
keeping the paper guides square with the folder.
Note that
feed table
slides in
below
Philips
head
screw
Feed table installed
on support pins and
rod
First Fold Table


