20SC2 20CC3
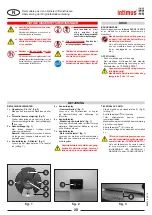
fig. 5
2
fig. 4
8
fig. 6
89823 5 03/13
DISPOSING OF THE MACHINE:
Dispose of the machine in an
environmentally sound fashion at the
end of its useful service life. Do not
dispose of any of the parts included
in the machine or its packaging with
household trash.
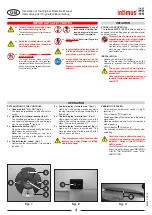
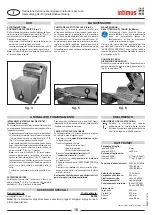
EMPTYING THE RECEPTACLE (Fig. 4):
When the shredded material becomes visible in
the “receptacle full” window (8) (fig. 4) it is time
to empty the receptacle.
Proceed as follows:
- Remove the receptacle from in front of the
machine and empty its contents.
- Replace the empty receptacle under the machine
and push all the way to the back.
Note:
The machine will only run when the recep-
tacle is pushed completely into the machine.
MAINTENANCE
5
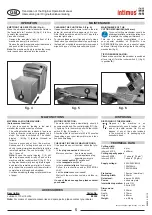
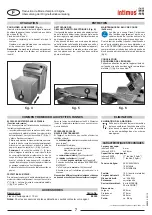
CLEANING THE PHOTOCELLS (Fig. 5):
If paper particles should come to rest in the inlet
guide (for example after a paper jam) it is pos-
sible that the machine will not turn off, due to the
covered light barrier.
To remove these paper strips and also to clean
the photocell, pass another sheet of paper through
the feed slot, or switch the machine to reverse and
wipe both „eyes“ of the photocell with a brush.
TECHNICAL DATA
MALFUNCTIONS
ACCESSORIES
Cutting width:
intimus 20SC2:
4 mm
intimus 20CC3:
4x28 mm
Cutting capacity paper:
intimus 20SC2:
11 sheets* (70g/m
2
)
intimus 20CC3:
7 sheets* (70g/m
2
)
Supply voltage:
220V-240V/50Hz
120V/60Hz
100V/50/60Hz
Pre-fusing:
10 amps (slow-blow)
Working width:
230 mm
Noise level:
approx. 55 dB(A)
Power:
see name plate
Intermittent operation:
8 min ON
30 min OFF
Dimensions:
Width:
350 mm
Depth:
270 mm
Height:
480 mm
Weight:
ca. 9.8 kg
Description
Order-No.
Lubricant, 110 ml bottle
88035
Note:
For orders of special accessories and spare parts, please contact your dealer.
MATERIAL JAM IN THE MACHINE:
(Auto-reverse function)
If a jam is caused by feeding in too much
material, the machine reacts as follows:
- The cutting mechanism is blocked, then runs
briefly in reverse (material is released) and
stops. The motor is switched off. The control
display (6) (fig. 1) lights up. Proceed as
follows:
- Remove excess paper from the machine.
Subsequent the cutting mechanism starts
shortly running forward automatically to cut the
remained material. The control display (6)
(fig. 1) goes off.
Note:
In case the control display (6) still
lights up please switch briefly off and on the
machine with the rocker switch (1) (fig. 2). The
cutting mechanism starts running forward again
and draws the remaining material in. If neces-
sary repeat this procedure until the material is
completely run through and shredded.
- Continue shredding, feeding smaller quantities
of paper.
MOTOR PROTECTION:
The motor shuts down automatically, should it
become overloaded. The control display (7) (fig.
1) lights up. Turn the machine off with the rocker
switch (1) (fig. 2) (position „ “).
Allow the motor to cool down for 25 to 30 minutes
(depending upon room temperature) and then
continue shredding.
CHECKLIST IN CASE OF MALFUNCTIONS:
If the device does not function, check the follo-
wing:
- Is the
plug connected
to the mains?
Mains connection: 2-pole mains switch,
internal appliance plug,
separate power cord
- is the
rocker switch (1)
switched on?
- is the
receptacle
pushed in?
- is there a
material jam
in the machine?
Follow the instructions under ”MATERIAL
JAM”
- has the
motor
been overloaded?
Wait until the motor has cooled, and then re-
start.
If none of the above applies, please contact
your dealer.
OPERATION
* based on A4-paper 70g/m² at 230V -10%, 50Hz
DISPOSING
MAINTANENCE OF THE
CUTTING MECHANISM (4x28 mm):
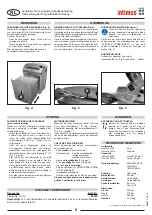
Cross-cut cutting mechanism should be
oiled regular after a certain operating time
to maintain the cutting performance.
This can be easily accomplished if you
pour special shredder oil (Order-No. see
ACCESSORIES) as shown on a sheet of paper
and feed it through the inlet guide to the cutting
mechanism (fig. 6).
TIP FOR ENERGY SAVING:
Please make sure that the shredder is switched
off over night (Turn the rocker switch (1) (fig. 2)
in position ).
GB
Translation of the Original Operation Manual
Übersetzung der Originalbetriebsanleitung


