TG20
6
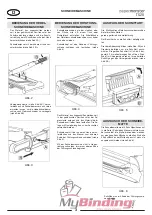
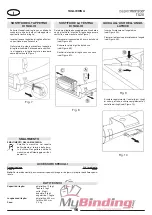
Figure 2
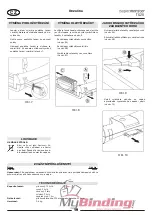
Figure 4
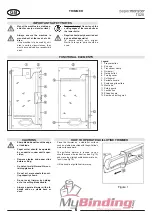
Figure 5
Figure 3
Figure 6
GB
TRIMMER
HOW TO OPERATE GUILLOTINE
TRIMMER
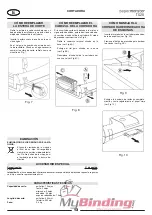
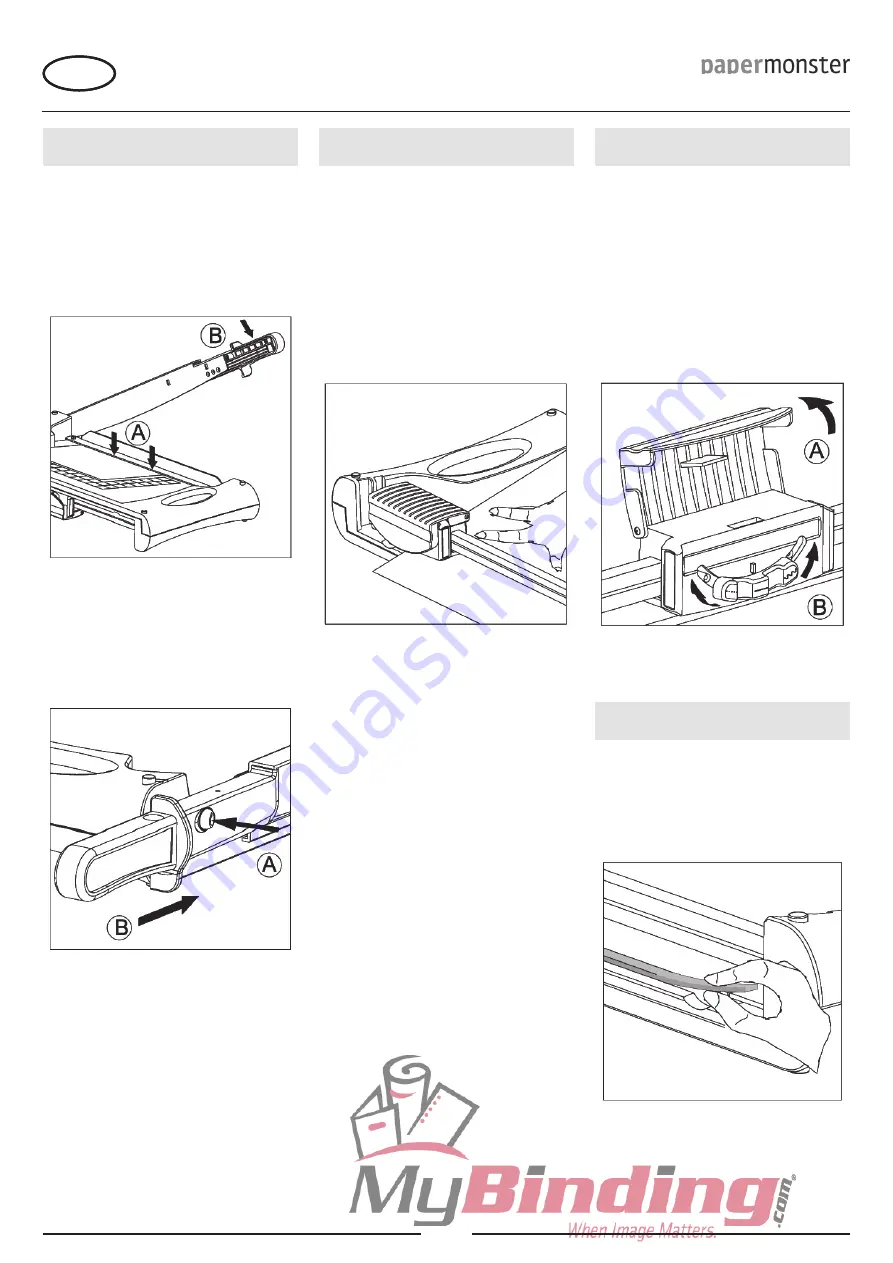
Please press down on the lock button (see
Fig 3A) and push in the sliding handle for-
ward to lock the guillotine trimmer after finish-
ing work. (see Fig 3B)
-
Place material to be trimmed at the selected
position under safety guard and press the
safety guard with one hand while cutting. (see
Fig 2A)
Press down on sliding handle with the other
hand to cut. (see Fig 2B)
-
-
Place the trimmer on a stable flat surface
such as a table or desktop with rotary trim-
mer’s work surface upward.
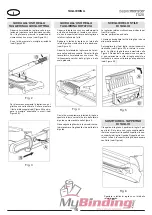
Push and hold the cutting head to one side of
guide rail. (see Fig 4)
Place material to be trimmed at the selected
position under presser plate and hold mate-
rial securely in place with one hand while cut-
ting. Grid pattern and scale can be used for
alignment.
-
-
-
HOW TO OPERATE ROTARY
TRIMMER
Press down on cutter head with the other
hand and slide blade toward the other top of
guide rail. Shown as Fig 4.
Do not make return trip cut with the trimmer.
Always begin cutting from the top of guide
rail.
-
-
CHOOSE THE CUTTING STYLE
Multi-functionality rotary trimmer including three
styles:
straight, perforate, and wave.
The user can choose the cutter style according
to need.
Open the turning cover (see Fig 5A) and turn the
rotary button to choose the cutting style. The cut-
ting style is straight shown as Fig-5. Turning the
rotary button clockwise is for wave cutting and
anticlockwise for perforate cutting (see Fig 5B).
REPLACE THE CUTTING MAT
Move the cutter head to one end of the guide
rail.
-
Cutting mat has 4 cutting positions (2 each side).
When blade does not cut cleanly, you should ei-
ther rotate or flip mat over the new cutting sur-
face. When mat has been worn on all 4 cutting
surfaces, replace it. (see Fig 6)


