PREPARATION:
After unpacking your NEW Booklet Maker, select a fl at and stable surface of a comfortable working height
and position the unit near a power outlet. Securely insert power cord into the 120V outlet.
LOADING THE STAPLERS:
Firmly pull the stapler bottom away from it’s main housing (
see Fig. 1)
and swing open until the spring
loaded slide fully retracts. Insert standard staples into the stapler
(see Fig. 2)
and close the unit. Use
caution and keep fi ngers away from end of stapler when closing to prevent being punctured by staples.
Fig. 1
Fig. 2
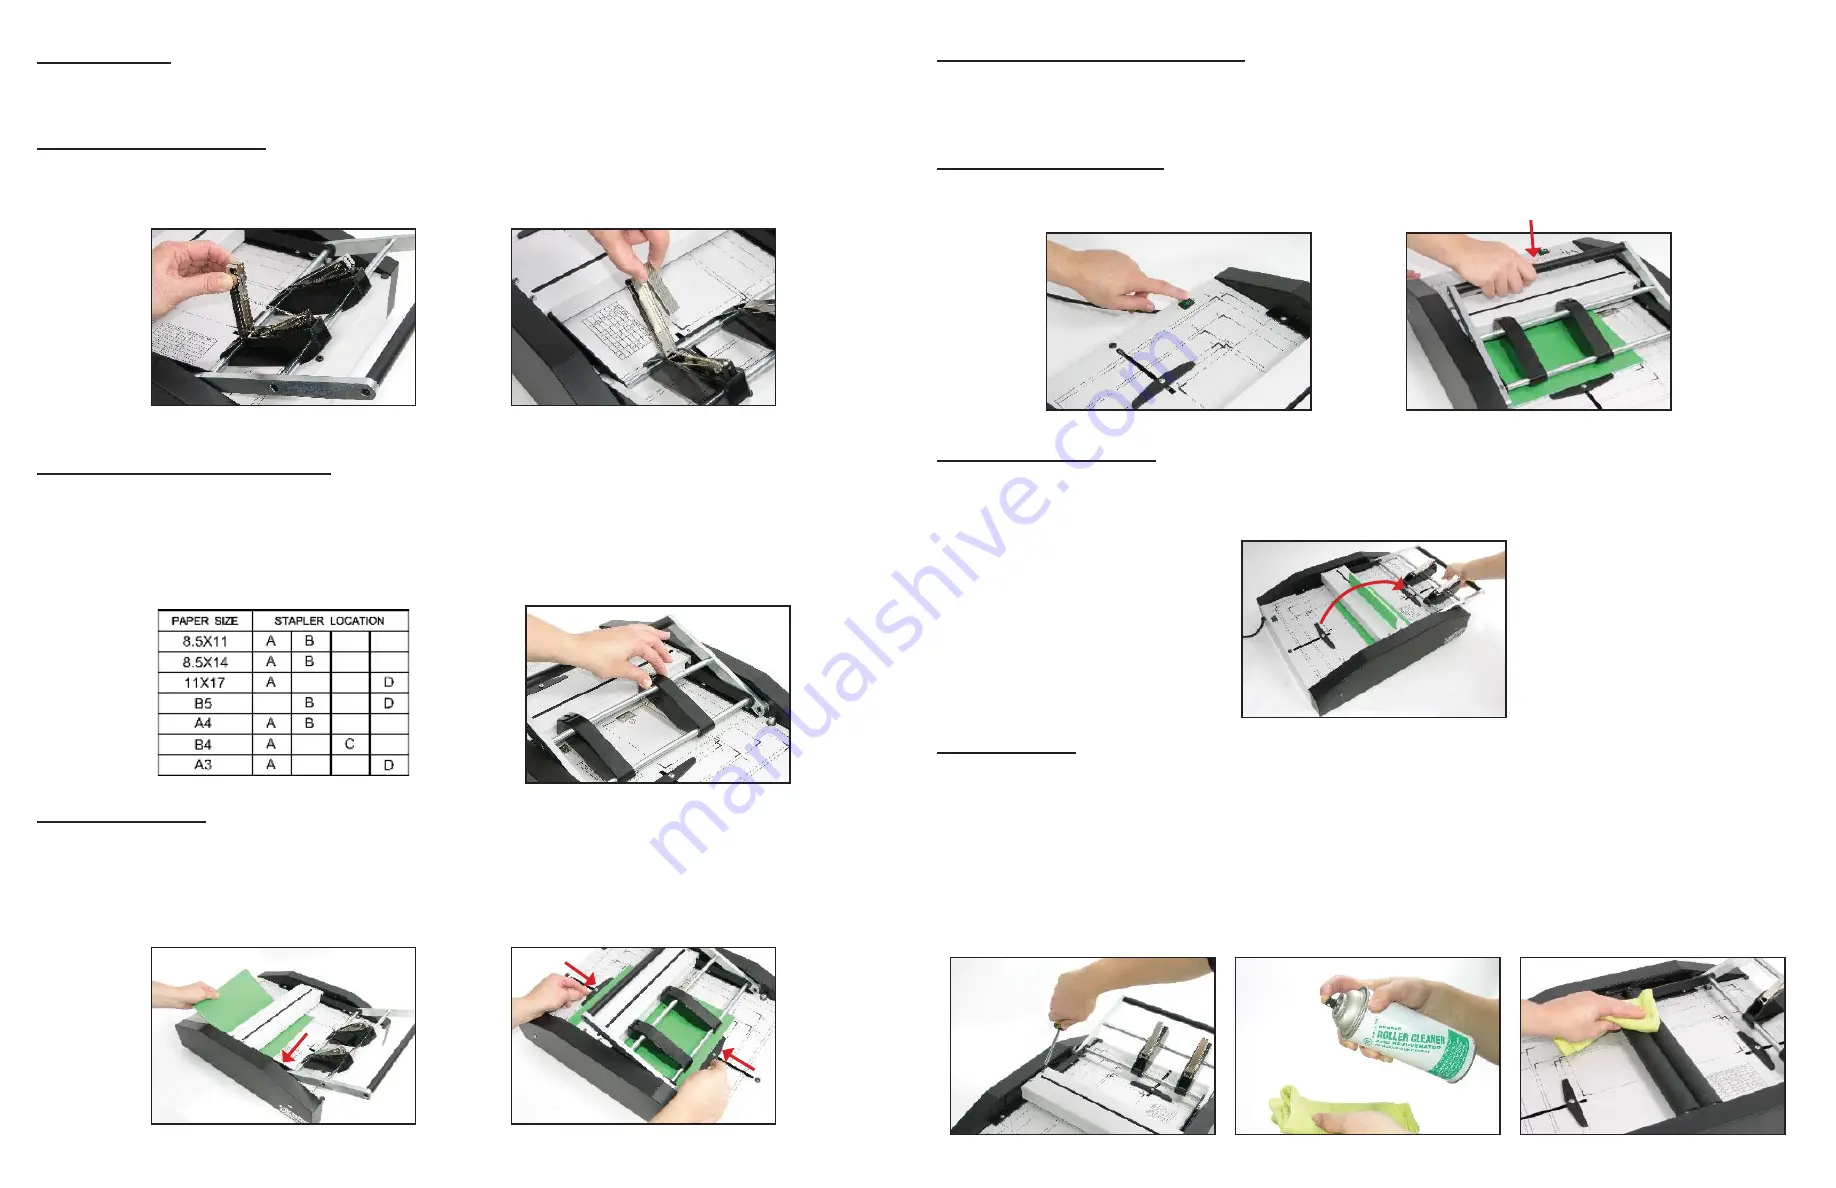
POSITIONING OF THE STAPLERS:
The chart located on top of the unit to the right of center
(see Fig. 3)
will designate the positions of the
staplers for that specifi c paper size.
Grasp the top of the stapler housing
(see Fig. 4)
and position the stapler over the correct letter designation
until you feel the stapler click into position on the locator rod.
Fig. 4
PAPER POSITIONS:
Insert your collated sheets into the unit
(see Fig. 5)
with your cover sheet on top. Place the stack against the
frame rail and both paper guides.
Adjust the paper guides until fi rmly against each side of the paper stack
(see Fig. 6)
. The stack will automati-
cally be positioned due to the synchronized self-centering paper guides.
Fig. 5
Fig. 6
POWER TO THE BOOKLET MAKER:
The power switch is located at the top left corner of your unit. Press “ON” to supply power to the unit (
see
Fig. 7)
. The switch will illuminate when power is on. If switch does not illuminate check the power cord to the
outlet. Turn the unit “OFF” when not in use.
STAPLING THE BOOKLET:
Place your hand on the top handle bar and midpoint between the stapler heads
(see Fig. 8)
. Press
downward fi rmly until the staples have been fully inserted through the paper stack.
Fig. 7
Fig. 8
FOLDING THE BOOKLET:
After the sheets have been stapled, rotate the handle and fi rmly press downward. Your booklet will be folded
and will be ejected
(see Fig. 9)
. Releasing the handle and/or returning it to the stapling position will stop the
folding motor.
Fig. 9
MAINTENANCE:
With extended usage, the folding rollers may become contaminated with inks and/or paper dust and will
require cleaning.
Before performing any maintenance, turn the power switch to the “OFF” position, remove the (4) screws
from the top of the roller cover
(see Fig. 10)
and remove cover.
For cleaning ink contamination, the Martin Yale Roller Cleaner is recommended. Spray a clean cloth
liberally with the cleaner
(see Fig. 11)
and clean the roller surface using fi rm strokes
(see Fig. 12)
. Replace
roller cover before use.
Fig. 10
Fig. 11
Fig. 12
Fig. 3


