


WB6
4
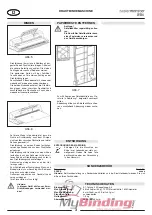
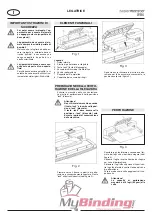
Figure 1
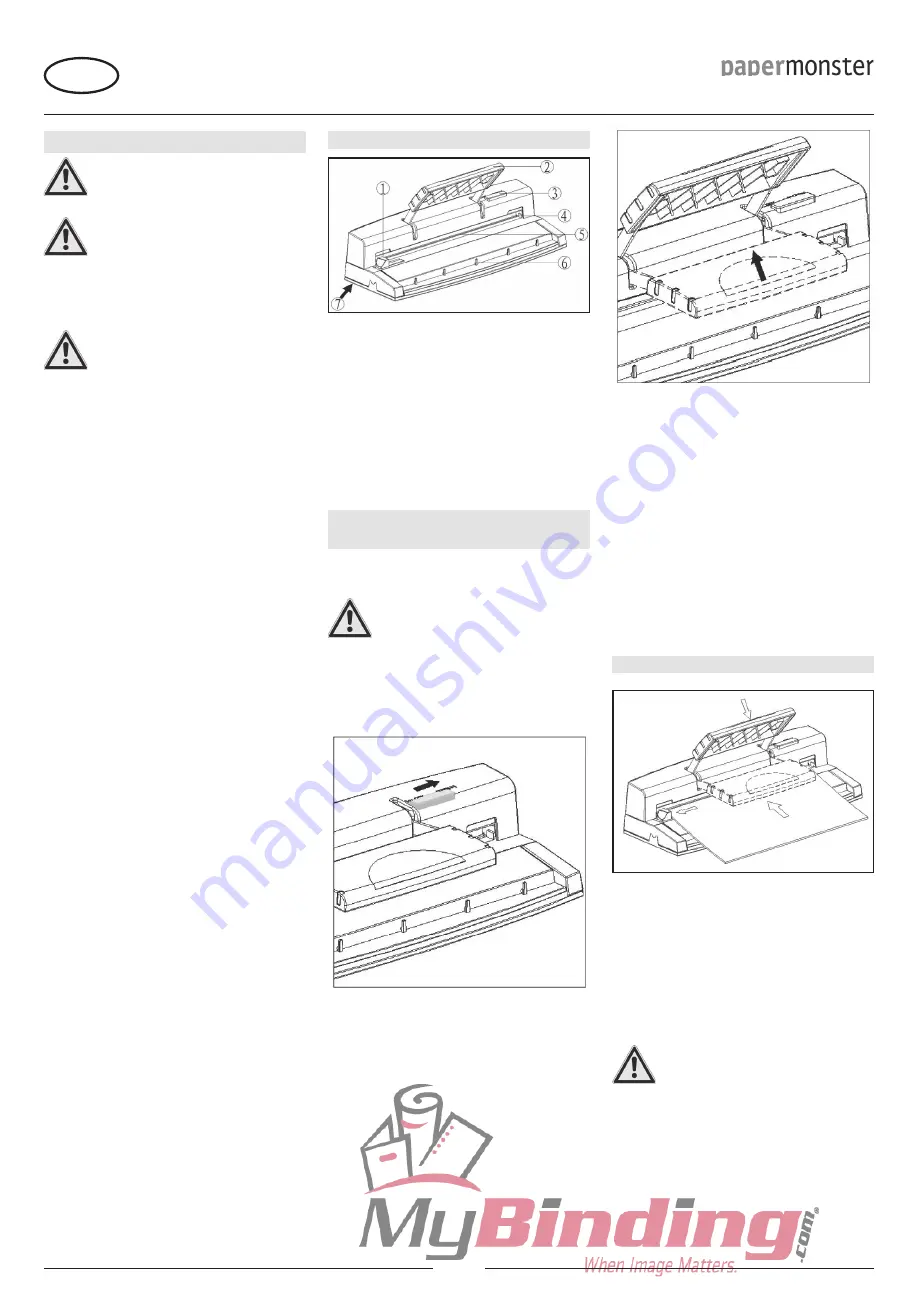
Figure 2
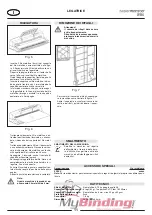
Figure 4
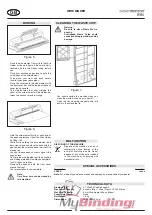
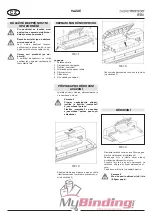
Figure 3
WIRE BINDER
GB
IMPORTANT SAFETY NOTES
Mount the machine in a stable po-
sition for use (on a level surface).
Always ensure the machine is
mounted out of the reach of chil-
dren.
If the cutter is to be used by chil-
dren in certain circumstances, they
must be supervised by a responsible
adult.
Repairs should only be carried out
by a qualified specialist.
To ensure safety, only original
Martin Yale spare parts should be
used.
«
«
«
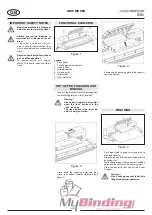
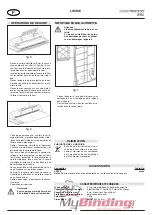
FUNCTIONAL ELEMENTS
Legend
1 Edge guide
2 Punching and binding plate
3 „Lock“ button
4 Wire closing tray
6 Punching slot
7 Wire holder
8 Lid of waste bin
SET UP FOR PUNCHING AND
BINDING
Take out the machine from the package box,
the punching plate is on „lock” position.
Warning!
Please don‘t operate the machine
when the “lock” button is in the
„lock“ position.
The „lock“ button in the „lock“ po-
sition is only for stored.
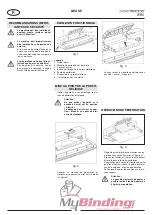
-
Press down the punching plate, and then
move „lock button“ towards right end (see
figure 2).
-
PUNCHING
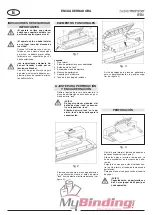
Set Edge Guide to paper size you wish to
bind (see figure 4)
Align sheets and insert edge to be bound into
punching slot.
Jog the sheets they are flush against the edge
guide and the bottom of the punching slot.
Allow the paper to rest against the Paper
Support..
Warning!
Max. Punching capacity is 6 sheets
(80gsm paper) per operation.
-
-
-
-
So release the punching plate to the top posi-
tion (see figure 3).
-
Summary of Contents for PaperMonster 399
Page 1: ...Papermonster 3 1 Personal Wire 32 Double Loop Binder WB6 Instruction Manual ...
Page 15: ...WB6 14 ...
Page 16: ...WB6 15 ...


