


WB6
5
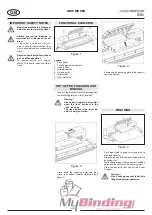
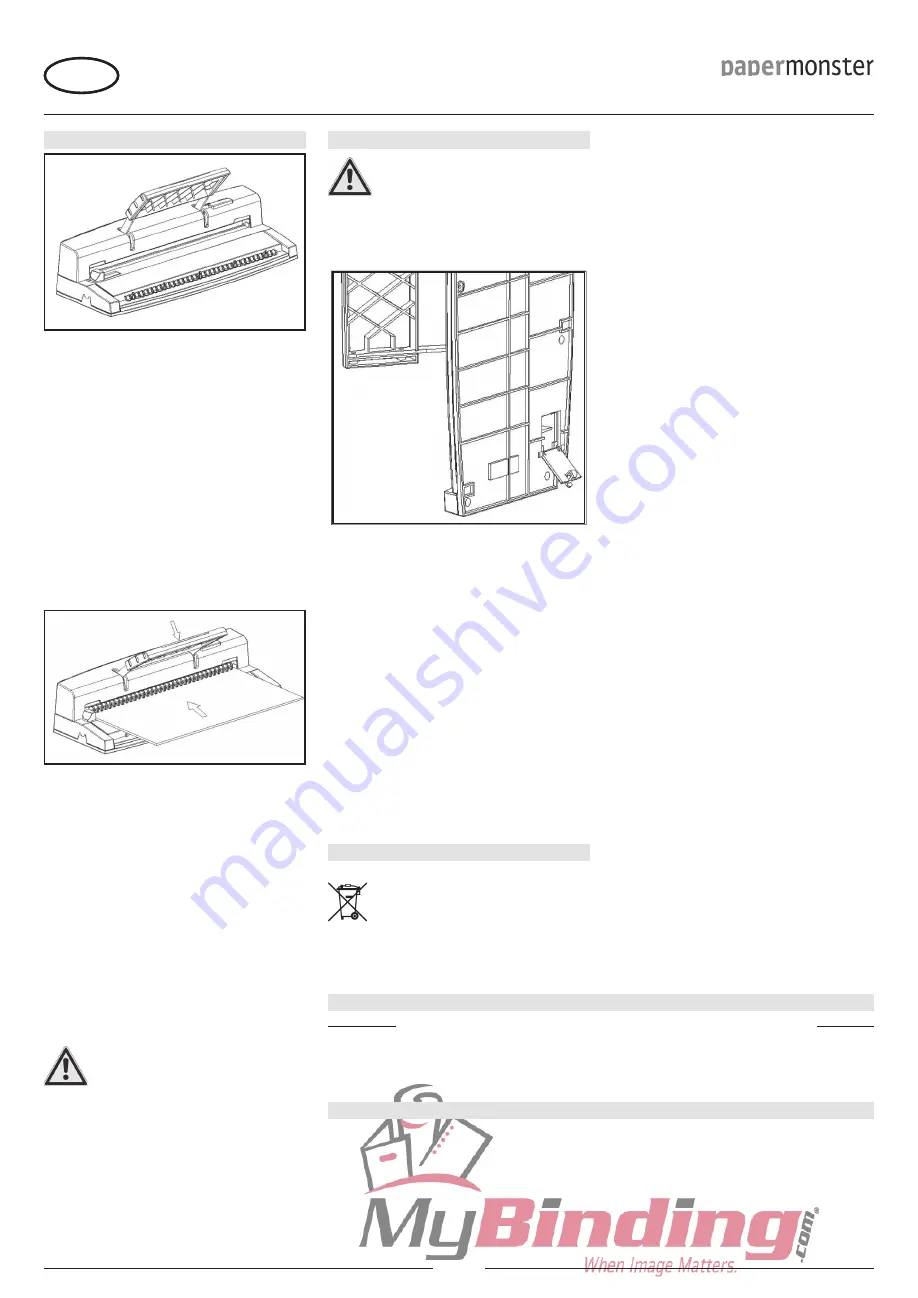
Figure 5
Figure 6
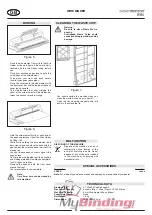
Figure 7
GB
WIRE BINDER
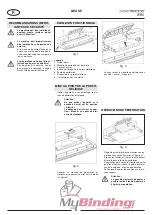
MALFUNCTION
DISPOSING OF THE MACHINE:
Dispose of the machine in an envi-
ronmentally sound fashion at the
end of its usefull service life. Do not
dispose of any of the parts included
in the machine or its packing with
household trash.
SPECIAL ACCESSOIRES
Description
Order-No.
XXXXX
x
xxxx
Note:
For orders of special accessoires and spare parts, please contact your dealer.
TECHNICAL DATA
Binding Style:
3:1 Wire 34 Double-Loop A4
Max Punch Capacity:
6 sheets (80g), 1 sheet Clear PVC 180 Micron
Max Bind Capacity:
6 mm Wire, Approx 45pp x 80gsm
Punch Hole Depth:
Fixed
Net Weight:
1,8 kg
Dimensions
:
360 x 155 x 85 mm
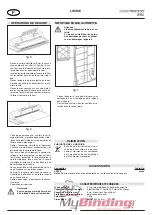
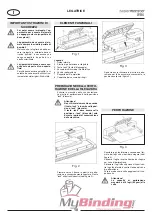
BINDING
Place the wire element (6 mm) into the Wire
Holder as shown in figure 5. Be sure its firmly
secured with the small loops facing toward
you.
Place your punched pages face up onto the
small loops of the wire element.
Then place your front and back covers
face-to-face against each other.
Place the covers onto the wire element with
the front cover first and the inside of the back
cover facing upward.
This step ensures that after crimping the
seam of the wire element will be hidden be-
tween the back cover and last page.
-
-
-
-
-
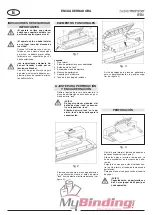
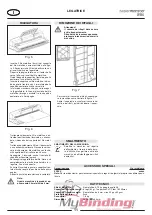
Hold the wire element firmly at each end of
the book and remove it from the Wire Holder
by lifting it off.
While firmly holding the wire element and
document at one end place the book with the
open end of the wire face down into the Wire
closing tray.
You can release book so it rests against the
support rack.
To crimp the wire together pull the punching
and binding plate down toward you complete-
ly until it goes no further.
Remove the book and flip the front cover
around the front.
Your presentation is now complete.
Note:
Only 6 mm wire can be closed by
this machine!
-
-
-
-
-
-
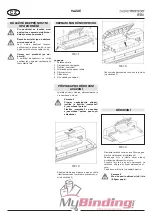
CLEANING THE WASTE CHIP
Warning!
Be sure to clean Waste Bin fre-
quently.
Overloaded Waste Chips could
cause punching jam and machine
damage.
You should upside the machine when you
clean the waste bin shown as in figure 7.
Open the lid and empty the waste chip into
dustbin, then close the lid.
-
-
Summary of Contents for PaperMonster 399
Page 1: ...Papermonster 3 1 Personal Wire 32 Double Loop Binder WB6 Instruction Manual ...
Page 15: ...WB6 14 ...
Page 16: ...WB6 15 ...


