Installation
11
Bracket adjustment
The mounting bracket can be positioned along the length of the power
section and 70/-210 degrees from the 6 o’clock position shown
inside front cover.
This procedure requires 4 mm and 5 mm Allen wrenches (hex keys).
Warning!
Allow the fixture to cool before handling.
To adjust the mounting bracket:
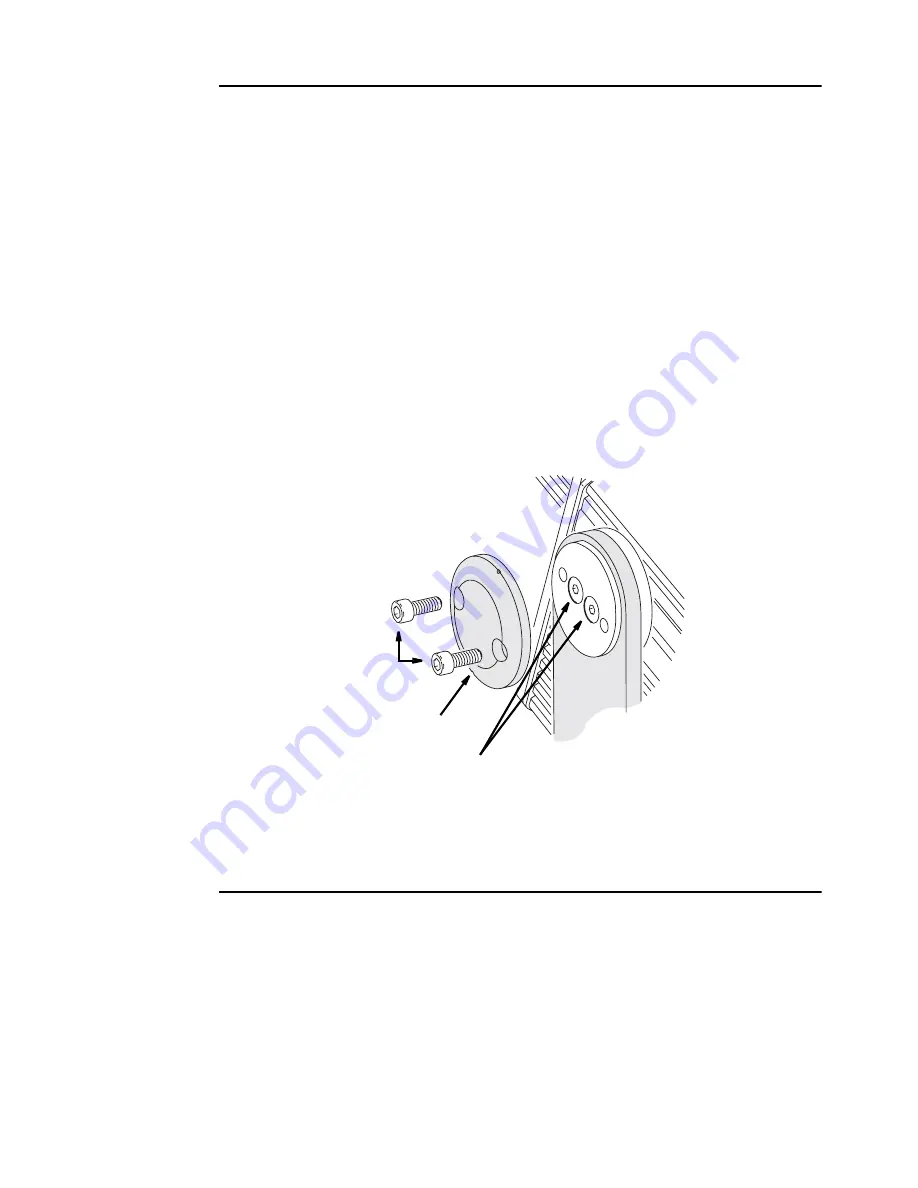
1 To adjust the bracket’s lateral position, remove the outer discs on each side
of the bracket. Loosen, but do not remove, the bracket screws. Slide the
fixture to the desired position and retighten the bracket screws. Replace the
outer discs.
2 To adjust the tilt angle, loosen the tilt-lock screws. Turn the fixture to the
desired angle and retighten the screws.
AC power
Do not connect the Exterior 200 to an electrical dimmer system: doing so
can damage the electronics.
Warning!
Disconnect the fixture from AC power before removing any
cover.
Important! Verify voltage and frequency settings before applying power.
outer disc
bracket screws
tilt-lock screws
Summary of Contents for Exterior 200
Page 1: ...Exterior 200 user manual mar tinar chi tect ura l ...
Page 5: ...5 SECTION 1 GETTING STARTED ...
Page 27: ...General operation 27 SECTION 2 STAND ALONE OPERATION ...
Page 48: ...48 Synchronous triggering during Stand Alone operation ...
Page 49: ...Synchronous triggering during Stand Alone operation 49 SECTION 3 DMX CONTROL ...
Page 53: ...DMX Controller operation 53 SECTION 4 OPTICS ...
Page 57: ...Lens options 57 SECTION 5 SERVICE AND TROUBLESHOOTING ...
Page 65: ...SECTION 6 REFERENCE ...
Page 75: ......


