56
Lens options
1 Remove the front cover and seal. Loosen the screws in the bottom lens
bracket a few turns to release the pressure in the rubber washers. Remove
the top lens bracket. Remove the existing lens.
2 Place the new lens flat against the metal plate with the rougher side in or out
as described above. Replace the top lens bracket. Tighten the 4 lens
bracket screws just enough to squeeze the rubber washers out against the
lens and hold the lens with light pressure. Do not overtighten.
3 To replace the front cover:
a Drive all screws to the bottom without tightening (finger-tight only).
b Starting with one screw and working around in a circle, tighten all screws
partially, with low torque.
c Gradually tighten to a maximum torque of 1.8 - 2.0 Nm. (1.3 - 1.5 Ft-Lbs),
still working around in a circle. Note that if you tighten the screws to more
than the maximum torque the front glass might break.
Changing the front glass
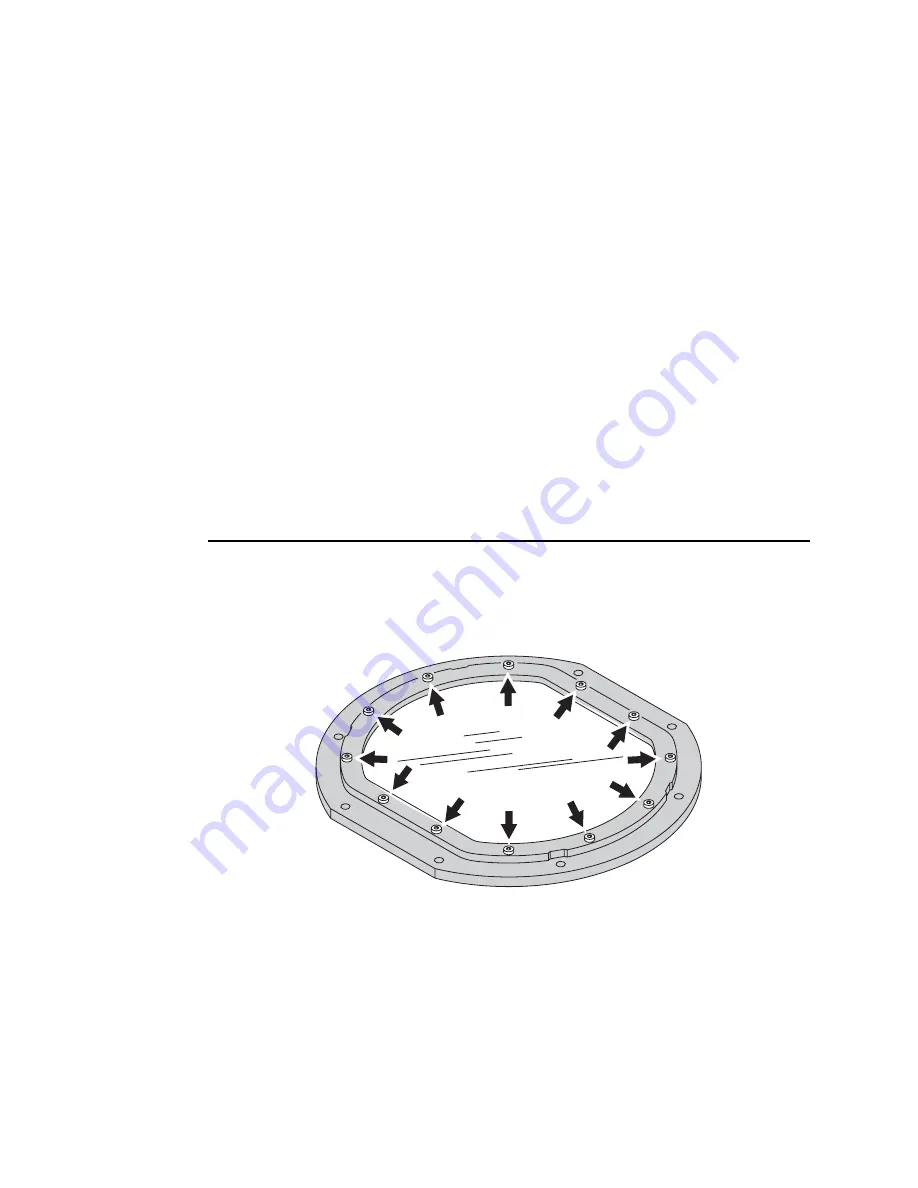
The front glass is held inside the front cover by 12 M4 screws. If replacing
the front glass, these screws must be gradually tightened to a maximum
torque of 1 Nm (0.8 Ft-Lbs), working around in a circle.
Front glass screws, M4: Torque = 1 Nm (0.8 Ft-Lbs)
Summary of Contents for Exterior 200
Page 1: ...Exterior 200 user manual mar tinar chi tect ura l ...
Page 5: ...5 SECTION 1 GETTING STARTED ...
Page 27: ...General operation 27 SECTION 2 STAND ALONE OPERATION ...
Page 48: ...48 Synchronous triggering during Stand Alone operation ...
Page 49: ...Synchronous triggering during Stand Alone operation 49 SECTION 3 DMX CONTROL ...
Page 53: ...DMX Controller operation 53 SECTION 4 OPTICS ...
Page 57: ...Lens options 57 SECTION 5 SERVICE AND TROUBLESHOOTING ...
Page 65: ...SECTION 6 REFERENCE ...
Page 75: ......


