14
P3-100 user manual
Stage 1: Setting up the on-screen ‘virtual installation’
1. Prepare a plan of what panels the physical installation will contain and
where those panels will be located.
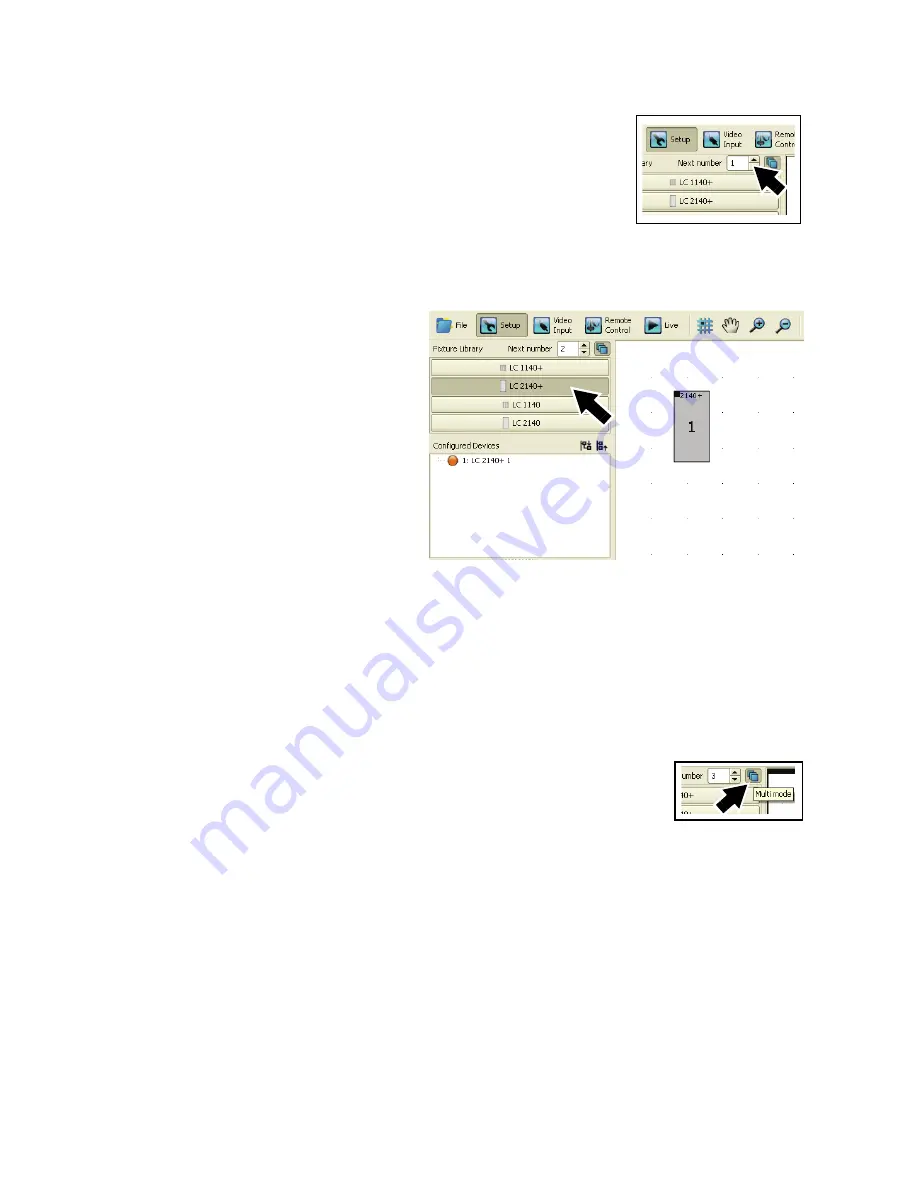
2. See Figure 7. Check that
Next number
(arrowed) is set to
1
.
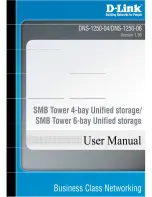
3. See Figure 8. Click on the panel
type in the
Fixture Library
(arrowed) that corresponds to the
panel you want to place in position
number
1
in the installation.
4. The white square on the right of
the screen corresponds to the
video frame the P3-100 is set to
display. Move the cursor over this
area. The cursor will take the form
of a panel. Click to approximately
position panel number
1
on the
video frame.
5. See Figure 8. The panel will be
placed on the video frame in your
on-screen installation labelled with
display address
1
in the center of
the panel icon. The panel will also
appear with an orange
‘bullet-point’ in the
Configured
Devices
list. The number in the
Next number
box will jump to
2
,
ready for the next panel.
If the P3-100 has auto-detected panels that are connected to it and these panels have the same display
address as the panels you add to the on-screen installation, they will automatically be assigned to the
panels in your on-screen installation and appear in the
Configured Devices
list with a green bullet-point.
Ignore this for the moment: you will assign physical panels to the on-screen installation later.
See Figure 9.
Multi-mode
is active by default. In this mode, you simply click on
the video frame each time you want to position another panel (if you de-activate
Multi-mode
, you must click on the desired panel type in the
Fixture Library
each time you want to add a panel to your on-screen installation).
6. Continue adding panels, selecting a different panel type in the
Fixture Library
if necessary. To remove a
panel from the on-screen installation, right-click on it and select
Delete
.
7. When you have added the correct number and type of panels to your on-screen installation, click on the
currently selected panel type in the
Fixture Library
to deselect it and stop adding panels. Your virtual
Figure 7: Next number
Figure 8: Fixture Library
Figure 9: Multi-mode
active


