3. OPERATION
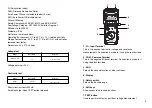
3.1 Installing or Replacing Batteries
1. Disconnect the test leads from any live source, turn the rotary
switch to OFF and remove the test leads from the input terminals.
2. Remove the battery cover using a Phillips screwdriver.
3. Install six LR6s (alkaline) battries.
4. Replace the battery cover.
3.2 REPLACING FUSES
The condition of the fuse can be checked as follows:
Unplug the test leads.
Select continuity (
K
Ω
, or
)))
, or
40
Ω
), press the
TEST
button. If
the fuse is defective the display will read
FUSE Err
. The fuse is
located in the battery compartment and is used to protect the
tester if the leads are connected to a live circuit when the
continuity/resistance ranges are selected.
Switch the tester off and release the
TEST
button. Remove the
battery cover using a Phillips screwdriver and carefully remove the
failed fuse from the metal clips, fit the correct replacement and
re-fit cover.
DO NOT OPERATE THE TESTER WITH THE BATTERY COVER
REMOVED.
WARNING
When the meter shows the "
" sign the batteries must be replaced to
maintain correct operation. Follow the procedure over.
5
16
Since some jurisdictions do not allow limitation of the term of an
implied warranty, or exclusion or limitation of incidental or
consequential damages, the limitations and exclusions of this
warranty may not apply to every buyer. If any part of any provision of
this warranty is held invalid or unenforceable by a court or other
decision-maker of competent jurisdiction, such holding will not affect
the validity or enforceability of any other provision or other part of that
provision.
Nothing in this statement reduces your statutory rights.


