background image


24 

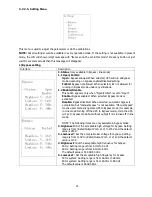
3-7-2-5. Setting Menu 


This menu is used to adjust the parameters or do the calibrations. 

NOTE:

 Not all settings could be available in every operation mode; If the setting is not available in present 

mode, the LCD will show prompt message with “Item can not be set in this mode”. Press any button or just 
wait for several seconds then this message will disappear.


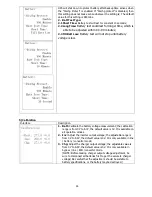
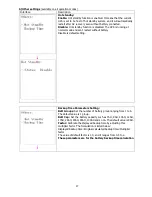
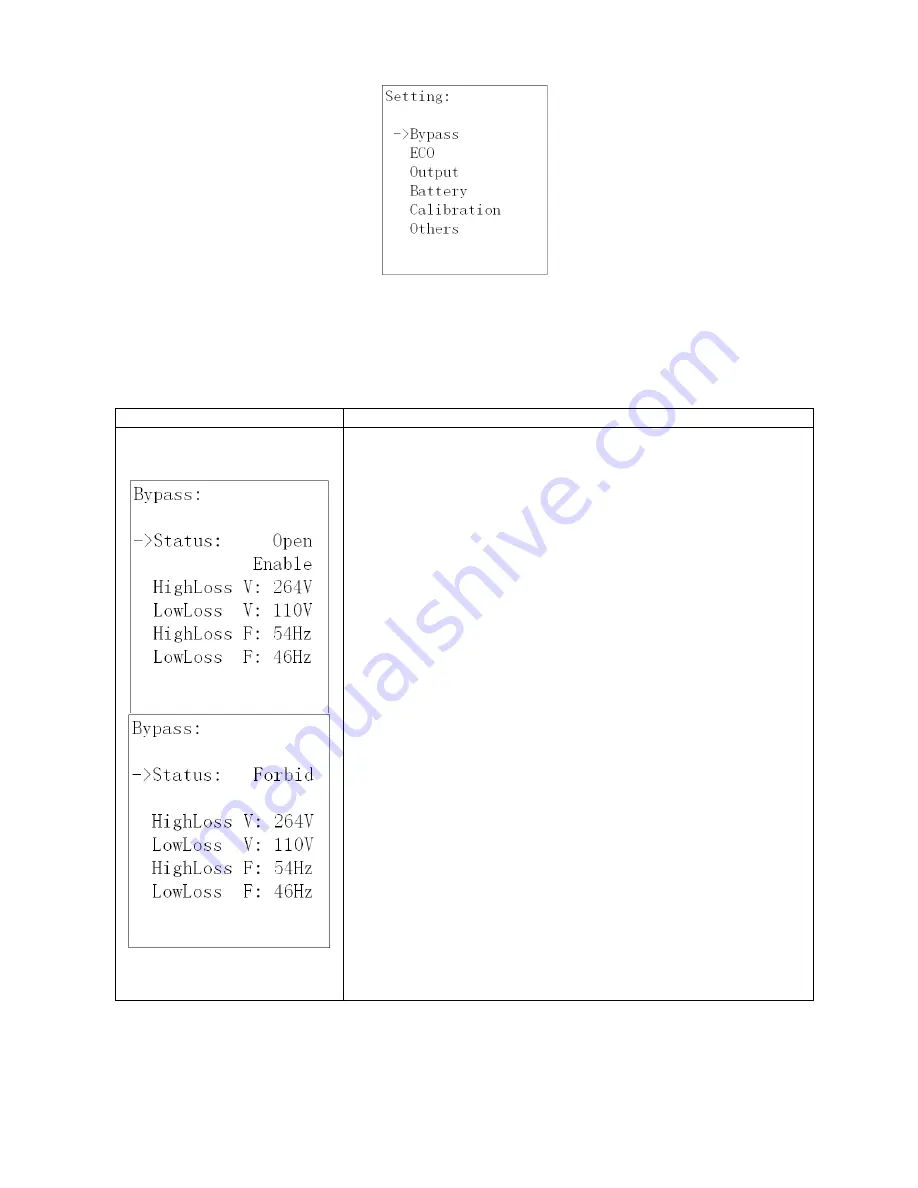
1) Bypass setting 

Interface 

Description 


1. Status 

(only available in bypass / line mode)


1.1 Open/Forbid: 

Open:

 Bypass allowed. When selected, UPS will run at Bypass 

mode depending on bypass enabled/disabled setting.


Forbid:

 Bypass not allowed. When selected, it’s not allowed for 

running in Bypass mode under any situations. 

1.2 Enable/Disable 

This option appears only when “Open/Forbid” is set to “Open”. 

Enable: 

Bypass enabled. When selected, Bypass mode is 

activated. 

Disable: 

Bypass disabled. When selected, automatic bypass is 

acceptable, but “manual bypass” is not available. “Manual bypass” 

means users manually operate UPS to Bypass mode (for example, 

in Line mode turning off the UPS to Bypass mode). Here the UPS 

will go to bypass mode but without output if it is turned off in line 

mode. 


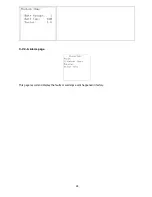
NOTE: The following items are only available in bypass mode: 

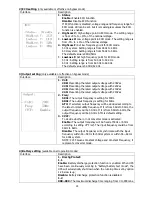
2. HighLoss V: 

Set the acceptable high voltage for bypass. Setting 

range is from (Rated Output Volt +11V) to 276V and the default 

value is 264V.


3. LowLoss V:

 Set the acceptable low voltage for bypass. Setting 

range is from 110V to (Rated Output Volt - 11V) and the default 

value is 110V. 

4. HighLoss F: 

Set the acceptable high frequency for bypass. 

50 Hz: Setting range is from 51Hz to 54 Hz.   

60 Hz: Setting range is from 61Hz to 64Hz. 

The default value is 54.0Hz/64.0Hz. 

5. LowLoss F

: Set the acceptable high frequency for bypass. 

50 Hz system: Setting range is from 46.0Hz to 49.0Hz. 

60 Hz system: Setting range is from 56.0Hz to 59.0Hz. 

The default value is 46Hz/56Hz. 


Summary of Contents for Ultima RT 10K

Page 1: ...l Info MarusonUSA com Copyright 2014 All Rights Reserved Maruson is a registered trademark of Maruson Technology U S Trademark Reg No 3 150 957 All other trademarks are the property of their respectiv...

Page 2: ...instructions in this manual strictly Save this manual properly and read carefully the following instructions before installing the unit Do not operate this unit before reading through all safety info...

Page 3: ...INE DIAGRAM 7 2 4 RACK TOWER TYPE INSTALLATION 8 2 5 SINGLE UPS INSTALLATION 9 2 6 OUTPUT CONFIGURATION 12 2 7 PARALLEL UPS INSTALLATION 14 3 OPERATIONS 15 3 1 OPERATING MODE STATUS DESCRIPTION 15 3 2...

Page 4: ...ts Install your UPS in a structurally sound area Your UPS is extremely heavy take care when moving and lifting the unit Only operate your UPS at indoor temperatures between 32 F and 104 F between 0 C...

Page 5: ...be done only by trained personnel During any service work to the UPS it should be turned off or manually bypassed Note that potentially lethal voltages exist within this unit as long as the battery su...

Page 6: ...terminals with any object Unplug and turn off the UPS before performing battery replacement Battery replacement should be performed only by authorized service personnel using the same number and type...

Page 7: ...cable and one share current cable option One battery cable option Tower type installation supporters Rack type installation ears Battery cable connection ears Sixteen M4 screws and four metal plates N...

Page 8: ...5 Diagram 3 Battery Pack Rear Panel Diagram 4 ISO Bank Rear Panel Overlook Diagram 5 ISO Bank Output Terminal...

Page 9: ...onnector 4 Share current port for parallel function 5 Parallel port for parallel function 6 Intelligent slot 7 EMBS External Maintain Bypass Switch port 8 Cooling fan 9 External battery connector 10 I...

Page 10: ...mal operation To activate EPO function please remove the jumper WARNING The EPO circuit is an IEC 60950 safety extra low voltage SELV circuit This circuit must be separated from any hazardous voltage...

Page 11: ...in 3U Assemble two feet and one short extension as one tower stand shown in step 1 Align the two stands approximately 35cm apart in step 2 Then put UPS module in the stands as shown in step 3 Step 1 S...

Page 12: ...ant to help you lift the UPS module and slide it onto the mounting shelves attach the UPS module to the rack by passing the screws nuts and washers user provided through its mounting ears and into the...

Page 13: ...ety and efficiency NOTE 2 The cable for Ultima RT 10K L should be able to withstand over 63A current It is recommended to use 8AWG or thicker wire for safety and efficiency NOTE 3 The selections for c...

Page 14: ...d then install the battery pack Pay highly attention to the rated battery voltage marked on the rear panel If you want to change the numbers of the battery pack please make sure you modify the setting...

Page 15: ...the final output of system The UPS s output connect to the input of ISO bank Option 1 The output of ISO bank There are 2 sets of low voltage outputs 104 110 115 120V on L1 N1 L2 N2 Each set is able t...

Page 16: ...d to L1 N1 and L2 N2 and connect high voltage load to L1 N2 NOTE 1 If any load current in L1 N1 or L2 N2 is higher than 25A in 6K L model and 42A in 10K L model the UPS will still operate normally wit...

Page 17: ...14 2 7 Parallel UPS Installation For parallel UPS installation please contact your dealer for more professional support...

Page 18: ...or 60 Hz through the inverter The UPS will still charge battery at this mode There is no bypass at this mode Battery Mode When the input voltage is out of the acceptable range or power failure and th...

Page 19: ...ery pack breaker is at ON position Set the external mains input breaker to ON position then the fan will be running and the UPS supplies power to the loads via bypass The UPS is operating in Bypass mo...

Page 20: ...ed carefully to see if capacity of the UPS can cover due to the huge starting power consumption of this kind of load 3 If the UPS is overload the buzzer will beep twice every second 4 When the UPS is...

Page 21: ...d also enter the control menu to select the instruction Turn Off to turn off the UPS Please refer to the section of LCD operation NOTE Here Turn Off means that UPS is not working on line converter ECO...

Page 22: ...am below Main Interface Control Measurement Information Setting Alarm Page 1 Input Page 2 Output Page 3 Battery Page 4 Bypass Page 5 Charger Turn On Batt Test Mute Para Unlock Page 1 Bypass Page 2 ECO...

Page 23: ...attery mode according to the setting and input status in reverse you could press the OFF ESC button to turn off the UPS to bypass mode or shutdown This has been mentioned on above section of Single UP...

Page 24: ...mode or ECO mode or battery mode according to the setting and input status NOTE you could turn on UPS by pressing the ON ENTER button in home page no necessary enter into this control menu b On line...

Page 25: ...icon 4 Para Unlock That means the instruction of parallel protection unlock It only appears when the LCD shows the warning 3F Para Protect that means the parallel system is in protection and could not...

Page 26: ...ent value of the parameters such as voltage current frequency power capacity time etc Press UP or DOWN to explore the pages 3 7 2 4 Information Pages These pages display the information of parameters...

Page 27: ...le Bypass disabled When selected automatic bypass is acceptable but manual bypass is not available Manual bypass means users manually operate UPS to Bypass mode for example in Line mode turning off th...

Page 28: ...put voltage with 230Vac 240 Presenting the rated output voltage with 240Vac 2 Freq 50Hz The output frequency is setting for 50Hz 60Hz The output frequency is setting for 60Hz ATO If selected output fr...

Page 29: ...Description 1 Batt Calibrate the battery voltage measurement the calibration range is from 0V to 5 7V the default value is 0V It is available on all operation modes 2 Inv Adjust the inverter output v...

Page 30: ...tery Disable is default setting Backup Time Parameters Setting Batt Groups Set the number of battery group ranging from 1 to 6 The default value is 1 group Batt Cap Set the battery capacity such as 7A...

Page 31: ...28 3 7 2 6 Alarm page This page record and display the faults or warnings event happened in history...

Page 32: ...n device Warning 07 Over Charge 1 Battery numbers and its setting is not matching 2 Charger voltage is too high the charger failed 1 Correct the battery number or its setting 2 Disconnect the battery...

Page 33: ...start up NOTE Be careful to check the UPS operation mode parallel or single and the connections If the parallel cable is not connected in the parallel mode the UPS may be destroyed Fault 01 Bus Start...

Page 34: ...el cable well Fault 36 OP I Unbalance The output current is extremely unbalanced between the paralleled UPSs there is some error in the parallel system Contact the dealer for repair Fault 41 Over Temp...

Page 35: ...Store the UPS covered and upright in a cool dry location During storage recharge the battery in accordance with the following table Storage Temperature Recharge Frequency Charging Duration 25 C 40 C...

Page 36: ...ity 9 hours recover to 90 capacity Charging Current 1 A 10 max Charging Voltage 273 V based on battery numbers at 20 pcs Long Run Model Type Depending on applications Numbers 18 20 Charging Current 4...

Reviews: