212
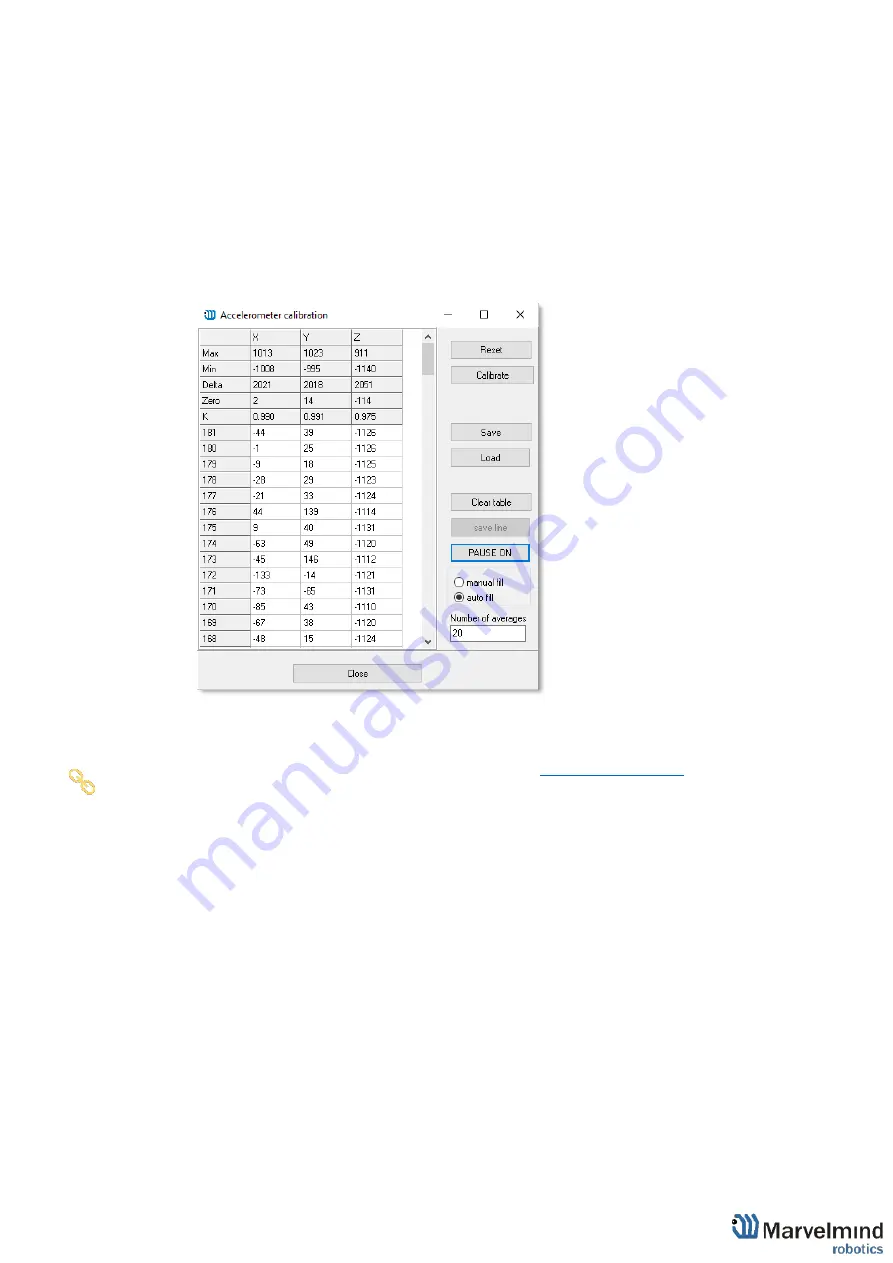
Then take the beacon (hedgehog) and tilt it to each side towards the ground (about 6
times). Rotate a little. You need to achieve x y z values:
-
When antenna directs down
z
≈ - 1000
=> antenna directs up
z ≈ 1000
-
So, one of the axis values always will be - + 1000. Others
⩽
10
(preferably less 10,
but 25 is also permissible)
-
Every time before calibrating the hedgehog click
Pause
-
Accelerometer calibrator will choose the best value for each axe. At the end click
Calibrate
and close the window
-
Calibration is needed to determine
g
value for each accelerometer axe
Start the system:
Setup the system as usual. It is described in paragraph
After the ultrasound tracking has started, select the hedgehog in the Dashboard, go to
menu
Interfaces
(on the right) and enable
Processed IMU data
. After that, it is
recommended to bring the hedgehog to real estate and press the ZERO IMU button (right-
bottom) for additional sub-calibration of the gyro. After 5 seconds the hedgehog will begin
streaming the processed IMU data.
Summary of Contents for IA-04-2D-Badge
Page 1: ...Marvelmind Indoor Navigation System Operating manual v2022_08_24 www marvelmind com ...
Page 21: ...21 Beacon Mini TX Beacon Industrial RX Beacon Industrial TX Metal ...
Page 22: ...22 Industrial Super Beacon Plastic ...
Page 39: ...39 Figure 7 One External Microphone connection Figure 8 Two External Microphone connection ...
Page 44: ...44 Figure 3 One external microphone soldering Figure 4 Two external microphones soldering ...
Page 46: ...46 Figure 7 Two External Microphones final view Figure 8 Two External Microphones final view ...
Page 118: ...118 6 6 28 The system is now fully operational ...
Page 180: ...180 Floor 5 is enabled Floor 4 is enabled ...
Page 190: ...190 Z X ...
Page 207: ...207 Choose color and press OK Color applied Now background matches floorplan ...
Page 214: ...214 9 24 IMU axis positioning Super Beacon IMU axis positions HW v4 9 IMU axis positions ...
Page 215: ...215 Mini TX IMU axis positions Mini RX beacon IMU axis positions ...
Page 219: ...219 Real time player turned on ...
Page 223: ...223 10 2 Beacon HW v4 9 external interface 4x4 pinout top view ...
Page 224: ...224 10 3 Modem HW v4 9 external interface pinout top view ...
Page 232: ...232 If everything done correctly Own IP address will change Static IP settings completed ...
Page 238: ...238 How to change modes Choose hedge Go to Ultrasound TDMA mode Left Click to change ...


