14
GX5280 User Guide
Handle the board by the edges. Avoid contact with any components on the circuit board.
Caution -
Do not insert or remove any board while the computer is on. Turn off the power from the PXI
chassis before installation.
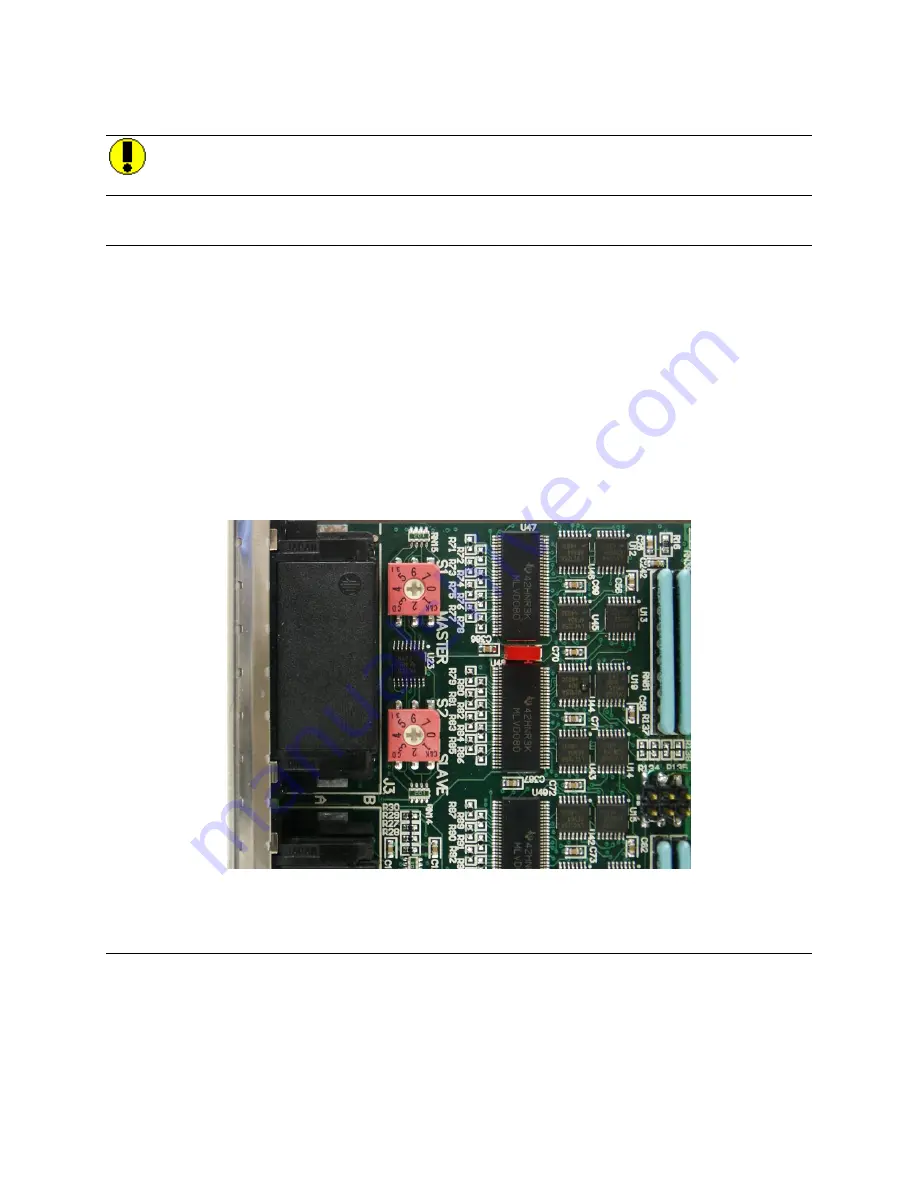
Board Selector Switch Settings
Any DIO domain is based on a single Master board and additional Slaves boards. The slaves are basically an
expansion of the number of channels in the domain. Each board needs to have a unique number so it can be identify
by the software as part of the specified domain, i.e. all Slave boards that belongs to the same Master are in the same
domain. You must setup the domain by setting the Master and Slave selectors as shown in Figure 3-2.
Master
The selector switch designated as “Master” sets the Master domain that the board belongs to. The
adjacent selector switch (designated as “Slave”) needs to be set to 0.
Slave
The selector switch designated as “Master” sets the Master domain that the Slave board belongs to. The
selector switch designated as “Slave”, select the Slave number in that domain and can be set to any
number from 1 to 7 for a total of 7 Slaves (number 0 is saved for the Master).
1.
Set unique board number for each new DIO board using the selector switch on the front.
2.
Lay boards out in slot order with the master in the middle (the Master should have equal number of Slaves from
both sides).
Figure 3-2: Master and Slave Switch Selectors
Installing a Board
Install each of the boards as follows:
1.
Turn off the PXI chassis and unplug the power cord.
2.
Locate a PXI empty slot on the PXI chassis.
3.
Place the module edges into the PXI chassis rails (top and bottom).
Summary of Contents for GX5280
Page 2: ......
Page 8: ...vi GX5280 User Guide ...
Page 16: ...8 GX5280 User Guide ...
Page 26: ...18 GX5280 User Guide ...
Page 38: ...30 GX5280 User Guide ...
Page 46: ...38 GX5280 User Guide ...


