background image

MXC

+

ECC

Air

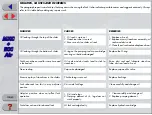
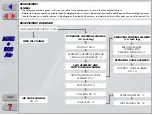
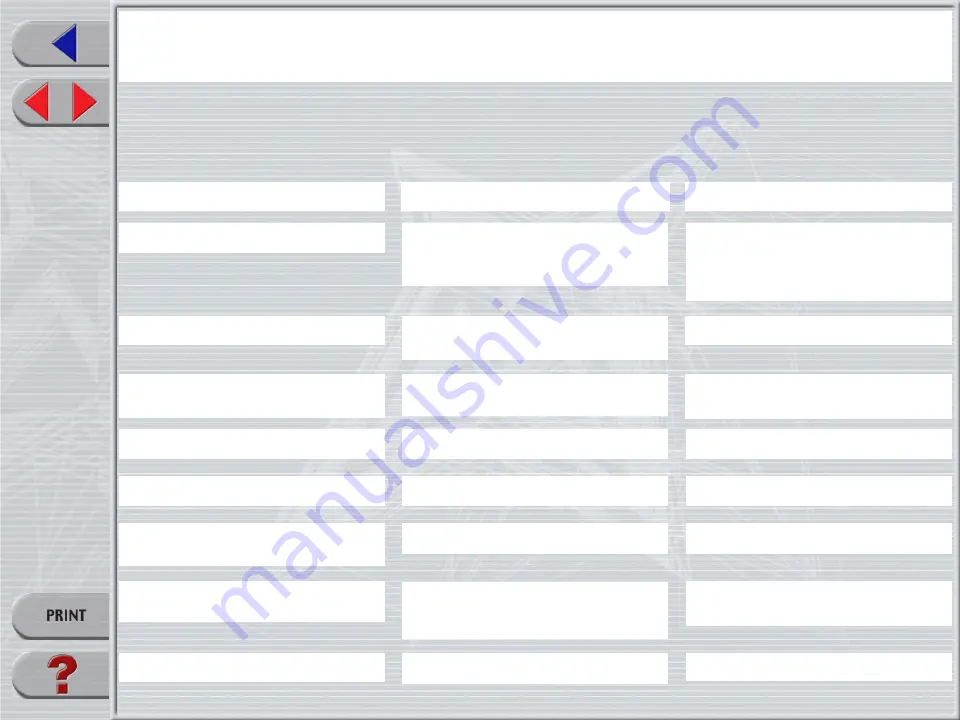
FAILURES, CAUSES AND REMEDIES

This paragraph reports some failures that may occur when using the fork. It also indicates possible causes and suggests a remedy. Always
refer to this table before doing any repair work.

FAILURES

CAUSES

REMEDIES

Adjuster position does not affect fork
operation

1. Dirt inside legs
2. Pumping element of r.h. leg does not

work properly.

1. Clean carefully and change oil
2. Replace pumping element.

Oil leaking through the bottom of slider

O-ring on the pumping rod or on cartridge
securing nut bottom damaged

Replace the O-ring

Oil leaking through the top of the slider

1. Oil seal is worn out
2. Stanchion tube is scored
3. Excessive dirt on slider oil seal

1. Replace oil seal
2. Replace crown/stanchions assembly, oil

seals and dust seals

3. Clean the oil seal seat and replace oil seal

Fork has not been used for some time and
is locked out

Oil seals and dust seals tend to stick to
stanchions

Raise dust seal and lubricate stanchion
tube, dust seal and oil seal

Pressure drop

Cap valve damaged

Replace cap and/or valve

Excessive play of stanchions in the sliders

Pilot bushings worn out

Replace bushings

Fork rebounds too fast in any adjuster
position

Dirt inside fork legs

Clean carefully and change oil

Fork does not react to rebound lock

LH fork cartridge faulty

Replace hydraulic cartridge

Summary of Contents for MXC+ECC Air

Page 1: ... with a special preferably biodegradable solvent such as trichloroethane or trichloroethylene 4 Before reassembling lubricate all parts in contact with each other using silicone fat spray or a specific oil for seals 5 Always grease the lip seal rings before reassembling 6 Use wrenches with metric size only Wrenches with inch size might damage the fastening devices even when their size is similar t...

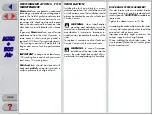
Page 2: ...Oil leaking through the top of the slider 1 Oil seal is worn out 2 Stanchion tube is scored 3 Excessive dirt on slider oil seal 1 Replace oil seal 2 Replacecrown stanchionsassembly oil seals and dust seals 3 Clean the oil seal seat and replace oil seal Fork has not been used for some time and is locked out Oil seals and dust seals tend to stick to stanchions Raise dust seal and lubricate stanchion...

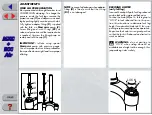
Page 3: ...very delicate operation that should be carried outwithextremecare Theinstallationshould always be checked by one of our Technical Service Centers WARNING Steer tube headset mounting and adjustment must be carried out in compliance with the headset manufacturer s instructions Improper in stallation may jeopardize the safety of the rider To replace it contact one of our Technical Service Centers wit...

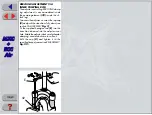
Page 4: ...gauge Use of improper tools or other procedures than specified ones might lead to improper inflating NOTE incaseofairleakageswhenadapter fitting D is fitted ensure that the O ring D1 is not damaged REBOUND LIMITER only left leg In case of hard uphill path fork leg rebound can be locked for improved behavior Position the knob 4 on l h fork leg top to LOCK to lock rebound limit in this posi tion thi...

Page 5: ...r h fork leg To access the adjuster unscrew the top cap 8 and push the stanchions fully down see section DISASSEMBLY Fig 2 Fit the supplied hexagon rod E into the stanchion tube and into the adjuster inner hole Rotatetheadjusterclockwiseforharder damping counterclockwise to soften it Refit the cap 8 and tighten it to the specified torque see section REASSEMBLY Fig 29 ...

Page 6: ...e which other parts you need to remove first DISASSEMBLY DIAGRAM FOOT NUT FIG 5 SEAL ASSEMBLY AND PILOT BUSHING CHANGE CROWN AND STANCHIONS ASSEMBLY FIG 7 STOP RING FIG 9 OIL SEAL FIG 10 UPPER WASHER FIG 11 PILOT BUSHING FIG 12 HYDRAULIC CARTRIDGE REBOUND SPRING AND WASHER FIG 6 HYDRAULIC CARTRIDGE CHANGE l h fork leg FORK OIL CHANGE STANCHION TUBE CAP FIG 1 2 3 AIR VALVE CHANGE FIG 15 REPLACING P...

Page 7: ...e rebound limiting knob 4 FIG 2 Depressurize each fork leg see section ADJUSTMENT Unscrew the caps 8 and 6 with a 21 mm socket wrench Remove the caps complete with O ring 5 from the stanchion tubes FIG 3 only left leg Lock the check nut 34 and remove the cap 6 from hydraulic cartridge end 11 ...

Page 8: ...ork leg oil follow the proce dureasdescribedinsection REASSEMBLY from Fig 27 to Fig 30 HYDRAULIC CARTRIDGE CHANGE AND PUMPING ROD CHANGE FIG 5 Turn the fork leg upside down and unscrew the foot nuts 20 by the use of a 15 mm socket wrench complete with O Rings 19 FIG 6 only left leg Remove the hydraulic cartridge 11 com plete with rebound spring 9 and foot washer 23 see exploded view from the l h s...

Page 9: ...sembly 1 from the sliders 18 FIG 8 Remove the dust seal 13 from the top of the sliders using a small screwdriver FIG 9 Remove the stop ring 14 from the sliders by placing the screwdriver bit in one of the three openings on the stop ring IMPORTANT when removing the stop ring make sure not to damage its seat ...

Page 10: ...MPORTANT when removing the oil seal make sure not to damage its seat Once removed the oil seals should not be used again FIG 11 Remove the upper washer 16 from the slider FIG 12 Fit the bit of a small screwdriver into upper edge slot of the pilot bushing 17 and lift gently Pull the bushing out of the slider and make all necessary changes ...

Page 11: ... Pull the valve assembly out of the tube with one finger in the following order covering 39 valve 38 and washer 28 REPLACING AIR VALVE FIG 15 This operation can be performed when fork is fully assembled and fitted on bike but only after draining inner pressure If the air valve is disassembled with the fork removed keep the fork vertical so as to avoid any oil leakage Remove the air valve 41 and it...

Page 12: ...ess the oil seal until it touches the lower washer by using the above seal press REASSEMBLY CAUTION before reassembling all metal components should be washed carefully with inflammable preferably biodegrad able solvent and dried with compressed air PILOT BUSHING AND SEAL ASSEMBLY FIG 16 Check that no dirt or debris is between slider and bushing Insert the pilot bushing 17 into place so that it adh...

Page 13: ...or replaced the valve unit and after having cleaned the inside of the tube reassemble Assemble valve components in correct sequence cov ering 39 valve 38 and washer 28 Then fit pumping rod 32 with seal ring 31 and rebound spring 29 into the valve assembly FIG 19 Insert the stop ring 14 into the slider making sure it is properly seated into place Use buffer B to properly seat the ring into the slid...

Page 14: ... any damages to sealing surfaces keep the stan chions duly lubricated and squared into the sliders Press the crown and stanchions assembly fully down and check that threaded the end of pumping element 32 is coming out through the bottom of the r h slider Check to see that the stanchions slide unre stricted by cycling the fork up and down several times The tube should slide freely inside the seal a...

Page 15: ...roke by pumping them up and down several times HOW TO FILL WITH OIL FIG 27 Pour oil little by little when the stanchions are fully down and then pump with the crown so as to have a better filling Check that the oil level H is as required in both legs HYDRAULIC CARTRIDGE RE ASSEMBLY left leg FIG 25 Push the stanchions up to slider bottom Fit the hydraulic cartridge 11 complete withreboundspring 9 a...

Page 16: ... fit caps 6 and 8 by hands Tighten both caps to 20 Nm FIG 28 onlyleft leg Screw the cap 6 on hydraulic cartridge end 11 unti it rests against the rod Lock check nut 34 on cap to the specified torque FIG 30 left leg only Set rebound limiting knob 4 on RH leg adjuster and tighten screw 3 to the torque of 1 5 Nm ...

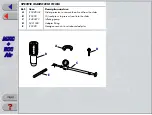
Page 17: ...ription and use A R 5089 AB Slider protector to remove the oil seal from the slider B R 5090 Oil seal press to press oil seal into the slider C R 4008 C Inflating pump D 5321038 Adapter fitting E R 5085 Hexagon wrench to set rebound adjuster A B D C E ...

Reviews: