WIRELESS
SETTING UP
9
Wireless Microphone
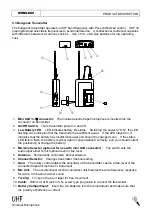
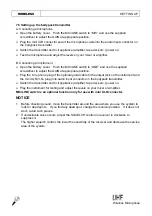
7.5 Setting up the bodypack transmitter
A. Connecting a microphone
Ø
Open the battery cover. Push the MIC/LINE switch to
“
MIC
”
and use the supplied
screwdriver to adjust the GAIN at appropriate position.
Ø
Plug the mini XLR connector end of the microphone cable into the audio input connector on
the bodypack transmitter.
Ø
Switch the transmitter and hi-fi appliance (amplifier, tape deck etc.) power on.
Ø
Test the microphone and adjust the levels on your mixer or amplifier.
B. Connecting an instrument
Ø
Open the battery cover. Push the MIC/LINE switch to
“
LINE
”
and use the supplied
screwdriver to adjust the GAIN at appropriate position.
Ø
Plug the 6.3
j
phone plug of the optional guitar cable to the output jack on the instrument and
the mini XLR (3.5
j
plug) into audio input connector on the bodypack transmitter.
Ø
Switch the transmitter and hi-fi appliance (amplifier, tape deck etc.) power on.
Ø
Play the instrument for testing and adjust the levels on your mixer or amplifier.
MIC/LINE switch is an optional function only for use with mini XLR connector.
NOTICE
1. Before checking sound, move the transmitter around the area where you use the system to
look for dead spots. If you find any dead spot, change the receiver position. If it does not
work, avoid such places.
2. If undesirable noise occurs, adjust the SQUELCH control on receiver in clockwise to
suppress it.
The higher squelch control, the lower the sensitivity of the receiver and decrease the service
area of the system.

