7
546565.A.3 - May 2019
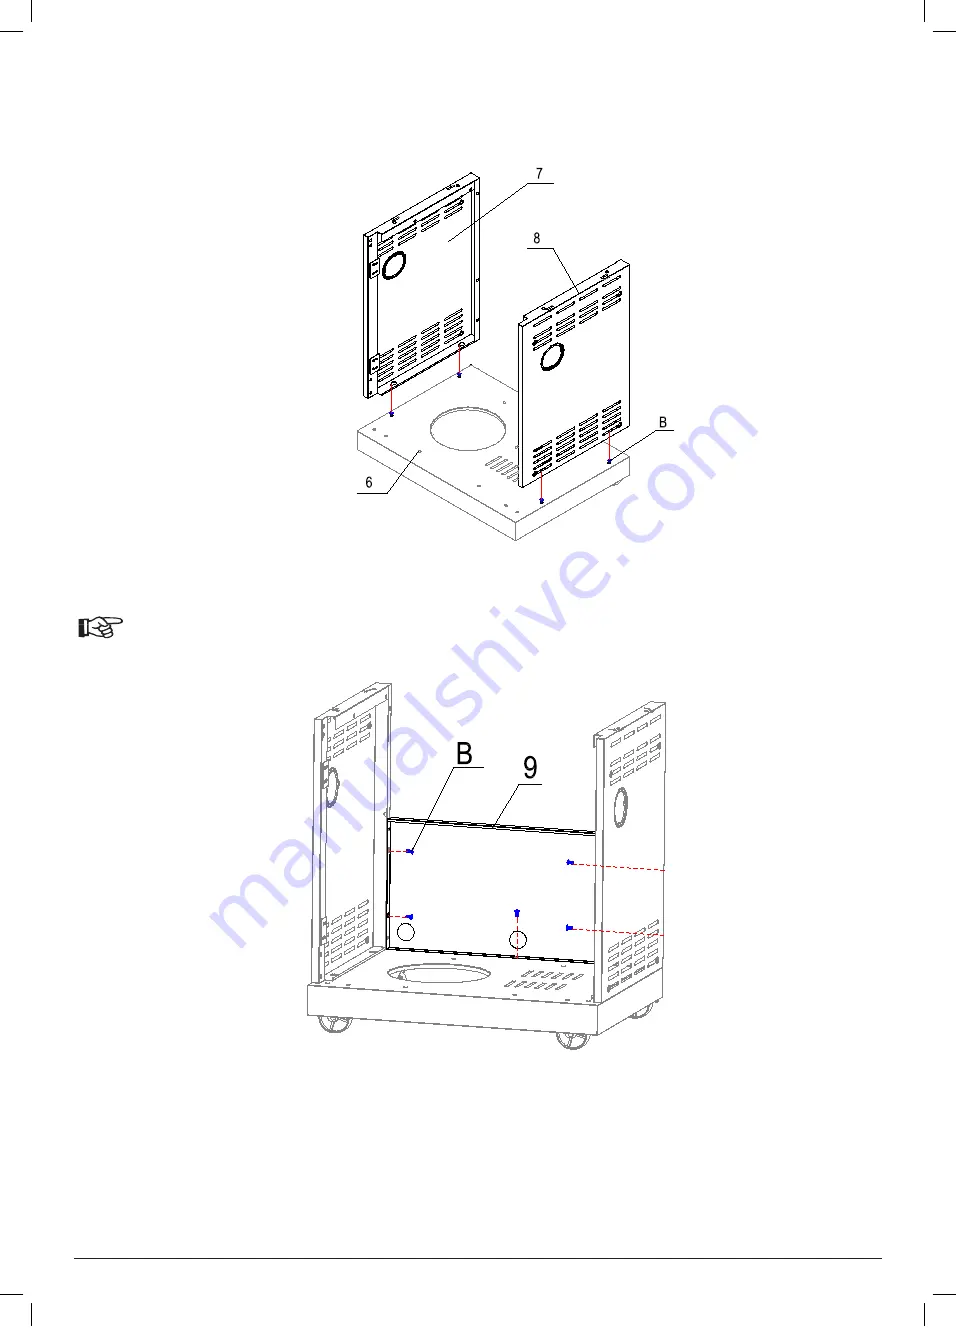
STEP 2. ATTACH THE CART SIDE PANEL.
Use two M6*12mm screws (B) to attach cabinet left side panel (7) and two more screws to attach cabinet right side panel (8) both to the
Bottom panel (2).
Note: Door hinge brackets should be at the front
ASSEMBLY INSTRUCTIONS
Step 1 Attach Castors.
Use four M6*16mm screws (A), four M6 flat washers (D) and four M6 spring
washers (E) to attach each castor onto the underside of the Bottom panel (6)
(two castors without lock (23) at the front and two castors with lock (24) at the
back).
Step
2 Attach the Cart Side Panel.
Use two M6*12mm screws (B) to attach cabinet left side panel (7) and two more
screws to attach cabinet right side panel (8) both to the Bottom panel (2).
Note: Door hinge brackets should be at the front.
STEP 3. ATTACH BACK PANEL.
Attach the Back panel (9) to the cart with five M6*12mm screws (B).
NOTE:
Do not fully tighten the screws.
Step 3 Attach Back Panel.
Attach the Back panel (9) to the cart with five M6*12mm screws (B).
Note: Do not fully tighten the screws until all five screws are started.
Step 4 Attach the Cart Front Beam and Triangle Plates.
a) Attach cart front beam (10) to the cart side panels with four M6*12mm screws
(B).
b) Attach each triangle plate (21) to a side panel and to the Bottom panel with
four M6*12mm screws (B).
Summary of Contents for Barbecues
Page 27: ...27 546565 A 3 May 2019 ...


