Page 12
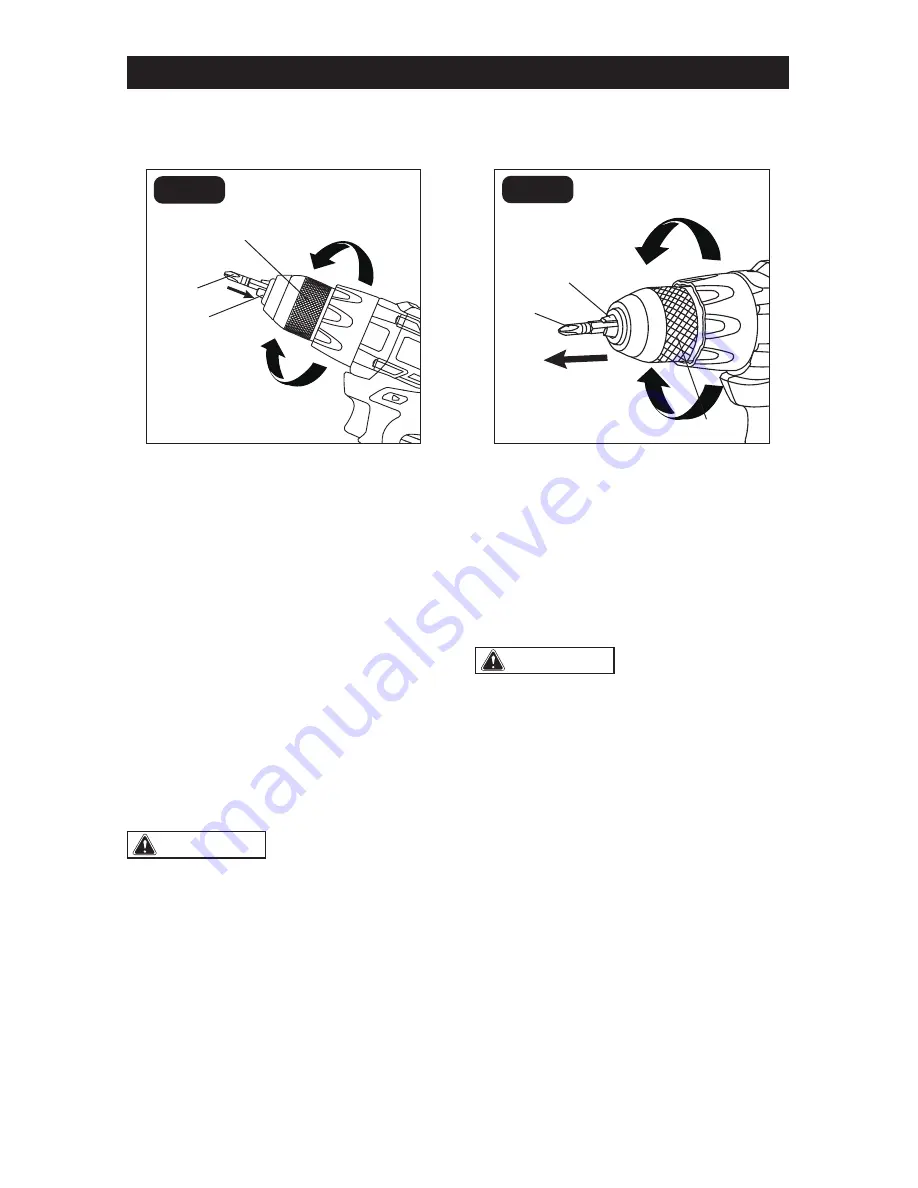
INSTALLING BITS (FIG. 9)
FIG. 9
Bit
1. Remove the battery pack from the drill/
driver.
2. Open the chuck jaws until the opening is
slightly larger than the bit you intend to
use, and raise the front of the drill/driver
slightly to keep the bit from falling out of
the chuck jaws.
3. Insert the bit into the chuck.
4. Rotate the chuck in the direction of the
arrow marked GRIP to close the chuck
jaws.
NOTICE: Do not use a wrench to tighten or
loosen the chuck jaws.
5. Tighten the chuck jaws securely on the
bit.
WARNING:
Make sure to insert
the bit straight into the chuck jaws. Do
not insert the bit into the chuck jaws at an
angle and then tighten. This could cause
the bit to be thrown from the drill/driver,
resulting in possibly serious personal
injury or damage to the chuck.
OPERATION
REMOVING BITS (FIG. 10)
FIG. 10
1. Remove the battery pack from the drill/
driver.
2. Open the chuck jaws.
3. Rotate the chuck in the direction of
the arrow marked OPEN to loosen the
chuck jaws.
4. Remove the bit.
WARNING:
Use protective gloves
when removing the bit from the tool, or
first allow the bit to cool down. The bit
may be hot after prolonged use.
GRIP (tighten)
GRIP
(tighten)
OPEN
(release)
OPEN
(release)
Keyless chuck
Keyless chuck
Chuck jaws
Chuck jaws
Bit
Summary of Contents for 241-0461
Page 18: ...Page 17 NOTES...


