background image

Page 3

Page 3

SAfETy INSTRUCTIONS

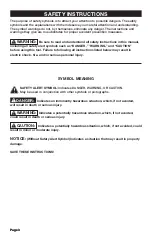
The purpose of safety symbols is to attract your attention to possible dangers. The safety 
symbols and the explanations with them deserve your careful attention and understanding. 
The symbol warnings do not, by themselves, eliminate any danger. The instructions and 
warnings they give are no substitutes for proper accident prevention measures. 

 WARNING:

 be sure to read and understand all safety instructions in this manual, 

including all safety alert symbols such as “DANGER,” ”WARNING,” and “CAUTION”  
before using this tool. failure to following all instructions listed below may result in 
electric shock, fire, and/or serious personal injury.

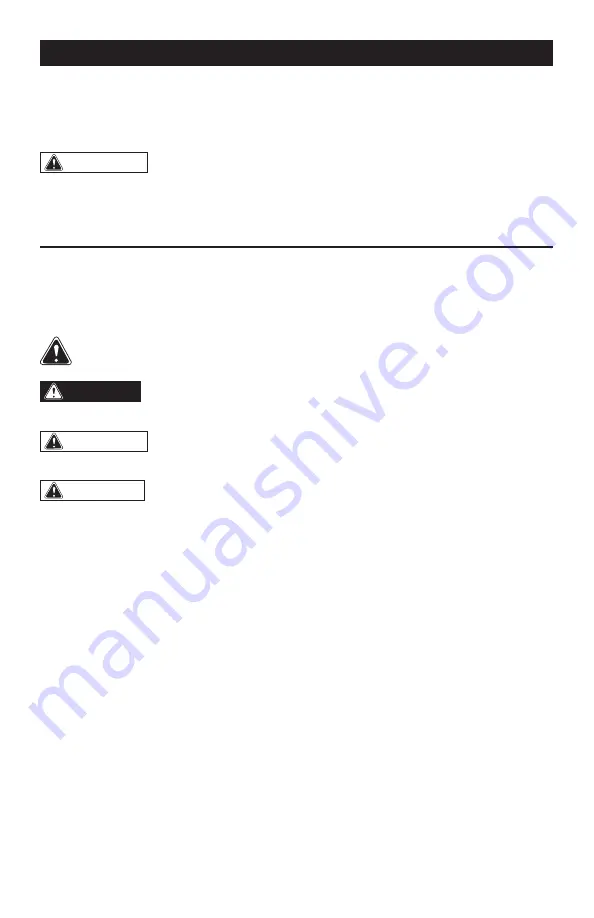
SyMbOL MEANING


SAfETy ALERT SyMbOL:

 Indicates DANGER, WARNING, OR CAUTION. 

May be used in conjunction with other symbols or pictographs.

  DANGER:

 Indicates an imminently hazardous situation, which, if not avoided, 

will result in death or serious injury.

 WARNING:

 Indicates a potentially hazardous situation, which, if not avoided, 

could result in death or serious injury.

 CAUTION:

 Indicates a potentially hazardous situation, which, if not avoided, could 

result in minor or moderate injury.

NOTICE:

 (Without Safety Alert Symbol) Indicates a situation that may result in property 

damage.

SAVE THESE INSTRUCTIONS!

Summary of Contents for Flexpower 241-0436

Page 1: ...comments technical assistance or repair parts Please Call Toll Free 1 866 917 4374 M F 8am 6pm EST OPERATOR S MANUAL CAUTION To Reduce The Risk Of Injury User Must Read And Understand The Operator s Manual Save These Instructions For Future Reference ...

Page 2: ...table of contents Safety Symbols Page 2 Safety Instructions Page 3 Overview Specifications Page 7 Assembly Page 8 Operation Page 9 Maintenance Page 12 Troubleshooting Page 13 Warranty Page 14 ...

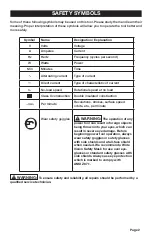
Page 3: ...current Direct current Type of characteristic of current no No load speed Rotational speed at no load Class II construction Double insulated construction min Per minute Revolutions strokes surface speed orbits etc per minute Wear safety goggles WARNING The operation of any power tool can result in foreign objects being thrown into your eyes which can result in severe eye damage Before beginning po...

Page 4: ...efore using this tool Failure to following all instructions listed below may result in electric shock fire and or serious personal injury SYMBOL MEANING SAFETY ALERT SYMBOL Indicates DANGER WARNING OR CAUTION May be used in conjunction with other symbols or pictographs DANGER Indicates an imminently hazardous situation which if not avoided will result in death or serious injury WARNING Indicates a...

Page 5: ...Do not expose power tools to rain or wet conditions Water entering a power tool will increase the risk of electric shock 4 Do not abuse the cord Never use the cord for carrying pulling or unplugging the power tool Keep the cord away from heat oil sharp edges or moving parts Damaged or entangled cords increase the risk of electric shock 5 When operating a power tool outdoors use an extension cord s...

Page 6: ...ons to operate the power tool Power tools are dangerous in the hands of untrained users 5 Maintain power tools Check for misalignment or binding of moving parts breakage of parts and any other condition that may affect the power tool s operation If damaged have the power tool repaired before use Many accidents are caused by poorly maintained power tools 6 Keep cutting tools sharp and clean Properl...

Page 7: ... with side shields Everyday glasses have only impact resistant lenses They are NOT safety glasses Following this rule will reduce the risk of eye injury 6 Protect your lungs Wear a face or dust mask if the operation is dusty Following this rule will reduce the risk of serious personal injury 7 Protect your hearing Wear hearing protection during extended periods of operation Following this rule wil...

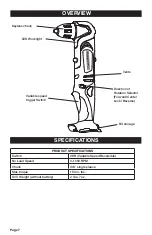
Page 8: ... Switch VSR Variable Speed Reversible No Load Speed 0 1050 RPM Chuck 3 8 single sleeve Max torque 150 in lbs Drill Weight without battery 2 lbs 7 oz LED Worklight Variable speed trigger Switch Bit storage Direction of Rotation Selector Forward Center Lock Reverse Vents ...

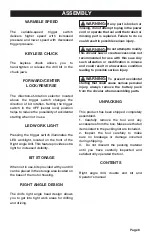
Page 9: ...s you to get into tight work areas for drilling and driving WARNING If any part is broken or missing do not attempt to plug in the power cord or operate the tool until the broken or missing part is replaced Failure to do so could result in possible serious injury WARNING Do not attempt to modify this circular saw or create accessories not recommended for use with this saw Any such alteration or mo...

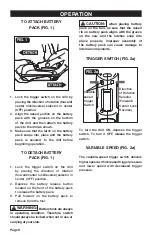
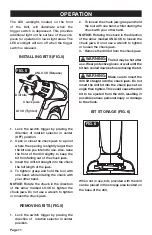
Page 10: ...center OFF position 2 Align the raised portion on the battery pack with the grooves on the bottom of the drill and then attach the battery pack to the drill as shown 3 Make sure that the latch on the battery pack snaps into place and the battery pack is secured to the drill before beginning operation TO DETACH BATTERY PACK Fig 1 1 Lock the trigger switch on the drill by placing the direction of ro...

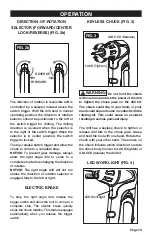
Page 11: ...n of rotation selector is engaged fully to the left or right ELECTRIC BRAKE To stop the right angle drill release the trigger switch and allow the tool to come to a complete stop The electric brake quickly stops the chuck rotation This feature engages automatically when you release the trigger switch KEYLESS CHUCK Fig 3 FIG 3 WARNING Do not hold the chuck with one hand and use the power of the dri...

Page 12: ...en the chuck jaws Do not use a wrench to tighten or loosen the chuck jaws REMOVING BITS Fig 5 1 Lock the switch trigger by placing the direction of rotation selector in center position 2 To loosen the chuck jaw grasp and hold the tool with one hand while rotating the chuck with your other hand NOTICE Rotating the chuck in the direction of the arrow marked UNLOCK to loosen the chuck jaws Do not use...

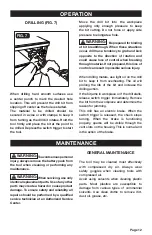
Page 13: ...the life of the bit and increase the drilling action If the bit jams in workpiece or if the drill stalls release switch trigger immediately Remove the bit from the workpiece and determine the reason for jamming This drill has an electric brake When the switch trigger is released the chuck stops turning When the brake is functioning properly sparks will be visible through the vent slots on the hous...

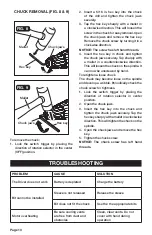
Page 14: ...se chuck The chuck may become loose on the spindle and develop a wobble Periodically check the chuck screw for tightness 1 Lock the switch trigger by placing the direction of rotation selector in center position 2 Open the chuck jaws 3 Insert the hex key into the chuck and tighten the chuck jaws securely Tap the hex key sharply with a mallet in a clockwise direction This will tighten the chuck on ...

Page 15: ...misuse of the Merchandise This warranty 1 excludes expendable parts including but not limited to blades brushes belts bits light bulbs and or batteries 2 shall be void if this tool is used for commercial and or rental purposes and 3 does not cover any losses injuries to persons property or costs This warranty does give you specific legal rights and you may have other rights which vary from state t...

Page 16: ...Page 15 06 2013 2013 Menard Inc Eau Claire WI 54703 ...

Reviews: