background image

Do Not Dive.

30

MASTER SPA - H2X

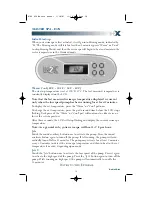
Initial Start-up

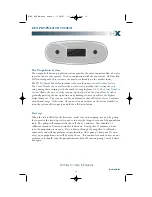
When your swim spa is first actuated, it will go into Priming mode, indicated by
“Pr.”The Priming mode will last for less than 5 minutes (press “Warm” or “Cool”
to skip Priming Mode) and then the swim spa will begin to heat and maintain the
water temperature in the Standard mode.

Warm/Cool (80˚F  - 104˚F / 26˚C - 40˚C)

The start-up temperature is set at 100˚F/37˚C.The last measured temperature is
constantly displayed on the LCD.

Note that the last measured swim spa temperature displayed is current
only when the low speed pump has been running for at least 2 minutes.

To display the set temperature, press the “Warm” or “Cool” pad once.
To change the set temperature, press the pad a second time before the LCD stops
flashing. Each press of the “Warm” or “Cool” pad will continue to either raise or
lower the set temperature.
After three seconds, the LCD will stop flashing and display the current swim spa 
temperature.

Note: As a general rule, your swim spa will heat 1-2˚ F per hour.

Jets

Touch the round auxiliary button once to activate the pump. Press the round 
auxiliary button again to turn off the pump. If left running, the pump will auto-
matically turn off after 15 minutes.The pump may activate for at least 2 minutes
every 30 minutes to detect the swim spa temperature and then to heat to the set
temperature if needed, depending upon mode.

Jets 2

Touch the “Jets” button once to activate the low speed of the pump. Press it again
to activate the high speed of the pump. Press the “Jets” button again to turn off the
pump. If left running on high speed, the pump will automatically turn off after 
15 minutes.

07MS H2X Owners Manual  1/10/07  11:30 PM  Page 30

Summary of Contents for H2X Challenger

Page 1: ...O W N E R S M A N U A L 2 0 0 7 07MS H2X Owners Manual 1 10 07 11 29 PM Page 1 ...

Page 2: ... other information please visit www masterspas com and follow the links to the customer service section Record Of Ownership Name _____________________________________________________ Address____________________________________________________ City _____________________________ State ______ Zip_________ Date Purchased ______ ______ _______ Model _______________________ Serial ______________________...

Page 3: ...im SpaWater Maintenance Start Up 22 24 Water MaintenanceTrouble Shooting 25 Why Chemicals are Important 26 Maintenance Recommendations 27 WinterizingYour Swim Spa 28 H2X Swim Spa Specifications 29 Electronic Controls 30 31 Diagnostic Messages 32 33 Propulsion System 34 Start Up 34 Max Stereo System 35 36 Trouble Shooting Guide 37 40 Regular Maintenance Procedures 41 42 Care of Swim Spa Cover Swim ...

Page 4: ...yone who enjoys the use of your swim spa is our utmost concern The sign should be mounted with screws or another type of permanent fastener Additional or replacement signs can be obtained from your dealer or direct from the factory It s time to relax You now have your very own H2X swim spa by Master Spas Inc By fully understanding the operation of each of the features of your new swim spa you will...

Page 5: ...l surfaces if in accordance with the National Electrical Code each metal surface is permanently connected by a No 6 AWG 8 4mm solid copper conductor attached to the wire connector on the terminal box A grounding lug is provided for this purpose 5 DANGER RISK OF INJURY The suction fittings in this swim spa are sized to match the specific water flow created by the pump Should the need arise to repla...

Page 6: ...mperature with an accurate thermometer Tolerance of water temperature regulating devices can vary as much as plus minus 5 F 3 C F Persons suffering from obesity or with a medical history of heart disease diabetes high or low blood pressure or circulatory system problems should consult with their physician before using the swim spa G Since excessive water temperature has a high potential for causin...

Page 7: ... the swim spa Warm and hot water temperatures may allow the growth of infectious bacteria if not properly disinfected 11 DANGER RISK OF ELECTRIC SHOCK Do not permit any electric appliance such as a light telephone radio or television within five 5 feet of the swim spa Never operate any electrical appliances from inside the swim spa or while wet HYPERTHERMIA Hyperthermia occurs when the internal te...

Page 8: ...rvice this product yourself as opening or removing covers may expose you to dangerous voltage or other hazards Refer all servicing to qualified service personnel If the power supply supply cord s are damaged water is entering the speaker CD compartment or any other component in the electrical equipment compartment area the protective shield is showing signs of deterioration or there are signs of o...

Page 9: ...IVERTERVALVE Located on the topside of the swim spa this valve physically diverts the flow of water from one jet zone of the swim spa to another jet zone Be sure that no sand or particles are brought into the swim spa as they will cause the diverter to seize up It is best to turn the diverter valve only when the pump is turned off 3 CASCADEWATERFALLVALVE Located on the topside of the swim spa this...

Page 10: ... in case of certain malfunctions Several user programmable functions are also available 6 PROPULSION SYSTEM CONTROL PANEL You may safely control the speed of the propulsion system from the inside of your swim spa This panel is used to turn the propulsion system on and off and to adjust the intensity of the water flow 7 PERSONAL REMOTE CONTROL Your swim spa has an additional remote which allows the...

Page 11: ... gate is the horizontal door located in front of the filters that trap debris in the filter area 13 SWIM SPA LIGHT Your swim spa light is designed for safety and is located in the interior wall of your swim spa The on off switch is located on the topside control panel 14 EQUIPMENT CONTROL SYSTEM This houses the wiring and electrical components necessary to operate the swim spa 15 SWIM SPA HEATER T...

Page 12: ...t action High speed should be used for maximum jet action The main pump is controlled by the Jets or Jets I button on theTopside Control Panel 18 SECONDARY PUMP This produces water flow through the stand up jet system in the swim spa The second pump operates similar to the main pump and is controlled by the personal remote control on the surface of the swim spa 19 PUMP UNION These are used by serv...

Page 13: ...opper wire and must be connect ed securely to a grounded metal structure such as a cold water pipe All MasterSpas equipment packs are wired for 240 VAC only The only electrical supply for your swim sp a must include a 50 AMP switch or circuit breaker to open all non grounded supply conducto rs to comply with section 422 20 of the National Electrical Code The disconnect must be readily accessible t...

Page 14: ...d hook up the white neutral wire is not required between the G F C I and the system box GRN GRN GROUND RED HOT BLK HOT BLK HOT RED HOT RED HOT WHT NEUTRAL WHT WHT BLK HOT GRN GROUND TB1 IDF00007 mac 6 17 97 Actual wiring of GFCI will vary by manufacturer of GFCI The GFCI shown is a Square D Improper wiring of GFCI may result in permanent damage to the swim spa system box Repair replacement of swim...

Page 15: ... beneath the swim spa can support the actual weight The swim spa must be on a uniformly firm continuous and level surface The recommended foundation is a concrete pad with a minimum thickness of four 4 inches with steel reinforcement bars crossed throughout the pad IMPORTANT Be sure to locate your swim spa so that equipment remains above grade and is not subject to flooding The equipment side s of...

Page 16: ...l complement landscaping and vice versa View from inside swim spa and view of swim spa from inside of home Exposure to sunlight and shading from trees Privacy Getting to swim spa from house and return Proximity to dressing rooms and bathrooms Storage for swim spa chemicals Local building codes if applicable Power cable NOTE The H2X is to be used in private residential use only Operating an H2X for...

Page 17: ...newly delivered swim spa may have loose unions caused in transporting the swim spa Check that all slice valves are open in the up position Again the slice valves may become closed during trans portation of the swim spa 4 Fill swim spa to the minimum safe water level sticker We recommend filling the swim spa through the filter area 5 Turn the power on to the swim spa The swim spa will go through it...

Page 18: ...cture on the discharge of the pump the end of the pump that water is being pushed through Water should leak out Tighten the union and test the pump for proper jet flow If needed repeat process NOTE Upon power up the propulsion system may cavitate or mix water with air for up to several minutes until all of the air is pulled from the propulsion chamber Your propulsion system may be noisy during thi...

Page 19: ...as when ever possible a measurement between 7 2 and 7 8 is best Whenever possible it should be between 7 4 and 7 6 With low pH the results can be corroded metals etched and stained plaster stained fiberglass or acrylic eye skin irritation rapid chlorine or bromine loss and total alkalinity destruction With high pH the results can be cloudy water eye skin irritation scale formation and poor chlorin...

Page 20: ...pa use a Sodium dichlor which is a granule fast dissolving and pH neutral 2 Chlorine is an immediate sanitizer B Bromine Note Bromine is not recommended for a swim spa due to its intolerences to U V 1 Two types of tablets a Hydrotech b Lonza 2 Bromine is a slow dissolve chemical and may take a few days to develop a reserve or reading in the water 8 Total dissolved solids TDS Materials that have be...

Page 21: ...h 5 teaspoons of Dichlor per 2 500 gallons These are general recommendations for water quality maintenance that may vary by usage and or bather load Depending on bather load and frequency of use drain and refill times may vary as well as the frequency of cleaning your filters Foam Gone may be used when excessive foaming occurs Be sure to use only two to four drops at a time Over use of Foam Gone w...

Page 22: ...ng test strips or a test kit test for pH and adjust if necessary to within the 7 2 and 7 8 range using the pH alkalinity increaser or decreaser 2 5 oz at a time Wait 30 minutes retest and adjust if necessary The pump should be running on high speed during this time without air controls open 8 Add the sanitizer of choice following label directions If chlorine is used broadcast the recommended amoun...

Page 23: ...yme product in place of the clarifier following the label directions 5 Use a small amount of defoamer only if necessary DAYTWO SKIP DAYTHREE 1 Test and adjust total alkalinity if necessary to between 80 and 120 ppm using the pH alkalinity increaser or decreaser 5 oz at a time Wait 30 minutes retest and adjust if necessary The pump should be running on high speed during this time with the air contr...

Page 24: ...non chlorine shock or superchlorinate following label directions A swim spa should be shocked at least once a week even if it is not used If using chlorine as the sanitizer the swim spa should be shocked whenever a free chlorine reading of 1 to 3 ppm cannot be obtained without raising the total chlorine level above 5 ppm Always shock a swim spa after any heavy bather load 5 Check filter cartridge ...

Page 25: ... levels High levels of body oils lotions soap etc HowTo Fix It Shock water with non chlorine shock treatment Adjust pH if necessary Shock water with non chlorine shock treatment or adjust sanitizer levels Adjust pH level if necessary Adjust sanitizer if necessary Clean filters and adjust filtration times Adjust chemistry levels Add spa clarifier see dealer Change swim spa water Wipe off with a cle...

Page 26: ...m spa 4 Environment The environment surrounding the swim spa is also a consideration Watch for pollen grass sand dirt lawn fertilizer dust storms insects dogs cats etc 5 Consider the human next In a heated swim spa the average adult sweats 3 pints per hour This person also brings in the swim spa surface dirt soap body oils deodorant hair spray hand and body lotion perfume and cologne make up lipst...

Page 27: ...ter in your swim spa is one of the most important components of your swim spa It not only is essential for clean water but also for extending the life of the swim spa equipment Your filter elements must be cleaned regularly once a month on average with normal swim spa use With heavy use they will need to be cleaned more often Turn swim spa off Never have the swim spa running when removing your fil...

Page 28: ...shop vac in a blowing mode insert the hose into the nozzle of each jet and blow the trapped water from the lines into the interior of the swim spa 7 After this is completed use the shop vac to remove any standing water in the swim spa and in the equipment area 8 Clean the swim spa with a soft cloth and a non abrasive spa surface cleaner 9 Replace access panels 10 Cover swim spa to prevent water fr...

Page 29: ...Electrical Water Weight Number of Jet Model Dimensions Required Capacity Dry Full Pumps Count H2X 201 x94 x52 240 volt 50 amp 3 000 gallons 3 500lbs 25 000lbs 2 pump 35 1 Propulsion System 07MS H2X Owners Manual 1 10 07 11 30 PM Page 29 ...

Page 30: ...D stops flashing Each press of the Warm or Cool pad will continue to either raise or lower the set temperature After three seconds the LCD will stop flashing and display the current swim spa temperature Note As a general rule your swim spa will heat 1 2 F per hour Jets Touch the round auxiliary button once to activate the pump Press the round auxiliary button again to turn off the pump If left run...

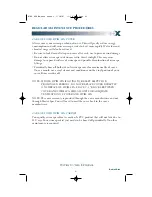
Page 31: ...10 C of the set temperature only during filter cycles SL will display solid when the temperature is not current and will alternate with temperature when temperature is current Preset Filter Cycles The first filter cycle begins 6 minutes after the swim spa is energized The second filter cycle begins 12 hours later Filter duration is programmable for 2 4 6 8 hours or for continuous filtration indica...

Page 32: ...fter the pump has been running for 2 minutes the temperature will be displayed DO NOT ENTERTHEWATER Remove the swim spa cover and allow water to cool Once the heater has cooled reset by pushing any button If swim spa does not reset shut off the power to the swim spa and call your dealer or service organization DO NOT ENTERTHEWATER Remove the swim spa cover and allow water to cool At 107 F 42 C the...

Page 33: ...ess any button to reset or this message will automatically reset within 15 minutes If problem persists contact your dealer or service provider Follow action required for dr message Swim spa will not automatically reset you may press any button to reset Do not attempt service of this control system Contact your dealer or service organization for assistance Follow all owner s manual power connection...

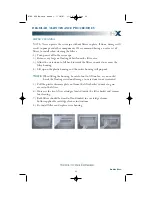
Page 34: ... automatic shut off feature after 30 minutes of continual usage Otherwise all you need to do to decrease the Swim Number or turn the system off is to press or hold the off down button Start up When the tub is filled for the first time make sure to turn pump two on the pump that operates the stand up seat in order to draw the trapped air out of the propulsion tank The pump will automatically shut o...

Page 35: ... for specific operations The Max Stereo System includes a CD FM Stereo with subwoofer two pop up speakers two exterior speakers transducer STEP 1 To use the pop up speaker system press down on the button located in the corner This will raise the speaker STEP 2 You can control the stereo selections via an optional remote see your local dealer for details or on the stereo itself STEP 3 When finished...

Page 36: ...lt in damage not covered under the warranty Note UV rays may interfere with the operation of the remote Note Do not place wet CD s into the stereo at anytime Note AM channels will be very limited in reception and in most cases be unavailable MAX STEREO SYSTEM continued 07MS H2X Owners Manual 1 10 07 11 30 PM Page 36 ...

Page 37: ... panel If you hear the pumps trying to operate A Check that all the slice valves are open See photo on page 12 B Pump may need to be primed See page 18 C Check that the air controls are open See photo on page 10 If you do not hear anything from the pump contact your local service company POOR JET PERFORMANCE 1 Make sure pump is operating 2 Check that the water level is adequate up to minimum safe ...

Page 38: ...dicator If the light is on the swim spa should be heating Wait a reasonable amount of time approximately 6 hours to see if the water temperature is changing 6 Check to make sure that the pump is primed and all slice valves are open 7 Reset power to the swim spa at GFCI breaker 8 If swim spa is still not heating contact your dealer for service GFCI IS TRIPPING The Ground Fault Circuit Interrupter G...

Page 39: ... overnight and then rinse with water Reinstall the jet s It may also be necessary to clean the grit deposit from the white jet body using an old toothbrush CLEANING DIVERTER VALVES Due to mineral deposits and grit sand that may get into the internal parts of the diverter valve it may become hard to turn or freeze up completely In this case it is necessary to remove the handle and cap of the divert...

Page 40: ... spa we recommend draining your swim spa with a submersable sump pump Draining your swim spa with a conventional spa drain is not a reasonable option REPLACING YOUR LIGHT BULB if equpped If your light bulb goes out it is very easy to replace Use a 12 volt 6 watt bulb that should be available through your dealer First make sure the power to the swim spa is off You can access the swim spa light fitt...

Page 41: ...th use a vinyl cleaner and conditioner on the vinyl portion of your cover Rinse residue off NOTE IFYOUR SWIM SPA IS GOINGTO BE LEFT EMPTY FOR PROLONGED PERIODS DO NOT REPLACE COVER DIRECTLY ON SURFACE OF SWIM SPA PLACE 2 3 BLOCKS BETWEEN COVER AND SWIM SPA THIS ALLOWS FOR ADEQUATE VENTILATION OF COVER AND SWIM SPA NOTE The cover warranty is provided through the cover manufacturer and not through M...

Page 42: ...filter housing 4 Lift up on the plastic housing and the entire housing will pop out NOTE When lifting the housing be careful not to lift too far as you could break the floating weir door Damage to weir door is not warranted 5 Pull the plastic skimmer plate out from the filter basket in order to gain access to the filters 6 Unscrew the two filter cartridges located inside the filter basket and remo...

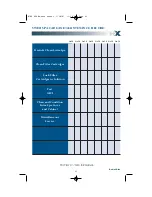
Page 43: ...ORD DATE Drain Clean Swim Spa Clean Filter Cartridges Soak Filter Cartridges in Solution Test GFCI Clean and Condition Swim Spa Cover and Cabinet Miscellaneous Service DATE DATE DATE DATE DATE DATE DATE 07MS H2X Owners Manual 1 10 07 11 30 PM Page 43 ...

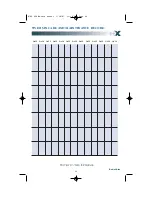
Page 44: ...Do Not Dive 44 SWIM SPA CARE AND MAINTENANCE RECORD DATE DATE DATE DATE DATE DATE DATE DATE DATE DATE DATE DATE DATE 07MS H2X Owners Manual 1 10 07 11 30 PM Page 44 ...

Page 45: ...Do Not Dive 45 SWIM SPA CARE AND MAINTENANCE RECORD DATE DATE DATE DATE DATE DATE DATE DATE DATE DATE DATE DATE DATE 07MS H2X Owners Manual 1 10 07 11 30 PM Page 45 ...

Page 46: ...POP07h2xownman Rev 201707 6927 Lincoln Parkway FortWayne Indiana 46804 800 860 7727 www masterspas com 07MS H2X Owners Manual 1 10 07 11 30 PM Page 46 ...

Reviews: